|
|
MX-6201N MX-7001N (serv.man12)
FRONT BACK COVER PAGES
Service Manual
|
6
|
581.4 KB
|
|
|
MX-6201N MX-7001N (serv.man13)
NOTES FOR SERVICING
Service Manual
|
2
|
560.22 KB
|
|
|
MX-6201N MX-7001N (serv.man14)
PRODUCT OUTLINE SECTION
Service Manual
|
2
|
961.37 KB
|
|
|
MX-6201N MX-7001N (serv.man15)
SPECIFICATION SECTION
Service Manual
|
16
|
698.58 KB
|
|
|
MX-6201N MX-7001N (serv.man16)
CONSUMABLES SECTION
Service Manual
|
6
|
573.75 KB
|
|
|
MX-6201N MX-7001N (serv.man17)
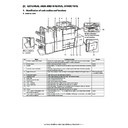
EXTERNAL VIEW INTERNAL STRUCTURE
Service Manual
|
19
|
2.32 MB
|
|
|
MX-6201N MX-7001N (serv.man18)
ADJUSTMENTS SECTION
Service Manual
|
76
|
9.42 MB
|
|
|
MX-6201N MX-7001N (serv.man19)
SIMULATIONS SECTION
Service Manual
|
127
|
4.25 MB
|
|
|
MX-6201N MX-7001N (serv.man20)
SELF DIAGNOSIS TROUBLE CODES SECTION
Service Manual
|
33
|
715.79 KB
|
|
|
MX-6201N MX-7001N (serv.man21)
MAINTENANCE SECTION
Service Manual
|
16
|
2.65 MB
|
|
|
MX-6201N MX-7001N (serv.man22)
ROM VERSION UP
Service Manual
|
3
|
901 KB
|
|
|
MX-6201N MX-7001N (serv.man23)
ELECTRICAL SECTION
Service Manual
|
49
|
1.2 MB
|
|
|
MX-6201N MX-7001N (serv.man24)
OTHERS
Service Manual
|
10
|
3.52 MB
|
|
|
MX-6201N MX-7001N (serv.man25)
EXTERNAL OUTFIT
Service Manual
|
8
|
2.38 MB
|
|
|
MX-6201N MX-7001N (serv.man26)
OPERATION PANEL SECTION
Service Manual
|
4
|
1.04 MB
|
|
|
MX-6201N MX-7001N (serv.man27)
DSPF SECTION
Service Manual
|
39
|
10.31 MB
|
|
|
MX-6201N MX-7001N (serv.man28)
SCANNER SECTION
Service Manual
|
10
|
2.19 MB
|
|
|
MX-6201N MX-7001N (serv.man29)
MANUAL PAPER FEED SECTION
Service Manual
|
10
|
2.91 MB
|
|
|
MX-6201N MX-7001N (serv.man30)
TRAY PAPER FEED SECTION
Service Manual
|
23
|
7.13 MB
|
|
|
MX-6201N MX-7001N (serv.man31)
PAPER TRANSPORT SECTION
Service Manual
|
20
|
5.22 MB
|
|
|
MX-6201N MX-7001N (serv.man32)
DUPLEX SECTION
Service Manual
|
18
|
8.1 MB
|
|
|
MX-6201N MX-7001N (serv.man33)
LSU SECTION
Service Manual
|
10
|
2.06 MB
|
|
|
MX-6201N MX-7001N (serv.man34)
PHOTOCONDUCTOR SECTION
Service Manual
|
16
|
4.22 MB
|
|
|
MX-6201N MX-7001N (serv.man35)
TONER SUPPLY SECTION
Service Manual
|
5
|
2.7 MB
|
|
|
MX-6201N MX-7001N (serv.man36)
DEVELOPING SECTION
Service Manual
|
14
|
4.25 MB
|
|
|
MX-6201N MX-7001N (serv.man37)
TRANSFER SECTION
Service Manual
|
18
|
6.37 MB
|
|
|
MX-6201N MX-7001N (serv.man38)
PROCESS CONTROL REG SENSOR SECTION
Service Manual
|
4
|
1.02 MB
|
|
|
MX-6201N MX-7001N (serv.man39)
FUSING SECTION
Service Manual
|
26
|
8.88 MB
|
|
|
MX-6201N MX-7001N (serv.man40)
PAPER EXIT SECTION
Service Manual
|
7
|
1.46 MB
|
|
|
MX-6201N MX-7001N (serv.man42)
PWB SECTION
Service Manual
|
8
|
2.13 MB
|
|
|
MX-6201N MX-7001N (serv.man43)
FAN FILTER SECTION
Service Manual
|
10
|
3.05 MB
|
|
|
MX-6201N MX-7001N (serv.man44)
SENSOR SWITCH SECTION
Service Manual
|
4
|
1.28 MB
|
|
|
MX-6201N MX-7001N (serv.man45)
MX6201 MX7001- Circuit Diagram
Service Manual
|
127
|
18.45 MB
|

|
MX-6201N MX-7001N (serv.man46)
INSTALLATION GUIDE NOTE For peripheral installation please see MX 6200-7000 installation guide.
Service Manual
|
|
6.24 MB
|

|
MX-6201N MX-7001N (serv.man49)
USER GUIDE
User Manual / Operation Manual
|
|
1.89 MB
|

|
MX-6201N MX-7001N (serv.man50)
SCANNER GUIDE
User Manual / Operation Manual
|
|
2.38 MB
|

|
MX-6201N MX-7001N (serv.man51)
PRINTER GUIDE
User Manual / Operation Manual
|
|
4.88 MB
|

|
MX-6201N MX-7001N (serv.man52)
COPIER GUIDE OP MANUAL
User Manual / Operation Manual
|
|
2.31 MB
|

|
MX-6201N MX-7001N
WHQL PCL6 32bit Printer Driver for 2k XP Vista Win7 server2003 200832 bit priNTer
Drivers
|
|
19.54 MB
|

|
MX-6201N MX-7001N (serv.man2)
WHQL PCL6 32bit Printer Driver for 2k XP Vista Win7 server2003 200832 bit priNTer
Drivers
|
|
19.54 MB
|

|
MX-6201N MX-7001N (serv.man3)
WHQL 64bit Printer Driver for XP Vista Win7 server2003 200864 bit priNTer
Drivers
|
|
20.65 MB
|

|
MX-6201N MX-7001N (serv.man4)
Mac OS10.8 Driver Rquires Postscript option. Mac OS
Drivers
|
|
2.94 MB
|
|
|
MX-6201N MX-7001N (serv.man47)
Parts Guide (Revised July 2014).
Service Manual / Parts Guide
|
127
|
23.72 MB
|
|
|
MX-6201N MX-7001N (serv.man48)
PWB PARTS GUIDE
Service Manual / Parts Guide
|
37
|
1.15 MB
|
|
|
MX-6201N MX-7001N (serv.man66)
Parts change for productivity improvement.
Service Manual / Technical Bulletin
|
3
|
184.15 KB
|
|
|
MX-6201N MX-7001N (serv.man67)
Design change of MF Tray 2 Upper.
Service Manual / Technical Bulletin
|
2
|
216.35 KB
|
|
|
MX-6201N MX-7001N (serv.man68)
Change of Photo Sensor and Harness
Service Manual / Technical Bulletin
|
3
|
962.43 KB
|
|
|
MX-6201N MX-7001N (serv.man69)
CCE 1508 IMPROVEMENT OF PERFORMANCE WHEN OPENING CLOSING DSPF LOWER DOOR
Service Manual / Technical Bulletin
|
3
|
235.02 KB
|
|
|
MX-6201N MX-7001N (serv.man70)
Design change of delivery paper guide.
Service Manual / Technical Bulletin
|
2
|
91.45 KB
|
|
|
MX-6201N MX-7001N (serv.man71)
CHANGE IN COLOUR OF PIPE CUSHION
Service Manual / Technical Bulletin
|
2
|
60.2 KB
|
|
|
MX-6201N MX-7001N (serv.man72)
Starting Powder List (This list takes priority over information in Service Manuals).
Service Manual / Technical Bulletin
|
4
|
66.25 KB
|
|
|
MX-6201N MX-7001N (serv.man73)
Recommended shutdown procedure and Power Cycling of MFD
Service Manual / Technical Bulletin
|
1
|
186.43 KB
|
|
|
MX-6201N MX-7001N (serv.man74)
IMPORTANT Handling of EEPROM's.
Service Manual / Technical Bulletin
|
5
|
203.32 KB
|
|
|
MX-6201N MX-7001N (serv.man75)
MODIFICATION OF NOISE GENERATED BY CONTACT BETWEEN TENSION PLATE AND DRIVE TRANSPORT FRAME.
Service Manual / Technical Bulletin
|
2
|
208.65 KB
|
|
|
MX-6201N MX-7001N (serv.man76)
IMPROVEMENT OF DETECTION ACCURACY FOR DSPF TRANSPORT UPPER ACTUATOR.
Service Manual / Technical Bulletin
|
2
|
198.78 KB
|
|
|
MX-6201N MX-7001N (serv.man77)
ENHANCEMENT TO PREVENT DETACHMENT OF PAPER FEED GUIDE TRANSPORT TOP ACTUATOR
Service Manual / Technical Bulletin
|
2
|
66.52 KB
|
|
|
MX-6201N MX-7001N (serv.man78)
CCE-1076 WHITE STREAK S DUE TO THE DOCTOR COVER SEAL OR INNER BLADE WEAR.
Service Manual / Technical Bulletin
|
3
|
280.8 KB
|
|
|
MX-6201N MX-7001N (serv.man79)
CCE-1067 Shape of the waste toner pipe D has been changed to improve operation.
Service Manual / Technical Bulletin
|
2
|
189.02 KB
|
|
|
MX-6201N MX-7001N (serv.man80)
New Pressure Roller for Special Paper Stock (MX-2310-5112)
Service Manual / Technical Bulletin
|
2
|
39.77 KB
|
|
|
MX-6201N MX-7001N (serv.man81)
DSPF GUIDE IMPROVMENT TO PREVENT SPPD2_S MISFEEDS (MX-4 5112,62 7001,MX-M623 753)
Service Manual / Technical Bulletin
|
2
|
39.77 KB
|
|
|
MX-6201N MX-7001N (serv.man82)
CCE 950 COUNTERMESURE NOISE FROM DSPF UPPER AND LOWER TRANSPORT UNITS
Service Manual / Technical Bulletin
|
2
|
304.1 KB
|
|
|
MX-6201N MX-7001N (serv.man83)
FALSE DELIVERY PAPER FULL DETECTION DURING PAPER DELVERY.
Service Manual / Technical Bulletin
|
1
|
289.4 KB
|
|
|
MX-6201N MX-7001N (serv.man84)
F2-02 AND F2-64 ERROR CODE OCCURRING FROM EXCESSIVE LOAD ON THE TN ROLLER OF THE (BK) DV UNIT.
Service Manual / Technical Bulletin
|
2
|
150.3 KB
|
|
|
MX-6201N MX-7001N (serv.man85)
CCE-905 Noise from the lower HR bearing modification.
Service Manual / Technical Bulletin
|
2
|
342.83 KB
|
|
|
MX-6201N MX-7001N (serv.man86)
REF CCE837 ELIMINATING CHARGING IRREGULARITIES, IMPROVING CQ.
Service Manual / Technical Bulletin
|
2
|
366.93 KB
|
|
|
MX-6201N MX-7001N (serv.man87)
Ref CCE821 L4-04 OCCURRING FROM THE PEELING MG SIDE SHEET F OF THE DV UNIT (BK).
Service Manual / Technical Bulletin
|
1
|
30.24 KB
|
|
|
MX-6201N MX-7001N (serv.man88)
CCE817 MX-FNX4 ROM Upgrade 2. When paper is rolled over the folding roller, there has been cases where the paper has slipped.
Service Manual / Technical Bulletin
|
1
|
29.41 KB
|
|
|
MX-6201N MX-7001N (serv.man89)
CCE803 IMPROVEMENTS TO DUST RESISTANCE OF THE DSPF REDUCTION OPTICAL UNIT
Service Manual / Technical Bulletin
|
2
|
854.47 KB
|
|
|
MX-6201N MX-7001N (serv.man90)
REF CCE 794 2ND TRANSFER BELT BEAD STRENGTH INCREASED.
Service Manual / Technical Bulletin
|
2
|
470.85 KB
|
|
|
MX-6201N MX-7001N (serv.man91)
Ref CCE779 MX-CFX1 COUNTERMEASURES FOR JAM (HI_SEN_S, ETC.)RESULTING FROM MISALIGNED SPRING HOOK SECTION OF DELIVERY SENSOR LEVER.
Service Manual / Technical Bulletin
|
2
|
342.03 KB
|
|
|
MX-6201N MX-7001N (serv.man92)
Ref CCE773 MX-FN3 FN4 HOW TO REMOVE THE F1-37 ERROR WHEN REPLACING THE FINISHER PWB
Service Manual / Technical Bulletin
|
1
|
18.65 KB
|
|
|
MX-6201N MX-7001N (serv.man93)
Ref CCE780 E7-20 When printing in thick paper mode, FIRMWARE CHANGE.
Service Manual / Technical Bulletin
|
2
|
726.21 KB
|
|
|
MX-6201N MX-7001N (serv.man94)
CCE783 FIRMWARE UPDATE.
Service Manual / Technical Bulletin
|
1
|
20.9 KB
|
|
|
MX-6201N MX-7001N (serv.man95)
ARE-963 MX-LCX3N FIRMWARE UPGRADE V01.01. Production Run Date Febuary 2010
Service Manual / Technical Bulletin
|
2
|
28.95 KB
|
|
|
MX-6201N MX-7001N (serv.man96)
CCE770 COUNTERMEASURES AGAINST THE MIDDLE TRANSFER BELT BEAD DETERIORATION
Service Manual / Technical Bulletin
|
1
|
326.19 KB
|
|
|
MX-6201N MX-7001N (serv.man97)
CCE-768 LCD BACK LIGHT LAMP CHANGED
Service Manual / Technical Bulletin
|
1
|
27.14 KB
|
|
|
MX-6201N MX-7001N (serv.man98)
CCE763 CORRECTIONS TO THE SIMULATION SETTING VALUES IN THE SERVICE MANUAL.
Service Manual / Technical Bulletin
|
3
|
92.71 KB
|
|
|
MX-6201N MX-7001N (serv.man99)
ARE-962 F1-46 TROUBLE CODE OCCURRENCE AFTER JAM PROCESSING.
Service Manual / Technical Bulletin
|
2
|
290.02 KB
|

|
MX-6201N MX-7001N (serv.man100)
REF ARE963 MX-LCX3N FIRMWARE UPGRADE.
Service Manual / Technical Bulletin
|
|
97.49 KB
|
|
|
MX-6201N MX-7001N (serv.man101)
CCE-752 COUNTERMEASURES TO PREVENT TRANSFER BELT SLIPPING DUE TO A COLLAR MISSING ON THE 1ST TRANSFER FOLLOWER ROLLER
Service Manual / Technical Bulletin
|
2
|
490.79 KB
|
|
|
MX-6201N MX-7001N (serv.man102)
CEE-750 PRECAUTIONS WHEN REPLACING THE WEB ROLLER
Service Manual / Technical Bulletin
|
2
|
617.5 KB
|
|
|
MX-6201N MX-7001N (serv.man103)
ARE-957 PREVENTION OF THE COOLING FAN MOTOR BEARING FIXING FROM BEING STRIPPED
Service Manual / Technical Bulletin
|
2
|
195.25 KB
|
|
|
MX-6201N MX-7001N (serv.man104)
PRECAUTIONS WHEN INSERTING A TONER CARTRIDGE
Service Manual / Technical Bulletin
|
1
|
15.47 KB
|
|
|
MX-6201N MX-7001N (serv.man105)
REF CCE722R POD1 JAM PROBLEM AND OTHERS, CAUSED BY TONER ADHERING TO POST-FUSING UPPER PG ON FUSING UNIT REVISED
Service Manual / Technical Bulletin
|
3
|
1.24 MB
|
|
|
MX-6201N MX-7001N (serv.man106)
REF CCE-730 PREVENTION OF THE DRUM SCUFFING AGAINST THE DV UNIT WHEN PULLED OUT
Service Manual / Technical Bulletin
|
2
|
768.82 KB
|
|
|
MX-6201N MX-7001N (serv.man107)
Operations Required for Machine Movement
Service Manual / Technical Bulletin
|
1
|
14.68 KB
|
|
|
MX-6201N MX-7001N (serv.man108)
CCE727 DAMAGE ON DRUM SURFACE CAUSED WHEN DV UNIT IS PULLED OUT.
Service Manual / Technical Bulletin
|
2
|
1.1 MB
|
|
|
MX-6201N MX-7001N (serv.man109)
ISSUING EXPLANATORY MATERIAL OF JOB LOG CODES.
Service Manual / Technical Bulletin
|
13
|
160.14 KB
|
|
|
MX-6201N MX-7001N (serv.man110)
REF. CCE-707 WHITE STRIPE RESULTING FROM DEVELOPER COAGULATION IN COLOUR DV UNIT.
Service Manual / Technical Bulletin
|
2
|
165.24 KB
|
|
|
MX-6201N MX-7001N (serv.man111)
CCE696 COUNTERMEASURES FOR ABNORMAL SOUND (PATTER)FROM BEARING SECTIONS OF UPPER AND LOWER HEAT ROLLERS OF FUSING UNIT.
Service Manual / Technical Bulletin
|
2
|
541.15 KB
|
|
|
MX-6201N MX-7001N (serv.man112)
CCE695 MX-FNX4 ROM UPGRADE ... (1).
Service Manual / Technical Bulletin
|
1
|
27.93 KB
|
|
|
MX-6201N MX-7001N (serv.man113)
CCE694 CHANGE OF INITIAL VALUES OF PREHEAT MODE AND AUTO POWER SHUT-OFF MODE INVOLVED IN SUPPORT OF ENERGY STAR VER1.1 (TIER II).
Service Manual / Technical Bulletin
|
1
|
22.91 KB
|
|
|
MX-6201N MX-7001N (serv.man114)
CCE686 CHANGE OF SHAPE OF PROCESS F COVER.
Service Manual / Technical Bulletin
|
2
|
198.81 KB
|
|
|
MX-6201N MX-7001N (serv.man115)
CCE591 COUNTERMEASURES FOR BK FOG.
Service Manual / Technical Bulletin
|
6
|
990.59 KB
|
|
|
MX-6201N MX-7001N (serv.man116)
WEB IDLE GEAR MATERIAL CHANGED TO IMPROVE HEAT FRICTION RESISTANCE
Service Manual / Technical Bulletin
|
1
|
195.17 KB
|
|
|
MX-6201N MX-7001N (serv.man117)
CCE650 MEASURE TO PREVENT WASTE TONER CLOGGING
Service Manual / Technical Bulletin
|
2
|
240.5 KB
|
|
|
MX-6201N MX-7001N (serv.man118)
PAPER FEED JAM (DPFD1_N4, ETC.)
Service Manual / Technical Bulletin
|
2
|
282.83 KB
|
|
|
MX-6201N MX-7001N (serv.man119)
FIX FOR SLACKENING FUSING UNIT SCREWS
Service Manual / Technical Bulletin
|
2
|
351.88 KB
|
|
|
MX-6201N MX-7001N (serv.man120)
F2-40 COUNTERMEASURES
Service Manual / Technical Bulletin
|
2
|
85.83 KB
|
|
|
MX-6201N MX-7001N (serv.man121)
POINTS TO KEEP IN MIND WHEN ADJUSTING
Service Manual / Technical Bulletin
|
1
|
22.07 KB
|
|
|
MX-6201N MX-7001N (serv.man122)
REINFORCEMENT OF DSPF GUIDES
Service Manual / Technical Bulletin
|
2
|
75.83 KB
|
|
|
MX-6201N MX-7001N (serv.man123)
DAMAGE OF REAR FRAME SIDE OF UPPER FUSER ROLLER.
Service Manual / Technical Bulletin
|
2
|
55.21 KB
|
|
|
MX-6201N MX-7001N (serv.man124)
PROCEDURE FOR REPLACING MFP PWB
Service Manual / Technical Bulletin
|
2
|
206.24 KB
|
|
|
MX-6201N MX-7001N (serv.man125)
COUNTERMEASURE TO IMPROVE UNEVEN SHADING OF IMAGE.
Service Manual / Technical Bulletin
|
1
|
31.16 KB
|
|
|
MX-6201N MX-7001N (serv.man126)
THERMO SPACER TO COUNTERACT THERMOSTAT DISTORTION.
Service Manual / Technical Bulletin
|
2
|
80.76 KB
|
|
|
MX-6201N MX-7001N (serv.man127)
PREVENTION OF TONER BOTTLE COUPLING DISENGAGEMENT.
Service Manual / Technical Bulletin
|
2
|
68.86 KB
|
|
|
MX-6201N MX-7001N (serv.man128)
CHANGE OF FUSING WEB SECTION (MX701WC)
Service Manual / Technical Bulletin
|
5
|
72.72 KB
|
|
|
MX-6201N MX-7001N (serv.man129)
CCE 510- INFORMATION OF PARTS CHANGE TO FUSER ASSEMBLY
Service Manual / Technical Bulletin
|
2
|
91.87 KB
|

|
MX-6201N MX-7001N (serv.man57)
MX PC Fax Driver (32 and 64 Bit version) Suitable for server install.
Driver / Update
|
|
18.02 MB
|

|
MX-6201N MX-7001N (serv.man58)
Refer to Bulletin Ref CCE-798
Driver / Update
|
|
27.81 MB
|

|
MX-6201N MX-7001N (serv.man59)
SAP Device Types for MX Colour devices.
Driver / Update
|
|
3.18 MB
|

|
MX-6201N MX-7001N (serv.man60)
ROM control No.A15 ROM Version 0103D0 SEE BULLETIN CCE817
Driver / Update
|
|
150.09 KB
|

|
MX-6201N MX-7001N (serv.man61)
PPD2_PRI Jam When Using Citrix Universal Printer
Driver / Update
|
|
6.41 MB
|

|
MX-6201N MX-7001N (serv.man62)
Combined Firmware Version ICU 01.05.V0_A PCU 01.08V0
Driver / Update
|
|
27.72 MB
|

|
MX-6201N MX-7001N (serv.man63)
PPD2_PRI Jam When Using Citrix Universal Printer
Driver / Update
|
|
6.12 MB
|

|
MX-6201N MX-7001N (serv.man64)
Mx Driver removal tool
Driver / Update
|
|
125.06 KB
|

|
MX-6201N MX-7001N (serv.man65)
Sharpdesk Registry Cleaner
Driver / Update
|
|
634.26 KB
|
|
|
MX-6201N MX-7001N (serv.man5)
EEPROM Programming Procedure
Handy Guide
|
4
|
772.27 KB
|
|
|
MX-6201N MX-7001N (serv.man6)
INFO REQUIRED FOR EE-PROM PROGRAMMING
Handy Guide
|
1
|
67.23 KB
|
|
|
MX-6201N MX-7001N (serv.man7)
GENERAL PROCEDURE FOR COLOUR CALIBRATION SET-UP
Handy Guide
|
2
|
83.06 KB
|
|
|
MX-6201N MX-7001N (serv.man8)
VERSION 1A
Handy Guide
|
54
|
1.04 MB
|
|
|
MX-6201N MX-7001N (serv.man53)
How To Read A Main Machine Serial Number
FAQ
|
1
|
16.5 KB
|

|
MX-6201N MX-7001N (serv.man54)
6201 TEMP NV RAM FILE
FAQ
|
|
13.47 KB
|

|
MX-6201N MX-7001N (serv.man55)
UPDATED PJL PCL PS Command Lists
FAQ
|
|
128.84 KB
|
|
|
MX-6201N MX-7001N (serv.man56)
How to connect MX colour product to Linux UNIX systems using CUPS
FAQ
|
9
|
1.45 MB
|

|
MX-6201N MX-7001N (serv.man130)
MSDS INFO CYAN DEVELOPER
Regulatory Data
|
|
24.3 KB
|

|
MX-6201N MX-7001N (serv.man131)
MSDS INFO MAGENTA DEVELOPER
Regulatory Data
|
|
24.33 KB
|

|
MX-6201N MX-7001N (serv.man132)
MSDS INFO YELLOW DEVELOPER
Regulatory Data
|
|
23.96 KB
|

|
MX-6201N MX-7001N (serv.man133)
MSDS INFO BLACK DEVELOPER
Regulatory Data
|
|
26.73 KB
|

|
MX-6201N MX-7001N (serv.man134)
MSDS INFO CYAN TONER
Regulatory Data
|
|
24.65 KB
|

|
MX-6201N MX-7001N (serv.man135)
MSDS INFO MAGENTA TONER
Regulatory Data
|
|
24.66 KB
|

|
MX-6201N MX-7001N (serv.man136)
MSDS INFO YELLOW TONER
Regulatory Data
|
|
24.69 KB
|

|
MX-6201N MX-7001N (serv.man137)
MSDS INFO BLACK TONER
Regulatory Data
|
|
27.14 KB
|
|
|
MX-6201N MX-7001N (serv.man9)
Updated December 2011
Peripheral
|
17
|
1.41 MB
|
|
|
MX-6201N MX-7001N (serv.man10)
Updated July 08
Peripheral
|
17
|
1.39 MB
|
|
|
MX-6201N MX-7001N (serv.man11)
Updated Jan 08
Peripheral
|
20
|
2.34 MB
|

