Sharp AR-285 (serv.man15) Service Manual ▷ View online
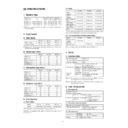
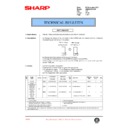
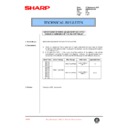
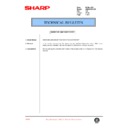
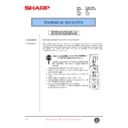
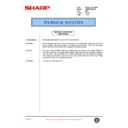
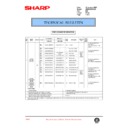
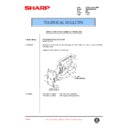
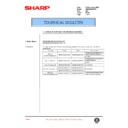
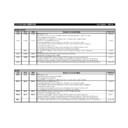
2. Self diagnostics
Trouble code
Description
Main
code
code
Sub
code
C1
00
Content MC trouble
Detail
Main charger output error (output
released)
Trouble signal from high-voltage
transformer
released)
Trouble signal from high-voltage
transformer
Cause
Main charger improperly installed
Main charger improperly assembled
High-voltage transformer connector
removed
High-voltage harness removed or wire
broken
Main charger improperly assembled
High-voltage transformer connector
removed
High-voltage harness removed or wire
broken
Check
and
remedy
and
remedy
Check main charger output with SIM8-2.
Check main charger connector for
disconnection.
Replace high-voltage unit.
Check main charger connector for
disconnection.
Replace high-voltage unit.
C2
00
Content TC trouble
Detail
Transfer charger output error (output
short-circuiting)
Trouble signal from high-voltage
transformer
short-circuiting)
Trouble signal from high-voltage
transformer
Cause
Transfer charger contaminated with
foreign matter
Transfer charger wire broken
High-voltage transformer connector
disconnected
foreign matter
Transfer charger wire broken
High-voltage transformer connector
disconnected
Check
and
remedy
and
remedy
Check transfer charger output with
SIM8-6.
Replace high-voltage unit.
SIM8-6.
Replace high-voltage unit.
E7
02
Content Laser trouble
Detail
BD signal from LSU kept at OFF or ON
Cause
Connector to LSU or harness inside LSU
disconnected or wire broken
Polygon motor improperly rotating
Laser home position sensor improperly
positioned inside LSU
Laser power supply line does not have
proper voltage
Laser LED improperly lighting
ICU PWB error
disconnected or wire broken
Polygon motor improperly rotating
Laser home position sensor improperly
positioned inside LSU
Laser power supply line does not have
proper voltage
Laser LED improperly lighting
ICU PWB error
Check
and
remedy
and
remedy
Check LSU connector for disconnection.
Check LSU operation with SIM61-1.
Check polygon motor for rotation.
Check laser LED for lighting.
Replace LSU unit.
Replace ICU PWB.
Check LSU operation with SIM61-1.
Check polygon motor for rotation.
Check laser LED for lighting.
Replace LSU unit.
Replace ICU PWB.
10
Content Shading trouble (black correction)
Detail
Improper CCD black reading level for
copy lamp going out
copy lamp going out
Cause
Improper installation of flat cable to CCD
unit
CCD unit error
ICU PWB error
unit
CCD unit error
ICU PWB error
Check
and
remedy
and
remedy
Check flat cable to CCD unit for
installation.
Check CCD unit.
Check ICU PWB.
installation.
Check CCD unit.
Check ICU PWB.
Trouble code
Description
Main
code
code
Sub
code
E7
11
Content Shading trouble (white correction)
Detail
Improper CCD white reference plate
reading level for copy lamp lighting
reading level for copy lamp lighting
Cause
Improper installation of flat cable to CCD
unit
Mirror, lens or reference white plate
contaminated
Copy lamp operation error
Improperly installed CCD unit
CCD unit error
ICD PWB error
unit
Mirror, lens or reference white plate
contaminated
Copy lamp operation error
Improperly installed CCD unit
CCD unit error
ICD PWB error
Check
and
remedy
and
remedy
Clean mirror, lens, or reference white
plate.
Check copy lamp for light amount
(SIM5-3) and lighting.
Check CCD unit.
Check ICU PWB.
plate.
Check copy lamp for light amount
(SIM5-3) and lighting.
Check CCD unit.
Check ICU PWB.
13
Content CCD light amount check error
Detail
Copy lamp light amount adjustment in
shading cannot be made
shading cannot be made
Cause
Copy lamp does not light (broken wire,
improper installation)
Improper installation of flat cable to CCD
unit
Improper connection of copy lamp CL
lead wire
Mirror, lens, or reference white plate
Dirt or dew
Improper output of copy lamp power
supply
Improper installation of CCD unit
CCD unit error
ICU PWB error
improper installation)
Improper installation of flat cable to CCD
unit
Improper connection of copy lamp CL
lead wire
Mirror, lens, or reference white plate
Dirt or dew
Improper output of copy lamp power
supply
Improper installation of CCD unit
CCD unit error
ICU PWB error
Check
and
remedy
and
remedy
Clean mirror, lens, reference white plate.
Check copy lamp for light amount
(SIM5-3) and lighting.
Check CCD unit.
Check ICU PWB.
Check copy lamp for light amount
(SIM5-3) and lighting.
Check CCD unit.
Check ICU PWB.
F1
00
Content Finisher communication trouble
Detail
Communication line test error occurs
when power is turned on or after the exit
of a simulation mode.
Improper communication with sorter
when power is turned on or after the exit
of a simulation mode.
Improper communication with sorter
Cause
Improper connection or broken wire of
connector or harness between copier
and sorter
Finisher control PWB defective
Control PWB (PCU) defective
Malfunction due to noise
connector or harness between copier
and sorter
Finisher control PWB defective
Control PWB (PCU) defective
Malfunction due to noise
Check
and
remedy
and
remedy
Clear by turning the power supply
OFF/ON.
Check communication line connector and
harness.
Replace Finisher control PWB or PCU
PWB.
OFF/ON.
Check communication line connector and
harness.
Replace Finisher control PWB or PCU
PWB.
01
Content Finisher jogger shift trouble
Detail
Jogger shift trouble
Cause
Motor lock
Motor rpm abnormality
Motor overcurrent
Finisher control PWB trouble
Motor rpm abnormality
Motor overcurrent
Finisher control PWB trouble
Check
and
remedy
and
remedy
Check the jogger motor operation with
SIM 3-3.
SIM 3-3.
11 – 2
Trouble code
Description
Main
code
code
Sub
code
F1
02
Content Finisher transport motor error
Detail
Transport motor drive trouble
Cause
Motor lock
Check
and
remedy
and
remedy
Check transport motor operation with
SIM3-3.
SIM3-3.
04
Content Finisher indexer lower limit detected
Detail
Indexer has exceeded lower limit.
Cause
Sensor defective
Finisher control PWB defective
Finisher control PWB defective
Check
and
remedy
and
remedy
Check sensor with SIM3-2.
05
Content Finisher indexer upper limit detected
Detail
Indexer has exceeded upper limit
Cause
Sensor defective
Finisher control PWB defective
Finisher control PWB defective
Check
and
remedy
and
remedy
Check sensor with SIM3-2.
06
Content Finisher bin shift motor error
Detail
1) Bin shift is not completed within 2.5
seconds after bin shift request
seconds after bin shift request
Cause
Motor lock
Improper motor speed
Overcurrent to motor
Finisher control PWB defective
Improper motor speed
Overcurrent to motor
Finisher control PWB defective
Check
and
remedy
and
remedy
Check bin shift motor operation with
SIM3-4.
SIM3-4.
10
Content Staple unit operation trouble
Detail
Staple operation trouble
Cause
Motor lock
Motor rpm abnormality
Motor overcurrent
Finisher control PWB trouble
Motor rpm abnormality
Motor overcurrent
Finisher control PWB trouble
Check
and
remedy
and
remedy
Check the staple motor operation with
SIM 3-3.
SIM 3-3.
11
Content Pusher motor trouble
Detail
Pusher motor trouble
Cause
Motor lock
Motor rpm abnormality
Motor overcurrent
Finisher control PWB trouble
Motor rpm abnormality
Motor overcurrent
Finisher control PWB trouble
Check
and
remedy
and
remedy
Check the pusher motor operation with
SIM 3-3.
SIM 3-3.
15
Content Finisher elevator motor trouble
Detail
Elevator motor trouble
Cause
Motor lock
Motor rpm abnormality
Motor overcurrent
Finisher control PWB trouble
Motor rpm abnormality
Motor overcurrent
Finisher control PWB trouble
Check
and
remedy
and
remedy
Check the elevator motor operation with
SIM 3-3.
SIM 3-3.
Trouble code
Description
Main
code
code
Sub
code
F1
80
Content Finisher power trouble
Detail
24V power is not supplied to the finisher
PWB.
PWB.
Cause
Connector harness improper connection
or disconnection
Finisher control PWB trouble
Power unit trouble
or disconnection
Finisher control PWB trouble
Power unit trouble
Check
and
remedy
and
remedy
Check the sensor operation with SIM 3-2.
F2
00
Content Toner control sensor open
Detail
Toner control sensor output open
Cause
Connector harness trouble
Connector unconnected.
Connector unconnected.
Check
and
remedy
and
remedy
Check connection of the toner control
sensor.
Check connection of the connector
harness with the main PWB.
Check for disconnection of the harness.
sensor.
Check connection of the connector
harness with the main PWB.
Check for disconnection of the harness.
02
Content Toner motor connector disconnected
Detail
Connection detection signal with toner
motor is OFF
motor is OFF
Cause
Connector harness defective
Connector disconnected
Connector disconnected
Check
and
remedy
and
remedy
Check toner motor connector for
connection.
Check connector harness to main PWB
for connection.
Check harness for broken wire.
connection.
Check connector harness to main PWB
for connection.
Check harness for broken wire.
31
Content Process control trouble (OPC base
surface reflection factor is improper)
Detail
Usually the sensor gain is adjusted so
that the output is a certain value, by
reading the drum base surface with the
image density sensor before starting
process control.
However, a certain output is not obtained
by adjusting the sensor gain.
that the output is a certain value, by
reading the drum base surface with the
image density sensor before starting
process control.
However, a certain output is not obtained
by adjusting the sensor gain.
Cause
Image density sensor defective
Check
and
remedy
and
remedy
Check process control sensor output with
SIM44-2. (Do not adjust)
If the result is far different from the
specified value, it suggests the sensor is
defective. Check the sensor and
harness.
If the deviation is relatively small, check
the sensor and drum surface for
contamination.
SIM44-2. (Do not adjust)
If the result is far different from the
specified value, it suggests the sensor is
defective. Check the sensor and
harness.
If the deviation is relatively small, check
the sensor and drum surface for
contamination.
11 – 3
Trouble code
Description
Main
code
code
Sub
code
F2
32
Content Process control trouble (drum marking
sensor defective)
Detail
Usually the sensor gain is adjusted so
that the output is a certain value, by
reading the drum base surface with the
drum marking sensor before starting
process control.
However, a certain output is not obtained
by adjusting the sensor gain.
that the output is a certain value, by
reading the drum base surface with the
drum marking sensor before starting
process control.
However, a certain output is not obtained
by adjusting the sensor gain.
Cause
Drum marking sensor defective
Improper connection of harness between
PCU PWB and drum marking sensor
Drum marking sensor contaminated
OPC drum cleaning improper
Charging voltage improper
Improper connection of harness between
PCU PWB and drum marking sensor
Drum marking sensor contaminated
OPC drum cleaning improper
Charging voltage improper
Check
and
remedy
and
remedy
Check process control output with
SIM44-02. (Do not adjust.)
If the result is far different from the
specified value, it suggests the sensor is
defective. Check the sensor and
harness.
If the deviation is relatively small, check
the sensor and drum surface for
contamination.
SIM44-02. (Do not adjust.)
If the result is far different from the
specified value, it suggests the sensor is
defective. Check the sensor and
harness.
If the deviation is relatively small, check
the sensor and drum surface for
contamination.
37
Content Drum marking sensor gain adjustment
error
Detail
When the drum marking area surface is
scanned with the drum marking sensor
before starting process control and the
sensor gain ia adjusted until a constant
output is provided, the output is not be
constant though the sensor gain is
changed.
scanned with the drum marking sensor
before starting process control and the
sensor gain ia adjusted until a constant
output is provided, the output is not be
constant though the sensor gain is
changed.
Cause
Drum marking sensor trouble
Improper connection between PCU PWB
and drum marking sensor
Drum marking sensor is dirty
OPC drum cleaning trouble
Improper connection between PCU PWB
and drum marking sensor
Drum marking sensor is dirty
OPC drum cleaning trouble
Check
and
remedy
and
remedy
Perform the gain adjustment of process
control sensor with SIM 44-2.
If ERROR is displayed, it may be a
breakdown. Check the sensor and the
harness.
When the adjustment is completed,
check the drum surface conditions.
control sensor with SIM 44-2.
If ERROR is displayed, it may be a
breakdown. Check the sensor and the
harness.
When the adjustment is completed,
check the drum surface conditions.
F3
12
Content Upper cassette lift-up trouble
Detail
UPED does not turn on within the
specified time.
ULUD does not turn on within the
specified time.
specified time.
ULUD does not turn on within the
specified time.
Cause
UPED or ULUD defective
Upper cassette lift-up motor defective
Improper connection of harness between
PCU PWB, lift-up unit, and paper feed
unit.
Upper cassette lift-up motor defective
Improper connection of harness between
PCU PWB, lift-up unit, and paper feed
unit.
Check
and
remedy
and
remedy
Check UPED, ULUD and their harness
and connector.
Check lift-up unit.
and connector.
Check lift-up unit.
Trouble code
Description
Main
code
code
Sub
code
F3
22
Content Lower cassette lift-up trouble
Detail
LPED does not turn on within the
specified time.
LLUD does not turn on within the
specified time.
specified time.
LLUD does not turn on within the
specified time.
Cause
LPED or LLUD defective
Lower cassette lift-up motor defective
Improper connection of harness between
PCU PWB, lift-up unit, and paper feed
unit.
Lower cassette lift-up motor defective
Improper connection of harness between
PCU PWB, lift-up unit, and paper feed
unit.
Check
and
remedy
and
remedy
Check LPED, LLUD, their harnesses and
connectors.
Check lift-up unit.
connectors.
Check lift-up unit.
H2
00
…
HL1
01
…
HL2
Content Thermister open
Fusing unit not installed
Detail
Thermister is open (more than 4.6-V
input voltage is detected).
Fusing unit not installed
input voltage is detected).
Fusing unit not installed
Cause
Thermister defective
Control PWB defective
Improper connection of fusing connector
AC power supply defective
Fusing unit not installed
Control PWB defective
Improper connection of fusing connector
AC power supply defective
Fusing unit not installed
Check
and
remedy
and
remedy
Check harness and connector between
thermister and control PWB.
Clear the display of self-diagnostics with
SIM14.
thermister and control PWB.
Clear the display of self-diagnostics with
SIM14.
H3
00
…
HL1
01
…
HL2
Content Too hot fusing section
Detail
The fusing temperature is over 241.5° C
(less than 1.3-V input voltage is
detected.)
(less than 1.3-V input voltage is
detected.)
Cause
Thermister defective
Control PWB defective
Improper connection of fusing unit
connector
AC power supply defective
Control PWB defective
Improper connection of fusing unit
connector
AC power supply defective
Check
and
remedy
and
remedy
Check heater lamp operation with
SIM5-2.
If lamp blinks properly:
Check thermister and its harness.
Check
SIM5-2.
If lamp blinks properly:
Check thermister and its harness.
Check
thermister
input
circuit
of
control
PWB.
If lamp lights and stays lit:
Check lamp control circuits of AC PWB
and control PWB.
Clear the trouble with SIM14.
If lamp lights and stays lit:
Check lamp control circuits of AC PWB
and control PWB.
Clear the trouble with SIM14.
11 – 4
Trouble code
Description
Main
code
code
Sub
code
H4
00
…
HL1
01
…
HL2
Content Too cold fusing section
Detail
The temperature does not reach the
preset value within the specified time (3
min. in usual modes; 5 min. in curl
correction mode.) after the power relay is
turned on.
preset value within the specified time (3
min. in usual modes; 5 min. in curl
correction mode.) after the power relay is
turned on.
Cause
Thermister defective
Heater lamp defective
Control PWB defective
Thermostat defective
AC power supply defective
Interlock switch defective
Heater lamp defective
Control PWB defective
Thermostat defective
AC power supply defective
Interlock switch defective
Check
and
remedy
and
remedy
Check heater lamp for blinking with
SIM5-2.
If lamp blinks properly:
Check thermister and its harness.
Check thermister input circuit of control
PWB.
If lamp does not light:
Check heater lamp for broken wire and
thermostat for operation.
Check interlock switch.
Check lamp control circuit of AC PWB
and control PWB.
Clear the trouble with SIM14.
H5
01
Content 3 continuous POD1 not-reaching JAM
detection
Detail
3 continuous POD1 not-reaching JAM
detection
detection
Cause
Check that the fusing JAM is completely
cancelled. (Jam paper may be
remained.)
POD1 sensor trouble or improper
harness connection
Improper installation of the fusing
harness.
cancelled. (Jam paper may be
remained.)
POD1 sensor trouble or improper
harness connection
Improper installation of the fusing
harness.
Check
and
remedy
and
remedy
Check JAM paper in the fusing section.
(Winding, etc.)
Check POD1 sensor harness. Check the
fusing unit installation.
Cancel the trouble with SIM 14.
(Winding, etc.)
Check POD1 sensor harness. Check the
fusing unit installation.
Cancel the trouble with SIM 14.
L1
00
Content Scanner field trouble
Detail
Scanner field is not finished within the
specified time. (timer is change by
magnification)
specified time. (timer is change by
magnification)
Cause
Mirror unit defective
Scanner wire disconnected
Scanner wire disconnected
Check
and
remedy
and
remedy
Check scanning operation with SIM1-1.
L3
00
Content Scanner return trouble
Detail
Scanner return is not finished within the
specified time. (timer is change by
magnification)
specified time. (timer is change by
magnification)
Cause
Mirror unit defective
Scanner wire disconnected
Scanner wire disconnected
Check
and
remedy
and
remedy
Check scanning operation with SIM1-1.
Trouble code
Description
Main
code
code
Sub
code
L4
01
Content Main motor lock detected
Detail
Motor lock signal is detected for 1.5
seconds during main motor rotation
seconds during main motor rotation
Cause
Main motor defective
Improper connection of harness between
PCU PWB and main motor
Control circuit defective
Improper connection of harness between
PCU PWB and main motor
Control circuit defective
Check
and
remedy
and
remedy
Check main motor operation with
SIM25-1.
Check harness and connector between
PCU PWB and main motor.
SIM25-1.
Check harness and connector between
PCU PWB and main motor.
L6
10
Content Polygon motor lock detected
Detail
It was judged that there is no output of
polygon motor lock signal of LSU.
The lock signal was checked at about
10-second intervals after the polygon
motor started rotating. As result, it was
judged that the polygon motor failed to
operate normally.
polygon motor lock signal of LSU.
The lock signal was checked at about
10-second intervals after the polygon
motor started rotating. As result, it was
judged that the polygon motor failed to
operate normally.
Cause
Disconnected connecter to LSU or
detached harness inside LSU or broken
wire.
Polygon motor defective
detached harness inside LSU or broken
wire.
Polygon motor defective
Check
and
remedy
and
remedy
Check polygon motor operation with
SIM61-1.
Check harness and connector for
connection. Replace LSU if needed.
SIM61-1.
Check harness and connector for
connection. Replace LSU if needed.
L8
01
Content No full-wave signal
Detail
Full-wave signal is not detected.
Cause
PCU PWB trouble
Power unit trouble
Power unit trouble
Check
and
remedy
and
remedy
Check connection of the harness and the
connector.
Replace the PCU PWB.
Replace the power unit.
connector.
Replace the PCU PWB.
Replace the power unit.
02
Content Full-wave signal abnormality
Detai
Full-wave signal frequency abnormality
detected.
(The detected frequency: 69Hz or above
or 42.5Hz or below)
detected.
(The detected frequency: 69Hz or above
or 42.5Hz or below)
Cause
Check for disconnection or improper
connection of the connector of the PCU
PWB and the power PWB harness.
PCU PWB trouble
Power unit trouble
connection of the connector of the PCU
PWB and the power PWB harness.
PCU PWB trouble
Power unit trouble
Check
and
remedy
and
remedy
Check connection of the harness and
connector.
Replace the power unit.
connector.
Replace the power unit.
11 – 5

