Sharp AR-161 (serv.man9) Service Manual ▷ View online
CODE: 00ZAR161//A1E
DIGITAL COPIER
AR-160
MODEL
AR-161
Parts marked with "
!
" is important for maintaining the safety of the set. Be sure to replace these parts with specified
ones for maintaining the safty and performance of the set.
[ 1 ] GENERAL . . . . . . . . . . . . . . . . . . . . . . . . . . . . . . . . . . . . . . . . . . . . . . . . 1-1
[ 2 ] SPECIFICATIONS . . . . . . . . . . . . . . . . . . . . . . . . . . . . . . . . . . . . . . . . . 2-1
[ 3 ] CONSUMABLE PARTS . . . . . . . . . . . . . . . . . . . . . . . . . . . . . . . . . . . . . 3-1
[ 4 ] EXTERNAL VIEWS AND INTERNAL STRUCTURE . . . . . . . . . . . . . . . 4-1
[ 5 ] UNPACKING AND INSTALLATION . . . . . . . . . . . . . . . . . . . . . . . . . . . . 5-1
[ 6 ] OPERATIONAL DESCRIPTIONS . . . . . . . . . . . . . . . . . . . . . . . . . . . . . 6-1
[ 7 ] ADJUSTMENTS . . . . . . . . . . . . . . . . . . . . . . . . . . . . . . . . . . . . . . . . . . . 7-1
[ 8 ] SIMULATIONS . . . . . . . . . . . . . . . . . . . . . . . . . . . . . . . . . . . . . . . . . . . . 8-1
[ 9 ] USER PROGRAM . . . . . . . . . . . . . . . . . . . . . . . . . . . . . . . . . . . . . . . . . . 9-1
[10] TROUBLE CODE LIST . . . . . . . . . . . . . . . . . . . . . . . . . . . . . . . . . . . . . 10-1
[11] MAINTENANCE . . . . . . . . . . . . . . . . . . . . . . . . . . . . . . . . . . . . . . . . . . 11-1
[12] DISASSEMBLY AND ASSEMBLY . . . . . . . . . . . . . . . . . . . . . . . . . . . . 12-1
[13] ELECTRICAL SECTION . . . . . . . . . . . . . . . . . . . . . . . . . . . . . . . . . . . . 13-1
[14] CIRCUIT DIAGRAM . . . . . . . . . . . . . . . . . . . . . . . . . . . . . . . . . . . . . . . 14-1
[15] ACTUAL WIRING DIAGRAM . . . . . . . . . . . . . . . . . . . . . . . . . . . . . . . . 15-1
CONTENTS
AR-161
SHARP CORPORATION
AR-160/161 FM/E COVER 11/27/1998
AR-161
AR-161
Warning!
This product is a class A product.
If it is operated in households, offices or similar surroundings, it
can produce radio interferences at other appliances, so that the
user has to take adequate countermeasures.
This product is a class A product.
If it is operated in households, offices or similar surroundings, it
can produce radio interferences at other appliances, so that the
user has to take adequate countermeasures.
CLASS 1 LASER PRODUCT
LASER KLASSE 1
LUOKAN 1 LASERLAITE
KLASS 1 LASERAPPARAT
VAROITUS!
LAITTEEN KÄYTTÄMINEN
MUULLA KUIN TÄSSÄ
KÄYTTÖOHJEESSA MAINITULLA
TAVALLA SAATTAA ALTISTAA
KÄYTTÄJÄN
TURVALLISUUSLUOKAN 1
YLITTÄVÄLLE
NÄKYMÄTTÖMÄLLE
LASERSÄTEILYLLE.
MUULLA KUIN TÄSSÄ
KÄYTTÖOHJEESSA MAINITULLA
TAVALLA SAATTAA ALTISTAA
KÄYTTÄJÄN
TURVALLISUUSLUOKAN 1
YLITTÄVÄLLE
NÄKYMÄTTÖMÄLLE
LASERSÄTEILYLLE.
VARNING
OM APPARATEN ANVÄNDS PÅ
ANNAT SÄTT ÄN I DENNA
BRUKSANVISNING
SPECIFICERATS, KAN
ANVÄNDAREN UTSÄTTAS FÖR
OSYNLIG LASERSTRÅLNING,
SOM ÖVERSKRIDER GRÄNSEN
FÖR LASERKLASS 1.
ANNAT SÄTT ÄN I DENNA
BRUKSANVISNING
SPECIFICERATS, KAN
ANVÄNDAREN UTSÄTTAS FÖR
OSYNLIG LASERSTRÅLNING,
SOM ÖVERSKRIDER GRÄNSEN
FÖR LASERKLASS 1.
CAUTION
VORSICHT
ADVARSEL
VORSICHT
ADVARSEL
ADVERSEL
VARNING
VARO!
VARNING
VARO!
INVISIBLE LASER RADIATION WHEN OPEN AND INTERLOCKS DEFEATED.
AVOID EXPOSURE TO BEAM.
AVOID EXPOSURE TO BEAM.
UNSICHTBARE LASERSTRAHLUNG WENN ABDECKUNG GEÖFFNET UND
SICHERHEITSVERRIEGELUNG ÜBERERÜCKT. NICHT DEM STRAHL AUSSETZEN.
SICHERHEITSVERRIEGELUNG ÜBERERÜCKT. NICHT DEM STRAHL AUSSETZEN.
USYNLIG LASERSTRÅLING VED ÅBNING, NÅR SIKKERHEDSAFBRYDERE ER
UDE AF FUNKTION. UNDGA UDSAETTELSE FOR STRÅLING.
UDE AF FUNKTION. UNDGA UDSAETTELSE FOR STRÅLING.
USYNLIG LASERSTRÅLING NÅR DEKSEL ÅPNES OG SIKKERHEDSLÅS BRYTES.
UNNGÅ EKSPONERING FOR STRÅLEN.
UNNGÅ EKSPONERING FOR STRÅLEN.
OSYNLIG LASERSTRÅLNING NÄR DENNA DEL ÄR ÖPPNAD OCH SPÄRRAR ÄR
URKOPPLADE. STRÅLEN ÄR FARLIG. BETRAKTA EJ STRÅLEN.
URKOPPLADE. STRÅLEN ÄR FARLIG. BETRAKTA EJ STRÅLEN.
AVATTAESSA JA SUOJALUKITUS OHITETTAESSA OLET ALTTIINA NÄKYMÄTÖNTÄ
LASERSÄTEILYLLE. ÄLÄ KATSO SÄTEESEEN.
LASERSÄTEILYLLE. ÄLÄ KATSO SÄTEESEEN.
Laserstrahl
CLASS 1
LASER PRODUCT
LASER KLASSE 1
AR-160/161 FM/E COVER 11/27/1998
CONTENTS
[ 1 ] GENERAL
. . . . . . . . . . . . . . . . . . . . . . . . . . . . . . . 1-1
1. General . . . . . . . . . . . . . . . . . . . . . . . . . . . . . . . 1-1
2. Target user copy volume: Monthly average . . . 1-1
3. Main features . . . . . . . . . . . . . . . . . . . . . . . . . . . 1-1
4. System configuration . . . . . . . . . . . . . . . . . . . . . 1-1
5. Copier installation . . . . . . . . . . . . . . . . . . . . . . . 1-1
[ 2 ] SPECIFICATIONS
. . . . . . . . . . . . . . . . . . . . . . . . 2-1
1. Copy mode . . . . . . . . . . . . . . . . . . . . . . . . . . . . 2-1
[ 3 ] CONSUMABLE PARTS
. . . . . . . . . . . . . . . . . . . 3-1
1. Supply system table . . . . . . . . . . . . . . . . . . . . . 3-1
2. Environment conditions . . . . . . . . . . . . . . . . . . . 3-3
3. Production number identification . . . . . . . . . . . . 3-3
4. Consumable parts recycling procedure . . . . . . 3-4
[ 4 ] EXTERNAL VIEWS AND INTERNAL
STRUCTURE
. . . . . . . . . . . . . . . . . . . . . . . . . . . . . 4-1
1. Appearance . . . . . . . . . . . . . . . . . . . . . . . . . . . . 4-1
2. Internal . . . . . . . . . . . . . . . . . . . . . . . . . . . . . . . 4-1
3. Operation Section . . . . . . . . . . . . . . . . . . . . . . . 4-2
4. Motor, solenoid, clutch . . . . . . . . . . . . . . . . . . . 4-3
5. Sensor, switch . . . . . . . . . . . . . . . . . . . . . . . . . . 4-4
6. PWB unit . . . . . . . . . . . . . . . . . . . . . . . . . . . . . . 4-5
7. Cross sectional view . . . . . . . . . . . . . . . . . . . . . 4-6
[ 5 ] UNPACKING AND INSTALLATION
. . . . . . . . . 5-1
1. Installation of machine . . . . . . . . . . . . . . . . . . . 5-1
2. Removal of protective material and fixing screw 5-1
3. Installation of developing cartridge . . . . . . . . . . 5-1
4. Removal and storage of fixing screw . . . . . . . . 5-2
5. Changing the copy paper size in the tray . . . . . 5-3
[ 6 ] OPERATIONAL DESCRIPTIONS
. . . . . . . . . . . 6-1
1. Outline of operation . . . . . . . . . . . . . . . . . . . . . . 6-1
2. Scanner section . . . . . . . . . . . . . . . . . . . . . . . . 6-1
3. Process section . . . . . . . . . . . . . . . . . . . . . . . . 6-2
4. Laser unit . . . . . . . . . . . . . . . . . . . . . . . . . . . . . 6-5
5. Paper feed section . . . . . . . . . . . . . . . . . . . . . . 6-6
6. Fusing section . . . . . . . . . . . . . . . . . . . . . . . . . . 6-7
[ 7 ] ADJUSTMENTS
. . . . . . . . . . . . . . . . . . . . . . . . . . 7-1
1. Adjustment item list . . . . . . . . . . . . . . . . . . . . . . 7-1
2. Copier adjustment . . . . . . . . . . . . . . . . . . . . . . . 7-1
[ 8 ] SIMULATIONS
. . . . . . . . . . . . . . . . . . . . . . . . . . . 8-1
1. Entering the simulation mode . . . . . . . . . . . . . . 8-1
2. Cancelling the simulation mode . . . . . . . . . . . . 8-1
3. List of simulations . . . . . . . . . . . . . . . . . . . . . . . 8-1
4. Contents of simulations . . . . . . . . . . . . . . . . . . . 8-2
[ 9 ] USER PROGRAM
. . . . . . . . . . . . . . . . . . . . . . . . 9-1
1. User program functions . . . . . . . . . . . . . . . . . . . 9-1
2. Setting change procedure . . . . . . . . . . . . . . . . . 9-2
3. Department counter setting . . . . . . . . . . . . . . . . 9-2
[10] TROUBLE CODE LIST
. . . . . . . . . . . . . . . . . . . 10-1
[11] MAINTENANCE
. . . . . . . . . . . . . . . . . . . . . . . . . 11-1
1. Maintenance table . . . . . . . . . . . . . . . . . . . . . . 11-1
[12] DISASSEMBLY AND ASSEMBLY
. . . . . . . . . 12-1
1. High voltage section . . . . . . . . . . . . . . . . . . . . 12-1
2. Optical section . . . . . . . . . . . . . . . . . . . . . . . . . 12-1
3. Fusing section . . . . . . . . . . . . . . . . . . . . . . . . 12-2
4. Paper exit section . . . . . . . . . . . . . . . . . . . . . . 12-4
5. MCU . . . . . . . . . . . . . . . . . . . . . . . . . . . . . . . . 12-6
6. Optical frame unit . . . . . . . . . . . . . . . . . . . . . . 12-6
7. LSU . . . . . . . . . . . . . . . . . . . . . . . . . . . . . . . . . 12-6
8. Tray paper feed section/
Paper transport section . . . . . . . . . . . . . . . . . . 12-7
9. Manual multi paper feed section . . . . . . . . . . 12-8
10. Power section . . . . . . . . . . . . . . . . . . . . . . . 12-10
11. Developing section . . . . . . . . . . . . . . . . . . . . 12-11
12. Process section . . . . . . . . . . . . . . . . . . . . . . 12-12
[13] ELECTRICAL SECTION
. . . . . . . . . . . . . . . . . . 13-1
1. Outline . . . . . . . . . . . . . . . . . . . . . . . . . . . . . . . 13-1
2. MCU . . . . . . . . . . . . . . . . . . . . . . . . . . . . . . . . 13-2
3. CCD PWB . . . . . . . . . . . . . . . . . . . . . . . . . . . 13-13
[14] CIRCUIT DIAGRAM
. . . . . . . . . . . . . . . . . . . . . . 14-1
[15] ACTUAL WIRING DIAGRAM
. . . . . . . . . . . . . 15-1
AR-161
AR-160/161 FM/E COVER 11/27/1998
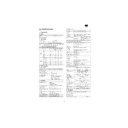
[7] ADJUSTMENTS
1. Adjustment item list
Section
Adjustment item
Adjustment procedure/SIM No.
A
Process section
(1)
Developing doctor gap adjustment
Developing doctor gap adjustment
(2)
MG roller main pole position adjustment
MG roller main pole position adjustment
(3)
Developing bias voltage output adjustment
SIM 8-1
(4)
Main charger voltage output adjustment
SIM 8-2/SIM 8-3
(5)
Transfer charger current adjustment
SIM 8-6
B
Mechanism section
(1)
Image position adjustment
SIM 50-1/SIM 50-10
(2)
Main scanning direction (FR direction)
distortion balance adjustment
distortion balance adjustment
No. 2/3 mirror base unit installing position
adjustment
adjustment
Copy lamp unit installing position adjustment
(3)
Main scanning direction (FR direction)
distortion adjustment
distortion adjustment
F rail height adjustment
(4)
Sub scanning direction (scanning direction)
distortion adjustment
distortion adjustment
Winding pulley position adjustment
(5)
Main scanning direction (FR direction)
magnification ratio adjustment
magnification ratio adjustment
SIM 48-1
(6)
Sub scanning direction (scanning direction)
magnification ratio adjustment
magnification ratio adjustment
a
OC mode in copying (SIM 48-2)
b
SPF mode in copying (SIM 48-5)
c
OC mode in FAX (SIM 48-6)
d
SPF mode in FAX (SIM 48-7)
(7)
Off center adjustment
a
OC mode (SIM 50-13)
b
SPF mode (SIM 50-16)
(8)
Document size detection sensor
SIM 41-2
C
Image density adjustment
(1)
Copy mode
SIM 46-1
2. Copier adjustment
A. Process section
(1) Developing doctor gap adjustment
1) Loosen the developing doctor fixing screw A.
2) Insert a thickness gauge of 1.5mm to the three positions at 20mm
and 130mm from the both ends of the developing doctor as
shown.
shown.
3) Push the developing doctor in the arrow direction, and tighten the
developing doctor fixing screw. (Perform the same procedure for
the front and the rear frames.)
the front and the rear frames.)
4) Check the clearance of the developing doctor. If it is within the
specified range, then fix the doctor fixing screw with screw lock.
*
When inserting a thickness gauge, be careful not to scratch the
developing doctor and the MG roller.
developing doctor and the MG roller.
<Adjustment specification>
Developing doctor gap
Both ends (20mm from the both ends): 1.5
±
0.1mm
C (Center)(150mm from the both ends): 1.5
±
0.1mm
(2) MG roller main pole position adjustment
1) Remove and separate the waste toner box and put the developing
unit on a flat surface.
2) Tie a string to a needle or a pin.
3) Hold the string and bring the needle close to the MG roller
horizontally. (Do not use paper clip, which is too heavy to make a
correct adjustment.) (Put the developing unit horizontally for this
adjustment.)
correct adjustment.) (Put the developing unit horizontally for this
adjustment.)
4) Do not bring the needle into contact with the MG roller, but bring it
to a position 2 or 3mm apart from the MG roller. Mark the point on
the MG roller which is on the extension line from the needle tip.
the MG roller which is on the extension line from the needle tip.
AR-161
AR-160/161 FM/E [7] ADJUSTMENT 11/27/1998
7 – 1

