Sharp AR-155 (serv.man5) Service Manual ▷ View online
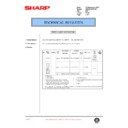
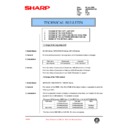
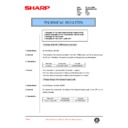
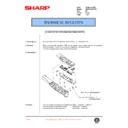
14) Clean the DV box unit with alcohol and attach the DV blade.
•
After drying the unit, attach the DV blade.
•
After attachment, check that there is no scratch and waves on
the DV blade.
the DV blade.
•
After attachment, be careful not to damage the DV blade.
•
Check that there is no foreign material in the DV blade and the
section.
section.
15) Install the DVF cover to the DV-TH box unit.
16) Clean the waste toner box unit and install it to the DV box unit.
16) Clean the waste toner box unit and install it to the DV box unit.
(Check that there is no toner in the waste toner box)
Be careful of the pawl.
Be careful of the pawl.
17) Replace the IC connector.
Check that there is no oil on the IC connector pins. (Do not touch
with fingers.)
with fingers.)
Put a white mark on the above position.
At that time, put marking for checking of the number of refilling.
18) Check the operations of the DV lever and the toner box shutter.
19) Shake the DV box unit 5 times horizontally. Rotate the DV18T
At that time, put marking for checking of the number of refilling.
18) Check the operations of the DV lever and the toner box shutter.
19) Shake the DV box unit 5 times horizontally. Rotate the DV18T
clockwise and check developer state on the MG roller. (Visually
check that developer state is normal and there is no foreign
material.)
check that developer state is normal and there is no foreign
material.)
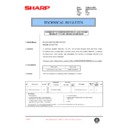
20) Install the MG cover.
Put the unit straight with the MG roller on the upper side. Rotate
the DV18T several times forward and reverse to store developer
on the MG roller into the inside. Check that there is no developer
on the MG roller surface, and install the MG cover.
the DV18T several times forward and reverse to store developer
on the MG roller into the inside. Check that there is no developer
on the MG roller surface, and install the MG cover.
Note: When attaching the MG cover, be careful not to wind around
the DV blade.
Note for MG cover installation
•
When installing, check that there is no breakage and peel-off of
the MG cover sheet and the MG cover molt attached to the MG
cover.
the MG cover sheet and the MG cover molt attached to the MG
cover.
•
Check that there is no winding into the DV blade, deformation
and scratches of DV molt F and R.
and scratches of DV molt F and R.
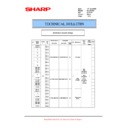
0.5
0
0.5
0
AR-F151
3 – 8
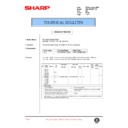
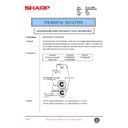
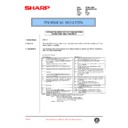
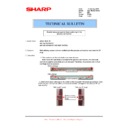
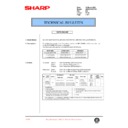
Remove the side sheets on the both sides of DV box unit.
Clean the DV box unit with alcohol and reattach the side sheets F and R to the both sides.
Clean the DV box unit with alcohol and reattach the side sheets F and R to the both sides.
0
0 . 5
0
0.
5
0
0.
5
0
0 . 5
.Remove glue completely before reattaching.
.After drying alcohol, attach the side sheet F,R.
DV box unit F side
DV box unit R side
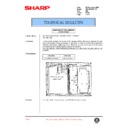
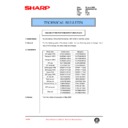
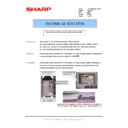
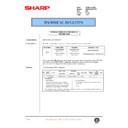
Remove the DV molt F,R and DV molt and clean with alcohol.
After attaching the DV molt F and R, attach the DV molt with the
DV molt R edge as the reference.
After attaching the DV molt F and R, attach the DV molt with the
DV molt R edge as the reference.
.Do not allow clearance between DV molt and DV molt F.
(Pull and attach them. Overlap may be allowed.)
.Remove glue completely before reattaching.
.After drying alcohol, attach the DV side sheet.
When attaching the DV molt F,
projection in the arrow
direction is not allowed.
projection in the arrow
direction is not allowed.
When attaching the DV molt R,
projection in the arrow
direction is not allowed.
projection in the arrow
direction is not allowed.
[The reattachment procedure]
0
0.5
0
0.5
0
0.5
0
0.5
0
0.5
0
0.5
0
1
0
0.5
0
0.5
DV molt F attachment
reference
(DV box edge)
reference
(DV box edge)
DV molt attachment
reference
(DV box edge)
reference
(DV box edge)
DV molt
attachment
reference
(DV box edge)
attachment
reference
(DV box edge)
DV molt
attachment
reference
(DV box edge)
attachment
reference
(DV box edge)
DV molt R
attachment
reference
(DV box edge)
attachment
reference
(DV box edge)
AR-F151
3 – 9
B. Drum unit
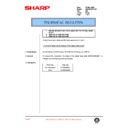
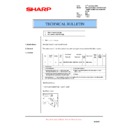
1) Check the external view.
•
Check for damage or cracks on the boss and the boss hole.
•
Check to insure that the waste toner pipe shutter slides smooth-
ly.
ly.
•
Check to insure that the star ring and the CRU washer rotate
smoothly.
smoothly.
2) Remove the drum cover. (4 Lock Tabs)
3) Remove the drum fixing plate and the photoconductor drum.
(Note) Dispose the drum fixing plate which was removed.
4) Check the cleaning blade and the red felt for no damage.
•
If there is any damage, execute all procedures from item 5) and
later.
later.
•
If there is no damage, execute the procedure of item 12).
5) Remove the main charger.
(Cleaning the screen grid and the sawteeth.)
6) Remove the cleaning blade.
Note: Dispose the cleaning blade which was removed.
(2)
(3)
L
O
C
K
AR-F151
3 – 10
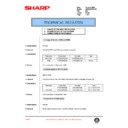
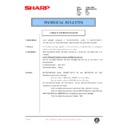
7) Clean the cleaning section and the waste toner pipe to remove
waste toner completely with a vacuum cleaner.
8) Remove the felt and duplex tape completely.
Note: Be careful not to scratch or bend the sub blade.
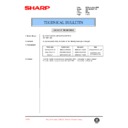
9) Attach the cleaning blade.
Securely insert the plate section of the cleaning blade into the
dove and fix it with a screw.
Do not touch the cleaning blade rubber with your hand.
When attaching the cleaning blade, press the cleaning blade in the
arrow direction and attach.
dove and fix it with a screw.
Do not touch the cleaning blade rubber with your hand.
When attaching the cleaning blade, press the cleaning blade in the
arrow direction and attach.
10) Attach the felt.
Attach the mocket with slightly pressing section A of the cleaning blade.
Do not touch the tip of the cleaning blade.
Do not put the mocket under the cleaning blade.
Do not put the mocket on the sub blade.
Do not press the sub blade with the mocket.
11) Attach the main charger.
Do not touch the tip of the cleaning blade.
Do not put the mocket under the cleaning blade.
Do not put the mocket on the sub blade.
Do not press the sub blade with the mocket.
11) Attach the main charger.
Securely set the MC holder on the projection of the process frame.
Securely insert two projections of the MC holder into the groove
in the process frame.
When attaching the MC holder ass’y, be careful not to make con-
tact with the cleaning blade.
Securely insert two projections of the MC holder into the groove
in the process frame.
When attaching the MC holder ass’y, be careful not to make con-
tact with the cleaning blade.
12) Attach the drum fixing plate and the photoconductor drum.
Apply grease to the inside of the photoconductor drum. (Dia. 2)
Attach the drum from (b). (Prevention against the sub blade edge
breakage)
Attach the drum so that its position with the sub blade is as shown.
breakage)
Attach the drum so that its position with the sub blade is as shown.
13) Attach the detection gear.
Note:
•
•
The detection gear is not installed to the drum cartridge packed
with the main body. Add a new one.
with the main body. Add a new one.
14) Attach the drum cover.
Note: After attaching the drum cover, do not make a copy.
When attaching the drum cover, engage the detection gear
20T rib with the 30T gear rib, and attach the drum cover to
the process frame.
20T rib with the 30T gear rib, and attach the drum cover to
the process frame.
15) Mark the number of times of recycling on the side of the cover with
white paint.
Max. times of recycling: 5 times
Max. times of recycling: 5 times
AR-F151
3 – 11

