Sharp AL-800 (serv.man5) Service Manual ▷ View online
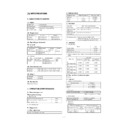
[6] MACHINE OPERATION
(1) Operation mode
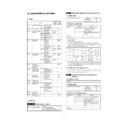
This machine has the following operation modes.
Mode
Content
Copy mode
During the coy mode, print data is received but not accepted. After completion of copying, print is
automatically performed.
automatically performed.
Print mode
Laser image data from the host is printed.
Power save mode
There are the pre-heat mode and the power shut down mode. In the pre-heat mode, fusing temperature is
lowered. In the power shut down mode, all the sections excluding the control circuit are stopped.
lowered. In the power shut down mode, all the sections excluding the control circuit are stopped.
Test command (Simulation)
This mode is used for servicing (various setting, adjustments, and checking of the operations).
User program mode
Used to set the operating specifications according to user’s need.
(2) Machine status and display
There are following machine status, and the operation and display are made for each status.
Machine status
Machine condition
READY
LAMP
ON
LINE
LAMP
3 GREEN
7
SEGMENT
LED
PRE-
HEAT
LAMP
LAMP
JAM
LAMP
TONER
CERTRIDGE
REPLACE-
MENT LAMP
DRUM
CERTRIDGE
REPLACE-
MENT LAMP
Copy
lamp
NOTE
Warm up
Warming up and initializing
are performed in the fusing
section, the image process
section, the scanner
section, and the electrical
circuits.
are performed in the fusing
section, the image process
section, the scanner
section, and the electrical
circuits.
OFF
—
—
—
—
—
—
ON
READY
ONLINE
Print image is received
and printing is allowed.
and printing is allowed.
ON
ON
—
—
OFF
OFF
OFF
ON
Press the clear key twice
to enter the online mode.
to enter the online mode.
OFFLINE
Only copying is allowed.
(Printing is inhibited.)
(Printing is inhibited.)
ON
OFF
—
—
OFF
OFF
OFF
ON
BUSY
Copying
OFF
OFF
—
—
—
—
—
ON
Interruption inhibited.
Printing
ON
ON
Power
save
save
Pre-heat
mode
mode
The fusing temperature is
lowered to reduce power
consumption.
lowered to reduce power
consumption.
ON
ON
—
ON
—
—
—
OFF
When any key is pressed,
warming up is started.
warming up is started.
Power
shut
down
mode
shut
down
mode
Conduction to the loads
other than electrical
circuits is inhibited,
excluding the heater lamp
and the copy lamp.
other than electrical
circuits is inhibited,
excluding the heater lamp
and the copy lamp.
OFF
ON
OFF
ON
OFF
OFF
OFF
OFF
All lamps except for
READY indicator are
turned OFF. When any key
is pressed, warming up is
started.
READY indicator are
turned OFF. When any key
is pressed, warming up is
started.
Machine
trouble
trouble
The machine operation
cannot continue operation,
and copying or printing is
forcibly stopped.
(Conduction is stopped
excluding the display
section.) The error code is
displayed and the error
lamp is lighted.
cannot continue operation,
and copying or printing is
forcibly stopped.
(Conduction is stopped
excluding the display
section.) The error code is
displayed and the error
lamp is lighted.
OFF
OFF
The error
code is
displayed.
—
—
—
—
OFF
Requires repair work by a
serviceman.
serviceman.
Paper jam
OFF
OFF
—
ON
BLINK
—
—
OFF
Mis-feed
Paper is not fed in the
paper feed section.
paper feed section.
OFF
OFF
P-
BLINKING
—
OFF
—
—
—
The 3 green 7 segment
LED displays blink "P."
LED displays blink "P."
Consumable part
empty
empty
Photoconductor cartridge
life (20K) over
life (20K) over
OFF
OFF
—
—
—
—
BLINK
OFF
When the life is reached
during copying or printing,
the job is completed then
the machine is stopped.
during copying or printing,
the job is completed then
the machine is stopped.
Photoconductor cartridge
life (19K) near
life (19K) near
ON
ON
—
—
—
—
ON
—
Toner empty
OFF
OFF
—
—
—
ON
—
—
The machine operation is
not stopped.
not stopped.
Paper empty
OFF
OFF
P-
BLINKING
—
—
—
—
—
The input tray indicator
blinks, 3 green 7 segment
LED displays blink "P."
blinks, 3 green 7 segment
LED displays blink "P."
Print data received
from the host
from the host
ON
ON
—
—
—
—
—
ON
Interrupt copy during
printing
printing
ON/
OFF
BLINK
—
—
—
—
—
ON
6 – 1
(3) Relationship between the power save mode and the display and machine operations
The power save mode is of two steps: the pre-heat mode and the power shut down mode. When the time set by user program 2 or 3 is passed from
the non-operation state, the machine enters the pre-heat mode and the power shut down mode.
the non-operation state, the machine enters the pre-heat mode and the power shut down mode.
Machine condition
READY LAMP
OTHER
LAMPS & LEDS
FUSING
SECTION
CONTROL
FAN
Copy lamp
Other load
Ready (Machine idle)
ON
Current state
indicated
(No change)
160°C
ON
ON
Normal
operation
Power save
Pre-heat mode
ON
Current state
indicated
(No change)
80°C
ON
OFF
OFF
Power shut
down mode
down mode
OFF
OFF
OFF
OFF
OFF
OFF
(4) Consumable parts life and operation
When consumable parts life is approached, a warning display is made. When the photoconductor drum life is reached, the machine is forcibly
stopped.
stopped.
Machine condition
READY
LAMP
3 GREEN 7
SEGMENT
LED
TONER
CARTRIDGE
REPLACEMENT
LAMP
DRUM
CARTRIDGE
REPLACEMENT
LAMP
NOTE
Consumable
part empty
part empty
Photoconductor
cartridge life
(20K) over
cartridge life
(20K) over
OFF
—
—
BLINK
When the life is reached during copying or
printing, the job is completed and then the
machine is stopped.
printing, the job is completed and then the
machine is stopped.
Photoconductor
cartridge life
(19K) near
cartridge life
(19K) near
ON
—
—
ON
Toner empty
ON
—
ON/BLINK
—
The machine operation is not stopped.
(However, the print density is lowered.)
(However, the print density is lowered.)
Paper empty
OFF
P-BLINKING
—
—
3 GREEN 7 SEGMENT LED show "P."
(5) Selection between the ON LINE mode
and the OFF LINE mode
In the ON LINE mode, the ON LINE lamp lights up to show that the
machine is ready for receiving print data from the host.
During copying, the machine is in the OFF line mode and the ON
LINE lamp goes off.
During printing, when copy interruption is made, printing is interrupted
and the ON LINE lamp blinks.
When a certain time passes after completion of copying, the machine
go back to the ON LINE mode and printing is resumed.
In any case, copying takes priority over printing.
The timing to going back to the ON LINE mode after completion of
copying can be set by the user program.
When the clear key is pressed twice, the machine goes into the ON
LINE mode immediately.
(6) Paper width detection and machine
operation
This machine is designed to detect only the following two sizes:
Max. paper size and Min. paper size shown in the table below.
Imaging (main scanning direction void area and image length) is
performed according to the paper size the machine detects, There-
fore, if the SIM 26-6 set value is not matched with the paper
specification, the image position on the paper is shifted to cause a
trouble.
Destination code
Detectable paper size
Set value
Destination Paper type
Paper width
detector ON
detector ON
(Max. paper size)
Paper width
detector OFF
(Min. paper size)
0
Inch series
11
×
8.5/14
×
8.5
8.5
×
5.5/8.5
×
5.5
1
EX Japan
AB series
A4 (210
×
356mm)
A5
2
Japan
AB series
A4 (210
×
356mm)
B5
(7) Auto copy function
The copy conditions can be set after turning on the power or during
resume operation from the energy save mode. Pressing the start key
allows copy reservation. After making a copy reservation, when the
copier warmup is completed, copy is started.
resume operation from the energy save mode. Pressing the start key
allows copy reservation. After making a copy reservation, when the
copier warmup is completed, copy is started.
Once a copy reservation is made, the copy conditions cannot be
canceled unless the clear key is pressed.
canceled unless the clear key is pressed.
(8) AE level adjustment procedure
Select the PHOTO mode with the copy mode select key, press and
hold the key for 5 sec, and the mode display will change from
PHOTO to AUTO blinking and the currently adjusted level will be
displayed on the exposure level display.
hold the key for 5 sec, and the mode display will change from
PHOTO to AUTO blinking and the currently adjusted level will be
displayed on the exposure level display.
Under this state, operate the density adjustment key to adjust the
auto density level. When the auto density level is adjusted, the
manual and the photo density levels are also shifted accordingly.
auto density level. When the auto density level is adjusted, the
manual and the photo density levels are also shifted accordingly.
When the copy mode select key is pressed after adjustment, the
mode display changes from blinking to lighting. Then the density level
setting is completed.
mode display changes from blinking to lighting. Then the density level
setting is completed.
1) Press the copy mode select key several times to light the photo
lamp
1 3 5
AUTO
MANUAL
PHOTO
6 – 2
2) Keep pressing the copy mode select key again for 5 sec, and the
AUTO lamp will blink and the density adjustment display lamp will
light up.
light up.
3) Press the copy density adjustment key to adjust the density level.
To make darker copy, press
key.
To make lighter copy, press
key.
When the intermediate value (2, 4) is set, the two lamps will light
up simultaneously.
up simultaneously.
4) Press the copy mode select key to terminate the setting.
The density adjustment lamp goes off and the AUTO lamp turns
ON from blinking.
ON from blinking.
(9) Toner save mode setup and cancel
Select MANUAL with the copy mode select key and press and hold
the key again for 5 sec. The mode display will change from MANUAL
to PHOTO blinking, and the currently set condition will be displayed in
the exposure level. Under this state, operate the density adjustment
key to set or cancel the toner save mode.
the key again for 5 sec. The mode display will change from MANUAL
to PHOTO blinking, and the currently set condition will be displayed in
the exposure level. Under this state, operate the density adjustment
key to set or cancel the toner save mode.
Press the left key: Level display "1" ON Toner save mode is set.
Press the write key: Level display "5" ON. Toner save mode is
canceled.
canceled.
After adjustment, press the copy mode select key, and the mode
display will change from blinking to lighting. The setup is completed.
display will change from blinking to lighting. The setup is completed.
*
The toner save mode is applicable to the auto and the manual
copy mode.
copy mode.
1) Press the copy mode select key to light the manual lamp.
2) Keep pressing the copy mode select key again for 5 sec, and the
PHOTO lamp will blinks and the density adjustment lamp of "5"
will light up.
will light up.
3) Press the copy density adjustment key (
) once.
To cancel the toner save mode, press the density adjustment key
(
(
) to light the lamp of "5."
4) Press the copy mode select key, then copying is allowed.
(10) Smart sharing (Auto interface
selection)
The controller in the printer detects and selects the interface which
receives a signal earliest. While, on the other hand, the interface is
being used by printing, the interface on other side is busy. When
printing is completed, the busy interface returns to the ready state.
receives a signal earliest. While, on the other hand, the interface is
being used by printing, the interface on other side is busy. When
printing is completed, the busy interface returns to the ready state.
Job process (Host side)
Interface state
Process
Ready
Busy
The job is canceled and the error message
appears on the screen.
appears on the screen.
(11) Others
a. Void area function
A void area is provided in the main scanning direction and in the sub
scanning direction to prevent against dirt on the transfer roller by
toner.
scanning direction to prevent against dirt on the transfer roller by
toner.
b. Special function of the key
When the clear key is kept pressing for 5 sec or more, the total copy
(print) counter value is displayed.
(print) counter value is displayed.
1 3 5
AUTO
MANUAL
PHOTO
1 3 5
AUTO
MANUAL
PHOTO
1 3 5
AUTO
MANUAL
PHOTO
1 3 5
AUTO
MANUAL
PHOTO
1 3 5
AUTO
MANUAL
PHOTO
AUTO
MANUAL
PHOTO
1 3 5
6 – 3
2) Keep pressing the copy mode select key again for 5 sec, and the
AUTO lamp will blink and the density adjustment display lamp will
light up.
light up.
3) Press the copy density adjustment key to adjust the density level.
To make darker copy, press
key.
To make lighter copy, press
key.
When the intermediate value (2, 4) is set, the two lamps will light
up simultaneously.
up simultaneously.
4) Press the copy mode select key to terminate the setting.
The density adjustment lamp goes off and the AUTO lamp turns
ON from blinking.
ON from blinking.
(9) Toner save mode setup and cancel
Select MANUAL with the copy mode select key and press and hold
the key again for 5 sec. The mode display will change from MANUAL
to PHOTO blinking, and the currently set condition will be displayed in
the exposure level. Under this state, operate the density adjustment
key to set or cancel the toner save mode.
the key again for 5 sec. The mode display will change from MANUAL
to PHOTO blinking, and the currently set condition will be displayed in
the exposure level. Under this state, operate the density adjustment
key to set or cancel the toner save mode.
Press the left key: Level display "1" ON Toner save mode is set.
Press the write key: Level display "5" ON. Toner save mode is
canceled.
canceled.
After adjustment, press the copy mode select key, and the mode
display will change from blinking to lighting. The setup is completed.
display will change from blinking to lighting. The setup is completed.
*
The toner save mode is applicable to the auto and the manual
copy mode.
copy mode.
1) Press the copy mode select key to light the manual lamp.
2) Keep pressing the copy mode select key again for 5 sec, and the
PHOTO lamp will blinks and the density adjustment lamp of "5"
will light up.
will light up.
3) Press the copy density adjustment key (
) once.
To cancel the toner save mode, press the density adjustment key
(
(
) to light the lamp of "5."
4) Press the copy mode select key, then copying is allowed.
(10) Smart sharing (Auto interface
selection)
The controller in the printer detects and selects the interface which
receives a signal earliest. While, on the other hand, the interface is
being used by printing, the interface on other side is busy. When
printing is completed, the busy interface returns to the ready state.
receives a signal earliest. While, on the other hand, the interface is
being used by printing, the interface on other side is busy. When
printing is completed, the busy interface returns to the ready state.
Job process (Host side)
Interface state
Process
Ready
Busy
The job is canceled and the error message
appears on the screen.
appears on the screen.
(11) Others
a. Void area function
A void area is provided in the main scanning direction and in the sub
scanning direction to prevent against dirt on the transfer roller by
toner.
scanning direction to prevent against dirt on the transfer roller by
toner.
b. Special function of the key
When the clear key is kept pressing for 5 sec or more, the total copy
(print) counter value is displayed.
(print) counter value is displayed.
1 3 5
AUTO
MANUAL
PHOTO
1 3 5
AUTO
MANUAL
PHOTO
1 3 5
AUTO
MANUAL
PHOTO
1 3 5
AUTO
MANUAL
PHOTO
1 3 5
AUTO
MANUAL
PHOTO
AUTO
MANUAL
PHOTO
1 3 5
6 – 3

