Sharp PN-V602 Handy Guide ▷ View online
PN-V601/V601A/PN-V602 Installation Manual for Multi Displays <Rev3.0> 2013/10
CONFIDENTIAL
3
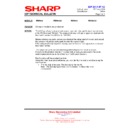
Required conditions for horizontal installation
Following procedures are needed for the face-up or face-down horizontal installation
1. The setting for the horizontal installation is required in the setting menu.
2. The original fan cover has to be replaced with the one (for only face-up horizontal installation) .
And the fan replacement timing is different from the one for vertical installation.
3. Because operational environments of the horizontal installation (state of the installation, temperature conditions
and spatial condition, etc.) become severer than those of vertical installation, the installation design and operational
management have to be considered carefully.
4. Please use “Auto” mode for the “Fan rotation speed” of factory default setting.
5. The life of fan replacement for face-up horizontal installation will be around two and a half years*, which is
shorter than usual vertical installation.
shorter than usual vertical installation.
Please note that the operation manual bundled with main unit does not describe explanation
about the horizontal installation.
*: The timing of fan replacement is a guideline.
The actual life may vary depending on the operating time, change of ambient temperature, environment such as
amount of dust, or regular maintenance. Even if a fan per LCD monitor has troubles, the neighboring fans
supplement its operation, and therefore, the LCD monitor works correctly.
supplement its operation, and therefore, the LCD monitor works correctly.
Above life time is described as rough guideline and it shall not guarantee the life.
The life does not include the failure.
The life does not include the failure.
6. Remove handles after face-up horizontal installation.
PN-V601/V601A/PN-V602 Installation Manual for Multi Displays <Rev3.0> 2013/10
CONFIDENTIAL
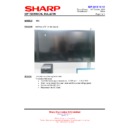
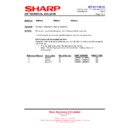
Rear view for bracket fastening position
Install iron plates etc. with the VESA holes.
Based on the construction situation, process the iron plate and connect with the structure.
Do NOT cover vent holes and intake duct. When the temperature inside the monitor goes up, it might cause breakdown.
For the pitch of the screw type with
the screw holes on the VESA
compliant, please refer to the
installation guidelines of the PN-V602
or PN-V601, V601A.
the screw holes on the VESA
compliant, please refer to the
installation guidelines of the PN-V602
or PN-V601, V601A.
Intake Duct
---- VESA compliant
screw holes
screw holes
4
PN-V601/V601A/PN-V602 Installation Manual for Multi Displays <Rev3.0> 2013/10
CONFIDENTIAL
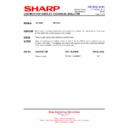
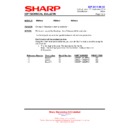
1) Remove four fans which assembled as factory default.
2) Replace with metallic fan cover (four places).
Fan cover (resin)
Fan Cover Replacement
The standard resin cover must be replaced with optional metallic cover.
(The fan covers are located at four positions and each fan is fixed with a screw.)
Please use Sharp genuine fan cover.
*: As for the replacement parts, please consult the dealers who sold the main unit or the sales contact of our company.
Each fan fixed
with a screw.
with a screw.
Caution: Please do not drop any screw into the product by mistake when installing and detaching fans.
Also, please do not nip cables.
Fan Cover Replacement
Each fan fixed
with a screw.
with a screw.
Fan cover (metallic)
5
Face-UP installation
(For only face-up installation)
PN-V601/V601A/PN-V602 Installation Manual for Multi Displays <Rev3.0> 2013/10
CONFIDENTIAL
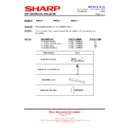
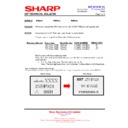
The setting for the horizontal installation in the OSD menu is required, when displays are installed horizontally.
Face-up horizontal installation setting
1) Press [SIZE] key for approx. 5 seconds.
(and the character “F” appears in the upper left of the screen)
2) [ ][ ][ ][ ]
1) Hold for approx 5 sec. both [MENU] and [INPUT] at the same time.
(and the character “F” appears in the upper left of the screen)
2) [ ][ ][ ][ ]
1. How to call menu
CUSTOM SETTING
MONITOR LAYOUT
FACE UP
- Change [VERTICAL] to [FACE UP].
- After checking the display, turn off the main
power
Note)
- Change the setting to [VERTICAL] in order to
change from horizontal installation to vertical one.
change from horizontal installation to vertical one.
- Do not use other setting.
2. Setting of the face-up installation
- If using the remote control unit
- If using the monitor buttons on the rear panel,
OK ---- [MENU]
Setting of face-up horizontal installation
6
Face-UP installation

