Sharp CD-MD3000 (serv.man8) Service Manual ▷ View online
CD-MD3000H/CD-MD3000W
– 40 –
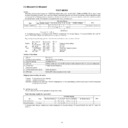
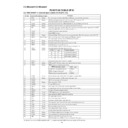
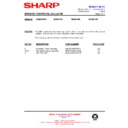
C) Tracking setting
Step No.
Setting Method
Display
Step 19
Press the EQUALIZER button.
[S L C T m _ _ _
]
Step 20
Press the EQUALIZER button.
[T C R S C 1 P _
]
Step 21
Press the EQUALIZER button.
[T C R S C 0 h _
]
Step 22
Press the EQUALIZER button.
[T C R S C 0 L _
]
Step 23
Press the EQUALIZER button.
[T C R S C H h _
]
Step 24
Press the EQUALIZER button.
[T C R S C H L _
]
Step 25
Press the EQUALIZER button.
[C O T L V p _ _
]
Step 26
Press the EQUALIZER button.
[C O T L V r _ _
]
Step 27
Press the EQUALIZER button.
[J P i n t _ _ _
]
Step 28
Press the EQUALIZER button.
[K I K 1 0 _ _ _
]
•
: Setting value
D) Sled setting
Step No.
Setting Method
Display
Step 1
Test mode STOP state
[ t s m
e
]
Step 2
Press the EQUALIZER button eight times. [ E E P R O M_ S E T ]
Step 3
Press the TAPE REC button.
[ _ _ F o c u s _ _ _ ]
Step 4
Press the EQUALIZER button three times. [ _ _ _ S l e d _ _ _ ]
Step 5
Press the TAPE REC button.
[S L G _ _ _ _ _
]
Step 6
Press the EQUALIZER button.
[S L 2 _ _ _ _ _
]
Step 7
Press the EQUALIZER button.
[S L D L I M _ _
]
Step 8
Press the EQUALIZER button.
[S L D L E V _ _
]
Step 9
Press the EQUALIZER button.
[S L K L V k _ _
]
Step 10
Press the EQUALIZER button.
[S L K L V t _ _
]
Step 11
Press the EQUALIZER button.
[S L K L V m _ _
]
Step 12
Press the EQUALIZER button.
[S L B K M _ _ _
]
Step 13
Press the EQUALIZER button.
[S L K r i o _ _
]
Step 14
Press the EQUALIZER button.
[S L K r o i _ _
]
Step 15
Press the EQUALIZER button.
[S L K l i o _ _
]
Step 16
Press the EQUALIZER button.
[S L K l o i _ _
]
•
: Setting value
E) TEMP setting
Step No.
Setting Method
Display
Step 1
EJECT state
[ _ _ E J E C T _ _ _ ]
Step 2
Press the X-BASS button.
[ T E M P_
_
]
•
: Setting value,
: Measurement value
F) CONTROL setting
Step No.
Setting Method
Display
Step 1
Test mode STOP state
[ t s m
e
]
Step 2
Press the EQUALIZER button eight times. [ E E P R O M_ S E T ]
Step 3
Press the TAPE REC button.
[ _ _ F o c u s _ _ _ ]
Step 4
Press the EQUALIZER button five times.
[ _ C o n t r o l _ _ ]
Step 5
Press the TAPE REC button.
[C O N T R L 1 _
]
Step 6
Press the EQUALIZER button.
[C O N T R L 2 _
]
Step 7
Press the EQUALIZER button.
[A D J T T M _ _
]
Step 8
Press the EQUALIZER button.
[H D E Q A D _ _
]
Step 9
Press the EQUALIZER button.
[L D E Q A D _ _
]
Step 10
Press the EQUALIZER button.
[G D E Q A D _ _
]
Step 11
Press the EQUALIZER button.
[H D E Q B C _ _
]
Step 12
Press the EQUALIZER button.
[L D E Q B C _ _
]
Step 13
Press the EQUALIZER button.
[G D E Q B C _ _
]
Step 14
Press the EQUALIZER button.
[H A L S G _ _ _
]
Step 15
Press the EQUALIZER button.
[L A L S G _ _ _
]
– 41 –
CD-MD3000H/CD-MD3000W
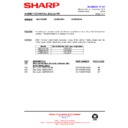
6. TEST-PLAY mode
Step 1
Test mode STOP state
The AUTO preliminary adjustment should have been completed.
[ t s m e
]
Step 2
Press the X-BASS button.
TEST-PLAY menu
[ T E S T _ P L A Y _ ]
Step 3
Press once the DISP/CHARACTER button. ADDRESS setting (Target address initial value is indicated)
[ A D R E S _ 0 0 3 2 ]
Press once the TAPE REC button.
Step 4
Continuous playback (pit section) (Address + C1 error indication)
[s
c
]
Continuous playback (groove section) (Address + C1 error indication)
[a
c
]
Step 5
Press once the DISP/CHARACTER button. (Address + ADIP error indication)
[a
a
]
Continuous playback (groove section) (HIGH reflection STEP 6)
Step 6
Continuous playback (pit section) Address + Jitter
[s
j
]
Continuous playback (groove section)
[a
j
]
Step 7
Press once the MD STOP button.
TEST-PLAY menu
[ T E S T _ P L A Y _ ]
Step No.
Setting Method
7. TEST-REC mode
Step 1
Test mode STOP state
The AUTO preliminary adjustment should have been completed.
[ t s m e
]
Step 2
Press twice the X-BASS button.
TEST-REC menu
[ T E S T _ R E C _ _ ]
Step 3
Press once the DISP/CHARACTER button. ADDERS setting (indication of address initial value)
[ a 0 0 3 2 _ p w
]
Step 4
Press once the TAPE REC button. Continuous recording
[ a
_ p w
]
Step 5
Press once the MD STOP button. TEST-REC menu
[ T E S T _ R E C _ _ ]
Step No.
Setting Method
Remarks
Display
Remarks
Display
(For confirmation of the playback ability at the named address.)
With recording mini disk (For confirmation of the playback ability at the named address.)
8. INNER mode
Step 1
Test mode STOP state
[ t s m e
]
Step 2
Press the MD PLAY button.
INNER menu
[ _ _ I N N E R _ _ ]
Step 3
Press once the TAPE REC button. INNER switch position measurement
[s
c
]
(SUBQ address and C1 error are also indicated.)
Step 4
Press once the MD STOP button.
INNER menu
[ _ _ I N N E R _ _ ]
Step No.
Setting Method
Remarks
Display
•
: Address
Step No.
Setting Method
Display
Step 16
Press the EQUALIZER button.
[G A L S G _ _ _
]
Step 17
Press the EQUALIZER button.
[H A L S O F S _
]
Step 18
Press the EQUALIZER button.
[L A L S O F S _
]
Step 19
Press the EQUALIZER button.
[G A L S O F S _
]
G) ADJUST setting
Step No.
Setting Method
Display
Step 1
Test mode STOP state
[ t s m
e
]
Step 2
Press the EQUALIZER button eight times. [ E E P R O M_ S E T ]
Step 3
Press the TAPE REC button.
[ _ _ F o c u s _ _ _ ]
Step 4
Press the EQUALIZER button six times.
[A D J S E T _ _ _ _ ]
Step 5
Press the TAPE REC button.
[C O K _ _ _ _ _
]
Step 6
Press the EQUALIZER button.
[F A T _ _ _ _ _
]
Step 7
Press the EQUALIZER button.
[T A T _ _ _ _ _
]
Step 8
Press the EQUALIZER button.
[C A T _ _ _ _ _
]
Step 9
Press the EQUALIZER button.
[F A B _ _ _ _ _
]
Step 10
Press the EQUALIZER button.
[S T R _ _ _ _ _
]
Step 11
Press the EQUALIZER button.
[S F S _ _ _ _ _
]
Step 12
Press the EQUALIZER button.
[S T C _ _ _ _ _
]
•
: Setting value
•
: Setting value
• Whenever the X-BASS button is pressed in the address setting mode, the address changes as follows.
0 0 3 2
0 0 3 2
→
0 3 C 0
→
0 7 0 0
→
0 8 A 0
→
0 9 5 0
→
0 0 3 2
→
…………
• Whenever the X-BASS button is pressed in the address setting mode, the address changes as follows.
0 0 3 2
0 0 3 2
→
0 3 C 0
→
0 7 0 0
→
0 8 A 0
→
0 9 5 0
→
0 0 3 2
→
…………
CD-MD3000H/CD-MD3000W
– 42 –
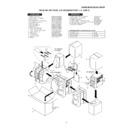
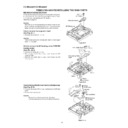
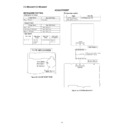
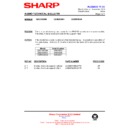
Figure 42-3 Optical Pickup Grating Deviation
Measuring Method
Mechanism Adjustment
1. Optical pickup grating inspecting method
After auto adjustment (COMPLETE appears) in the test mode (auto)
using the high reflection MD disc TGYS1, adjust the Lissajou's
waveform (x-y) of EOUT to FOUT.
1. Slightly loosen the 3 screws of the spindle motor, adjust while
using the high reflection MD disc TGYS1, adjust the Lissajou's
waveform (x-y) of EOUT to FOUT.
1. Slightly loosen the 3 screws of the spindle motor, adjust while
observing the Lissajou's waveform.
2. After adjustment, tighten screws 1, 2, and 3 in numerical order.
(See Fig. 42-4.)
Lead-in switch position measurement mode
Insert the high reflection test disk TGYS1.
Note: Adjust the lead-in switch position within the range of FF85 -
FFD2.
1. Measure the lead-in switch position. Loosen the screw (A1) x 1 pc.
Note: Adjust the lead-in switch position within the range of FF85 -
FFD2.
1. Measure the lead-in switch position. Loosen the screw (A1) x 1 pc.
which fixes the mechanism switch PWB.
2. When the lead-in switch is located FF85 or less, tighten the screw
while pressing the PWB in the direction of the arrow A. When FFD2
or more, to direction B. Measure the lead-in switch position again.
After position adjustment is completed, fix the PWB with the screw
(A1) x 1 pc.(shown in Figure 42-1)
or more, to direction B. Measure the lead-in switch position again.
After position adjustment is completed, fix the PWB with the screw
(A1) x 1 pc.(shown in Figure 42-1)
Figure 42-1
Rotating the loading motor forcibly
The loading motor can be rotated forcibly by rotating the JOG UP/
DOWN knob while STOP or EJECT in the test mode appears on the
display.
DOWN knob while STOP or EJECT in the test mode appears on the
display.
Figure 42-2
Figure 42-4
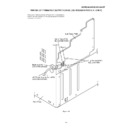
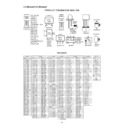
Magnetic head mounting position check
•
Check the mounting position whenever the magnetic head and the
optical pickup are replaced.
•
Move the optical pickup to the center to adjust the position easily.
1. Set the adjusting transparent disc 3.
2. Press down the magnetic head up shift arm by hand to raise the
2. Press down the magnetic head up shift arm by hand to raise the
magnetic head.
3. View the set from above to check whether the magnetic head aligns
with the optical pickup objective lens.
4. Check that the magnetic head moves up and down smoothly.
(shown in Figure 42-2)
(shown in Figure 42-2)
A
B
(A1) X1
Magnetic head
Objective lens
Radiai
Head up- shift arm
Tangential direction
2
3
1
2
3
1
adjusting
hole
hole
Check the Lissajou's waveform,
shifting the mounting position with
a screwdriver (to be fitted into the
disc motor adjusting hole).
shifting the mounting position with
a screwdriver (to be fitted into the
disc motor adjusting hole).
OSILLOSCOPE
GND CH1
CH2
X
Y
4 Pin of IC1201
GND (TP1202)
11Pin of IC1201
EOUT (TP1253)
12 Pin of IC1201
FIN (TP1253)
100K
470p
470p
a
b
LISSAJOUS'S WAVEFORM
Less than a:b = 4:1
100K

