Sharp CD-DVD500 (serv.man7) Service Manual ▷ View online
– 11 –
CD-DVD500H
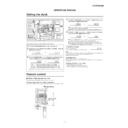
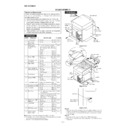
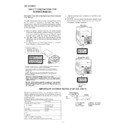
External unit connections
RCA lead
(not supplied)
T
o
the line output sockets
VCR etc.
TV
MD recorder
, Dolby Digital
(5.1 ch)/DTS/MPEG audio
processor or amplifier
Optical Digital lead
(not supplied)
Speaker with a
built-in amplifier
4
T
o
the digital input socket
Front left
Centre
Front right
Surround left
Surround right
Same distance
Front left
Centre
Front right
Example: When installed on the wall
Surround speaker
W
all
60 - 90 cm
(2’ - 3’)
Example: When installed vertically
Example: When installed horizontally
Placing the speakers
5
CD-DVD500H
– 12 –
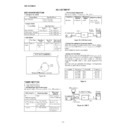
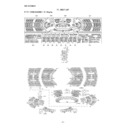
Disc type
DVD V
ideo Disc
Region Numbers:
DVD discs that conform to the
region numbers noted above
Audio CD
CD-R/CD-R
W
Discs recorded in audio format
T
urning on your system
The first time the unit is plugged
in, the unit will enter the demon-
stration mode.
Y
ou will see words
scroll.
6
Press the
X-BASS/DEMO
button to cancel
the demonstration
mode.
12
Prepare the disc you want to play
Supported disc types
Disc contents
Audio and video (movies)
Audio
Audio
Disc size
12 cm (5") / 8 cm (3")
12 cm (5") / 8 cm (3") (single)
12 cm (5") / 8 cm (3")
Press the ON/ST
AND-
BY button to turn the
power on.
T
o
TV with external terminals
Connecting a TV
SCART cable
(commercially available)
SCAR
T
INPUT
No sound is played through the TV
.
– 13 –
CD-DVD500H
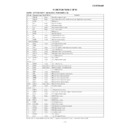
Playing a DVD/CD (DVDs/CDs)
1
Press the DVD/CD button.
2
Press the
OPEN/CLOSE button to
open the disc tray
.
3
Place the DVD(s) or CD(s) on the disc
tray
, label side up.
When loading a third disc, press the
DISC SKIP
button to turn the disc tray
,
then place the DVD or CD in the open
position.
4
Press the
OPEN/CLOSE button to
close the disc tray
.
5
T
o
select the DVD or CD you want to lis-
ten to first, press one of the
1 -
3
buttons.
6
Press the
button to start playback.
12 cm (5”)
8 cm (3”)
Listening to the radio
FM stereo mode indicator
FM stereo receiving indicator
1
Press the TUNER (BAND) button repeat-
edly to select the desired frequency
band (FM or
AM).
2
Press the TUNING/TIME (
or
) but-
ton to tune in to the desired station.
When the TUNING/TIME (
or
) button
is pressed for more than 0.5 seconds,
scanning will start automatically and the
tuner will stop at the first receivable
broadcast station.
T
o
receive an FM stereo transmission:
Press the TUNER (BAND) button to display “ST”.
“
”
will appear when an FM broadcast is in ste-
reo.
Listening to a cassette tape (T
APE 1 or T
APE 2)
TAPE 1
TAPE 2
1
Open the cassette door by pushing the
area marked “
PUSH EJECT”.
2
Load the cassette into the T
APE 1 or
T
APE 2 cassette compartment with the
side to be played facing toward you.
3
Press the T
APE (1
2) button to select
the cassette you want to listen to.
4
Press the
button to start playback.
If trouble occurs
, abnormal
supply voltage due to lightning, etc.) or if it is operated incorrectly
, it may malfunction.
If such a problem occurs, do the following:
1.
Set the unit to the stand-by mode and turn the power on again.
2.
Note:
If neither operation above restores the unit, clear all the memory by resetting it.
Clearing all the memory (reset)
1
.
Press the ON/ST
AND-BY button to enter the power stand-by mode.
2
.
Whilst
pressing down the
button and X-BASS/DEMO button, press the ON/ST
AND-BY
button until “CLEAR
AL” appears.
Caution:
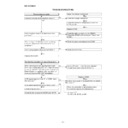
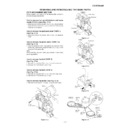
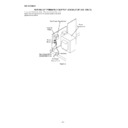
Cleaning the tape-handling parts
Dirty heads, capstans or pinch rollers can cause poor sound and tape jams. Clean these parts with a cotton swab
moistened with commercial head/pinch roller cleaner or isopropyl alcohol.
When cleaning the heads, pinch rollers, etc., unplug the unit which contains high voltages.
After long use, the deck’
s heads and capstans may become
magnetised, causing poor sound. D
emagnetise these
demagnetiser
’s instructions carefully before use.
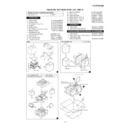
TAPE 1
TAPE 2
A
C
C
D
E
B
B
A
Playback head
B
Capstan
C
Pinch roller
D
Erase head
E
Recording/Playback head
Display

