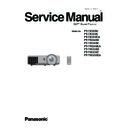
Panasonic PT-TX300U / PT-TX300E / PT-TX300EA / PT-TW240U / PT-TW240E / PT-TW240EA / PT-TW330U / PT-TW330E / PT-TW330EA Service Manual ▷ View online
PT-TX300 / PT-TW240 / PT-TW330 series
2-1
Chapter 2
Disassembly & Assembly Process
2-1 Equipment Needed & Product Overview
1. Screw Bit (+): 105
2. Screw Bit (+): 107
3. Screw Bit (-): 107
4. Hex Sleeves 5mm
5. Long Nose Nipper
6. Tweezers
7. Projector
2. Screw Bit (+): 107
3. Screw Bit (-): 107
4. Hex Sleeves 5mm
5. Long Nose Nipper
6. Tweezers
7. Projector
* Before you start: This process is protective level II. Operators should wear electrostatic chains.
* Note: - The disassembly process for PT-TX300/PT-TW240/PT-TW330
* Note: - The disassembly process for PT-TX300/PT-TW240/PT-TW330
series are the same. Here, we take PT-TX300 as an example.
PT-TX300 / PT-TW240 / PT-TW330 series
2-2
2-2 Disassemble Filter and
Focus Ring
1.Separate the Lens Cap and projector(as
blue square).
2. Pull down the tenon(as red square) to
disassemble the Left Filter.
3. Pull down the tenon(as yellow square)
to disassemble the Right Filter.
4. Disassembled the Left Filter and the
Right Filter.
The Left Filter
The Right Filter
5. Rotate the Focus Ring to move outward
so as to take out the focus ring easily.
6. Pull out the Focus Ring.
Note: - When you assemble the Focus
Note: - When you assemble the Focus
Ring, ensure the 3 card slot (as
green square) placed in the 3
double-screw bolt (as red circle)
properly, and the Focus Ring can
be well adjusted.
Focus Ring
Lens Cap
PT-TX300 / PT-TW240 / PT-TW330 series
2-3
Lamp Cover
Lamp Module
3. Loosen 2 screws (as yellow circle) on the
Lamp Module.
4. Take off the Lamp Module.
2-3 Disassemble Lamp
Module
1. Loosen 1 screw(as red circle) on the
Lamp Cover.
2. Disassembled the Lamp Cover.
PT-TX300 / PT-TW240 / PT-TW330 series
2-4
3.Unplug 1 connector (as blue square),then
remove the Top Cover Module.
remove the Top Cover Module.
4. Disassemble the Top Cover Module.
2-4 Disassemble Top Cover
Module
1. Unscrew 2 screws (as red circle) from
the Top Cover and unscrew 8 screws (as
green circle) from the Bottom Cover
2. Pull upward the Top Cover Module.
Click on the first or last page to see other PT-TX300U / PT-TX300E / PT-TX300EA / PT-TW240U / PT-TW240E / PT-TW240EA / PT-TW330U / PT-TW330E / PT-TW330EA service manuals if exist.

