JBL CSC55 (serv.man12) User Manual / Operation Manual ▷ View online
5
DOLBY PRO LOGIC
®
(NON-DIGITAL) – LINE LEVEL
Use this installation method
for Dolby Pro Logic
applications (not Dolby Digital,
DTS or other digital
processing), where the
receiver/processor is
equipped with a subwoofer
output, or a volumecontrolled
preamp (line-) level output:
for Dolby Pro Logic
applications (not Dolby Digital,
DTS or other digital
processing), where the
receiver/processor is
equipped with a subwoofer
output, or a volumecontrolled
preamp (line-) level output:
Use RCA-type interconnects
to connect the line-level
subwoofer outputs on your
receiver or amplifier to the
line-level inputs on the
subwoofer. IMPORTANT: Do
not use the LFE input on the
subwoofer with Dolby
Pro Logic processors.
to connect the line-level
subwoofer outputs on your
receiver or amplifier to the
line-level inputs on the
subwoofer. IMPORTANT: Do
not use the LFE input on the
subwoofer with Dolby
Pro Logic processors.
NOTE: If your receiver or
amplifier has only one
subwoofer output jack, then
you will need to use a Y-
connector (not included). Plug
the male end of the Y-connec-
tor into your receiver or ampli-
fier’s subwoofer output jack,
and connect each of the two
female ends to separate RCA-
type interconnects. Finally,
plug the RCA-type
interconnects into the line-
level inputs on the subwoofer.
Connect each speaker to
the corresponding speaker
terminals on your receiver
or amplifier.
the corresponding speaker
terminals on your receiver
or amplifier.
Make sure your receiver or
processor is correctly config-
ured to indicate that the
subwoofer is “On.”
processor is correctly config-
ured to indicate that the
subwoofer is “On.”
Use this installation method
for Dolby Digital, DTS or other
digital surround processors:
for Dolby Digital, DTS or other
digital surround processors:
Use the line-level input jack
marked “LFE” for the Low-
Frequency Effects channel.
marked “LFE” for the Low-
Frequency Effects channel.
Connect this jack to the LFE
output or subwoofer output
on your receiver or amplifier.
Connect each speaker to
the corresponding speaker
terminals on your receiver
or amplifier.
output or subwoofer output
on your receiver or amplifier.
Connect each speaker to
the corresponding speaker
terminals on your receiver
or amplifier.
Make sure that you have con-
figured your surround sound
processor for “Sub-woofer
On.” Also configure your
receiver for 5.1-, 6.1-
figured your surround sound
processor for “Sub-woofer
On.” Also configure your
receiver for 5.1-, 6.1-
or 7.1-channel operation as
appropriate. The front left,
front right, center and rear
speakers should all be set
to “Small.” If your receiver
allows you to set the cross-
over frequency between the
subwoofer and the main
speakers, select 100Hz or
the setting that is the closest
frequency below it.
appropriate. The front left,
front right, center and rear
speakers should all be set
to “Small.” If your receiver
allows you to set the cross-
over frequency between the
subwoofer and the main
speakers, select 100Hz or
the setting that is the closest
frequency below it.
DOLBY
®
DIGITAL OR DTS
®
(OR OTHER DIGITAL SURROUND MODE) CONNECTION
LINE
LEVEL
IN
LFE
L
R
LFE OUT
RECEIVER
SUBWOOFER
– +
– +
– +
– +
– +
– +
– +
– +
– +
Left
Surround
Left
Front
Right
Front
Center
Right Front
Right Surround
Subwoofer
Receiver
Subwoofer
Out
Line
Level In
L
L
Left Front
Surround Back
Left
Surround Back
Right
Surround Back
Left
Right
Surround
Center
Surround Back
Right
– +
Left Surround
– +
– +
– +
– +
R
R
English
6
SUBWOOFER OPERATION
Press the Master Power
switch (marked “Power”
switch (marked “Power”
a)
to the On position to use the
subwoofer. The CSS10
subwoofer will automatically
turn on or go into standby
(sleep) mode as described
below. When your receiver or
amplifier is off, or is not send-
ing program material
to the subwoofer, the
subwoofer will be in standby
mode (the LED on the front of
the CSS10 will be red). When
the subwoofer senses an
audio signal, it will
automatically turn on (the LED
will be green). If the
subwoofer does not sense a
signal after approximately 20
minutes, it will automatically
go into standby mode.
If you will be away from home
for an extended period of time,
for an extended period of time,
or if the subwoofer will not be
used, switch the Master
Power switch
used, switch the Master
Power switch
a to the Off
position by pressing it until it
pops out.
pops out.
VOLUME
Volume may be adjusted using
the Subwoofer Level control
b, as shown.
the Subwoofer Level control
b, as shown.
The Phase control determines
whether the subwoofer’s pis-
tonlike action moves in and
out in phase with the main
speakers or opposite the main
speakers. There is no correct
or incorrect setting. Proper
phase adjustment depends on
several variables, such as
subwoofer placement and lis-
tener position. Adjust the
Phase switch
whether the subwoofer’s pis-
tonlike action moves in and
out in phase with the main
speakers or opposite the main
speakers. There is no correct
or incorrect setting. Proper
phase adjustment depends on
several variables, such as
subwoofer placement and lis-
tener position. Adjust the
Phase switch
c to maxi-mize
bass output at the
listening position.
listening position.
Remember, every system,
room and listener is different.
There are no right or wrong
settings; this switch offers the
added flexibility to adjust your
subwoofer for optimum
performance for your specific
listening conditions without
having to move your speakers.
If at some time in the future
you happen to rearrange your
listening room and move your
speakers, you should
experiment with the phase
switch in both positions, and
leave it in the position that
maximizes bass performance.
MIN MAX
Subwoofer
Level
MIN MAX
Subwoofer
Level
7
If there is no sound from any
of the speakers:
of the speakers:
• Check that receiver/amplifier
is on and a source is playing.
is on and a source is playing.
• Check that the powered
subwoofer is plugged in and is
turned on (Power switch
subwoofer is plugged in and is
turned on (Power switch
a
pushed in).
• Check all wires and
connections between
receiver/amplifier and speakers.
Make sure all wires are
connected. Make sure none of
the speaker wires are frayed,
cut or punctured, or touching
each other.
connections between
receiver/amplifier and speakers.
Make sure all wires are
connected. Make sure none of
the speaker wires are frayed,
cut or punctured, or touching
each other.
• Review proper operation of
your receiver/amplifier.
your receiver/amplifier.
If there is no sound coming
from one speaker:
from one speaker:
• Check the “Balance” control
on your receiver/amplifier.
on your receiver/amplifier.
• Check all wires and
connections between
receiver/amplifier and speakers.
Make sure all wires are
connected. Make sure none of
the speaker wires are frayed,
cut or punctured, or touching
each other.
connections between
receiver/amplifier and speakers.
Make sure all wires are
connected. Make sure none of
the speaker wires are frayed,
cut or punctured, or touching
each other.
• In Dolby Digital or DTS modes,
make sure that the receiver/
amplifier is configured so that
the speaker in question is
enabled.
make sure that the receiver/
amplifier is configured so that
the speaker in question is
enabled.
• Turn off all electronics and
switch the speaker in question
with one of the other speakers
that is working correctly. Turn
everything back on, and
determine whether the problem
has followed the speaker or has
remained in the same channel.
If the problem is in the same
channel, the source of the prob-
lem is most likely with your
receiver or amplifier, and you
should consult the owner’s man-
ual for that product for further
information. If the problem has
followed the speaker, consult
your dealer for further
assistance or, if that is not pos-
sible, visit www.jbl.com.
If there is no sound from the
center speaker:
center speaker:
• Check all wires and
connections between receiver/
amplifier and speaker. Make
sure all wires are connected.
Make sure none of the speaker
wires are frayed, cut or
punctured, or touch-ing each
other.
connections between receiver/
amplifier and speaker. Make
sure all wires are connected.
Make sure none of the speaker
wires are frayed, cut or
punctured, or touch-ing each
other.
• If your receiver/processor is
set in Dolby Pro Logic mode,
make sure the center speaker is
not in phantom mode.
set in Dolby Pro Logic mode,
make sure the center speaker is
not in phantom mode.
• If your receiver/processor is
set in one of the Dolby Digital or
DTS modes, make sure the
receiver/processor is
configured so that the center
speaker is enabled.
set in one of the Dolby Digital or
DTS modes, make sure the
receiver/processor is
configured so that the center
speaker is enabled.
If the system plays at low
volumes but shuts off as
volume is increased:
volumes but shuts off as
volume is increased:
• Check all wires and
connections between receiver/
processor and speakers. Make
sure all wires are connected.
Make sure none of the speaker
wires are frayed, cut or
punctured, or touching each
other.
connections between receiver/
processor and speakers. Make
sure all wires are connected.
Make sure none of the speaker
wires are frayed, cut or
punctured, or touching each
other.
• If more than one pair of main
speakers is being used, check
the minimum impedance
requirements of your
receiver/amplifier.
speakers is being used, check
the minimum impedance
requirements of your
receiver/amplifier.
If there is low (or no) bass
output:
output:
• Make sure the connections to
the left and right “Speaker
Inputs” have the correct
polarity (+ and –).
the left and right “Speaker
Inputs” have the correct
polarity (+ and –).
• Make sure the subwoofer is
plugged into an active electrical
outlet and is turned on (Power
switch
plugged into an active electrical
outlet and is turned on (Power
switch
a
pushed in).
• In Dolby Digital or DTS modes,
make sure your receiver/
processor is configured so that
the subwoofer and LFE output
are enabled.
make sure your receiver/
processor is configured so that
the subwoofer and LFE output
are enabled.
• Switch the Phase switch
c
to
the opposite position, and select
the position that results in the
most pleasing bass response.
the position that results in the
most pleasing bass response.
If there is no sound from
the surround speakers:
the surround speakers:
• Check all wires and con-nec-
tions between receiver/ proces-
sor and speakers. Make sure all
wires are connected. Make
sure none of the speaker wires
are frayed, cut or punctured, or
touching each other.
tions between receiver/ proces-
sor and speakers. Make sure all
wires are connected. Make
sure none of the speaker wires
are frayed, cut or punctured, or
touching each other.
• Review proper operation of
your receiver/amplifier and its
surround sound features.
your receiver/amplifier and its
surround sound features.
• Make sure the movie or
TV show you are watching
is recorded in a surround sound
mode. If it is not, check to see
whether your receiver/proces-
sor has other surround modes
you may use.
TV show you are watching
is recorded in a surround sound
mode. If it is not, check to see
whether your receiver/proces-
sor has other surround modes
you may use.
• In Dolby Digital or DTS modes,
make sure your receiver/
processor is configured so that
the surround speakers are
enabled. When five satellites
are in use, remember to config-
ure your receiver or processor
for 6.1-channel operation, and
when six satellites are in use,
configure your receiver or
processor for 7.1 channels.
make sure your receiver/
processor is configured so that
the surround speakers are
enabled. When five satellites
are in use, remember to config-
ure your receiver or processor
for 6.1-channel operation, and
when six satellites are in use,
configure your receiver or
processor for 7.1 channels.
• Review the operation of your
DVD player and the jacket of
your DVD to make sure that the
DVD features the desired Dolby
Digital or DTS mode, and that
you have properly selected that
mode using both the DVD
player’s menu and the DVD
disc‘s menu.
DVD player and the jacket of
your DVD to make sure that the
DVD features the desired Dolby
Digital or DTS mode, and that
you have properly selected that
mode using both the DVD
player’s menu and the DVD
disc‘s menu.
TROUBLESHOOTING
English
SYSTEM
Frequency Response
27Hz – 30kHz (–6dB)
Frequency Response
27Hz – 30kHz (–6dB)
CST55
Maximum Recommended Amplifier Power
150 Watts*
Power Handling
50W Continuous/300W Peak
Frequency Response
55Hz – 30kHz (–6dB)
Nominal Impedance
8 Ohms
Sensitivity
90dB @ 1 Watt/1 meter
Tweeter
One 3/4" (19mm) titanium-laminate dome, video-
shielded
shielded
Woofers
Dual 130mm (5") transducers with PolyPlas
™
cones, neodymium magnets and HeatScape
™
motor structure, video-shielded
Dimensions (H x W x D)
(including wall-mount bracket and grille)
1168 x 203 x 165mm (46" x 8" x 6-1/2")
Weight
7.7kg (17 lb)
CSC55
Maximum Recommended Amplifier Power
Maximum Recommended Amplifier Power
150 Watts*
Power Handling
50W Continuous/300W Peak
Frequency Response
55Hz – 30kHz (–6dB)
Nominal Impedance
8 Ohms
Sensitivity
90dB @ 1 watt/1 meter
Tweeter
One 19mm (3/4") titanium-laminate dome,
video-shielded
video-shielded
Woofers
Dual 130mm (5") transducers with PolyPlas
™
cones, neodymium magnets and HeatScape
™
motor structure, video-shielded
Dimensions (H x W x D)
(including wall-mount bracket and grille)
159 x 667 x 108mm (6-1/4" x 26-1/4" x 4-1/4")
159 x 667 x 108mm (6-1/4" x 26-1/4" x 4-1/4")
Weight
4.5kg (10 lb)
CSS10
Amplifier Power
Amplifier Power
150 Watts RMS
Frequency Response
27Hz – Low-pass crossover
setting at signal source
Low-Frequency Driver
250mm (10") cone and HeatScape
™
motor structure, video-shielded
Input
LFE preamp level
Dimensions (H x W x D)
(including feet)
464 x 337 x 406mm (18-1/4" x 13-1/4" x 16")
Weight
19.5kg (43 lb)
SPECIFICATIONS
All features and specifications are subject to change with-
out notice.
Dolby and Pro Logic are registered trademarks of Dolby
Laboratories.
DTS is a registered trademark of DTS, Inc.
*The maximum recommended amplifier power rating will
ensure proper system headroom to allow for occasional
peaks.
We do not recommend sustained operation at these
maximum power levels.
®
JBL and Harman International are registered trademarks, and JBL Cinema Sound,
PolyPlas, HeatScape and Pro Sound Comes Home are trademarks,
of Harman International Industries, Incorporated.
Part No.406-000-05331-E
PolyPlas, HeatScape and Pro Sound Comes Home are trademarks,
of Harman International Industries, Incorporated.
Part No.406-000-05331-E
PRO SOUND COMES HOME
™
JBL Consumer Products, 250 Crossways Park Drive, Woodbury, NY 11797 USA
2, route de Tours, 72500 Chateau du Loir, France
516.255.4JBL (4525) (USA only) www.jbl.com
Declaration of Conformity
We, Harman Consumer Group International
2, route de Tours
72500 Chateau du Loir
France
72500 Chateau du Loir
France
declare in own responsibility that the products described in
this owner’s manual are in compliance with technical stan-
dards:
EN 61000-6-3:2001
EN 61000-6-1:2001
this owner’s manual are in compliance with technical stan-
dards:
EN 61000-6-3:2001
EN 61000-6-1:2001
Laurent Rault
Harman Consumer Group International
Chateau du Loir, France 10/05
Declaration of Conformity
We, Harman Consumer Group International
2, route de Tours
72500 Chateau du Loir
France
72500 Chateau du Loir
France
declare in own responsibility that the product described in
this owner’s manual is in compliance with technical stan-
dards:
EN 55013:2001+A1:2003
EN 55020:2002+A1:2003
EN 61000-3-2:2000
EN 61000-3-3:1995+A1:2001
EN 60065:2002
this owner’s manual is in compliance with technical stan-
dards:
EN 55013:2001+A1:2003
EN 55020:2002+A1:2003
EN 61000-3-2:2000
EN 61000-3-3:1995+A1:2001
EN 60065:2002
Laurent Rault
Harman Consumer Group International
Chateau du Loir, France 10/05
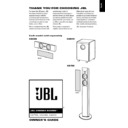
CSC55, CST55
CSS10 (230V only)
Display

