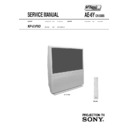
Sony KP-51PX3 Service Manual ▷ View online
- 1 -
KP-51PX3
RM-943
SERVICE MANUAL
AE-6Y
CHASSIS
MODEL
COMMANDER
DEST
CHASSIS NO.
KP-51PX3
RM-943
AEP
SCC-Q85J-A
MODEL
COMMANDER
DEST
CHASSIS NO.
PROJECTION TV
RM-943
KP-51PX3
- 2 -
KP-51PX3
RM-943
TABLE OF CONTENTS
Section
Title
Page
Section
Title
Page
Caution ................................................................
3
Specifications ......................................................
4
Connectors ..........................................................
5
1. SELF DIAGNOSIS FUNCTION
AE-6Y Self Diagnostic Software .......................
6
2. GENERAL ...................................................................
7
3. DISASSEMBLY
3-1.
Rear Cover Removal ..........................................
16
3-2.
Speaker Bracket Removal ..................................
16
3-3.
Main Bracket Block Removal ............................
16
3-4.
Service Position .................................................
16
3-5.
Front Panel Removal .........................................
17
3-6.
H1 Board Removal .............................................
17
3-7.
F1 Board Removal ..............................................
17
3-8.
Front Speakers Removal .....................................
17
3-9.
Beznet Block Removal .......................................
18
3-10. Terminal Board Removal ....................................
18
3-11. AD and D Board Removal .................................
19
3-12. G Board Removal ...............................................
19
3-13. A Board Removal ...............................................
20
3-14. High Voltage Cable Removal and Installation ....
20
3-15. Picture Tube Removal .........................................
20
4. SET-UP ADJUSTMENTS
4-1.
Screen Voltage Adjustment
(Rough Alignment) ............................................
21
4-2.
Focus Rough Adjustment ..................................
21
4-3.
Screen (G2) Adjustment ....................................
21
4-4.
Deflection Yoke Tilt Adjustment ........................
21
4-5.
2-Pole Magnet Adjustment .................................
22
4-6.
4-Pole Magnet Adjustment .................................
22
4-7.
Green, Red and Blue Focus Adjustment ............
22
5. SAFETY RELATED ADJUSTMENT
5-1.
HV Hold-Down Adjustment .............................
23
6. ELECTRICAL ADJUSTMENTS
6-1.
Adjustments with Commander ...........................
24
6-1-1. How to Select Each Mode ..............................
24
6-1-2. Programming the Remote Commander
for Operation in Service Mode .......................
24
6-1-3. Setting the TV into Service Mode ..................
24
6-1-4. Service List (Projector Engine) ......................
26
6-2.
Registration Adjustment .....................................
28
6-2-1. Setup for Adjustment .....................................
28
6-2-2. Main Deflection Adjustment ..........................
28
6-2-3. Operation Method for
Projector Engine Mode ...................................
29
6-2-4. Projector Engine Adjustment
(Sub Deflection Adjustment) ..........................
30
6-3.
Auto Convergence Offset ...................................
32
6-4.
White Balance Adjustment ..................................
32
6-5.
Sub Bright Adjustment .......................................
32
6-6.
Sub Color Adjustment ........................................
32
6-7.
Auto Convergence Error Code List ....................
33
6-8.
Test-Test Mode ...................................................
34
7. DIAGRAMS
7-1.
Block Diagrams ..................................................
35
7-2.
Circuit Boards Location ......................................
40
7-3.
Schematic Diagrams and Printed Wiring
Boards .................................................................
40
A Board Schematic Diagram ..............................
41
A Printed Wiring Board ....................................
44
AD Board Schematic Diagram ...........................
46
AD Printed Wiring Board .................................
48
D Board Schematic Diagram ..............................
50
D Printed Wiring Board ....................................
51
G Board Schematic Diagram ..............................
52
G Printed Wiring Board ....................................
53
B Board Schematic Diagram ...............................
54
B Printed Wiring Board ....................................
57
J Board Schematic Diagram ................................
58
J Printed Wiring Board .....................................
57
CB, VMB, H1 and F1Board
Schematic Diagrams ...........................................
59
CB, VMB, H1and F1
Printed Wiring Boards ......................................
60
CG, VMG, CR and VMR Board
Schematic Diagrams ...........................................
61
CG, VMG, CR and VMR
Printed Wiring Boards ......................................
62
7-5.
Semiconductors ..................................................
63
7-6.
IC Block Diagrams .............................................
65
8. EXPLODED VIEWS
8-1.
Screen and Cover Block ...................................
68
8-2.
Cabinet Block .....................................................
69
8-3.
Main Bracket Block ............................................
70
8-4.
Picture Tube Block .............................................
71
9. ELECTRICAL PARTS LIST ..................................
72
SAFETY-RELATED COMPONENT WARNING !!
COMPONENTS IDENTIFIED BY SHADING AND MARKED
ON
THE SCHEMATIC DIAGRAMS, EXPLODED VIEWS AND IN THE
PARTS LIST ARE CRITICAL FOR SAFE OPERATION. REPLACE
THESE COMPONENTS WITH SONY PARTS WHOSE PART
NUMBERS APPEAR AS SHOWN IN THIS MANUAL OR IN
SUPPLEMENTS PUBLISHED BY SONY.
PARTS LIST ARE CRITICAL FOR SAFE OPERATION. REPLACE
THESE COMPONENTS WITH SONY PARTS WHOSE PART
NUMBERS APPEAR AS SHOWN IN THIS MANUAL OR IN
SUPPLEMENTS PUBLISHED BY SONY.
CAUTION
SHORT CIRCUIT THE ANODE OF THE PICTURE TUBE AND THE
ANODE CAP TO THE METAL CHASSIS, CRT SHIELD, OR THE
CARBON PAINTED ON THE CRT, AFTER REMOVAL OF THE
ANODE CAP.
ANODE CAP TO THE METAL CHASSIS, CRT SHIELD, OR THE
CARBON PAINTED ON THE CRT, AFTER REMOVAL OF THE
ANODE CAP.
WARNING !!
AN ISOLATION TRANSFORMER SHOULD BE USED DURING
ANY SERVICE WORK TO AVOID POSSIBLE SHOCK HAZARD
DUE TO LIVE CHASSIS, THE CHASSIS OF THIS RECEIVER IS
DIRECTLY CONNECTED TO THE POWER LINE.
ANY SERVICE WORK TO AVOID POSSIBLE SHOCK HAZARD
DUE TO LIVE CHASSIS, THE CHASSIS OF THIS RECEIVER IS
DIRECTLY CONNECTED TO THE POWER LINE.
- 3 -
KP-51PX3
RM-943
The circuit boards listed below [Table 1] used in these models
may have been processed using Lead Free Solder. The boards are
identified by the LF logo located close to the board designation
e.g. F1, H1 etc [ see examples ]. The servicing of these boards
requires special precautions to be taken as outlined below.
may have been processed using Lead Free Solder. The boards are
identified by the LF logo located close to the board designation
e.g. F1, H1 etc [ see examples ]. The servicing of these boards
requires special precautions to be taken as outlined below.
Table 1
d
r
a
o
B
n
o
i
t
c
n
u
F
A
,
r
e
n
u
T
,
n
o
i
t
c
e
l
f
e
D
,
o
i
d
u
A
e
c
a
f
r
e
t
n
I
N
,
B
,
J
D
A
n
o
i
t
c
e
r
r
o
C
i
g
e
R
,
D
E
J
P
B
e
c
a
f
r
e
t
n
I
_
A
,
S
D
V
L
,
e
t
a
r
n
a
c
S
,
d
n
e
k
c
a
B
B
C
,
G
C
,
R
C
t
u
O
B
,
G
,
R
1
F
R
I
&
D
E
L
/
h
c
t
i
w
S
r
e
w
o
P
,
n
I
C
A
r
e
v
i
e
c
e
R
1
H
t
u
O
P
H
/
t
u
p
n
I
V
A
B
M
V
,
G
M
V
,
R
M
V
n
o
i
t
a
l
u
d
o
M
y
t
i
c
o
l
e
V
CAUTION
Lead Free Soldered Boards
example 1
example 2
It is strongly recommended to use Lead Free Solder material in order to guarantee optimal quality of new solder joints. Lead Free Solder is
available under the following part numbers :
available under the following part numbers :
Due to the higher melting point of Lead Free Solder the soldering iron tip temperature needs to be set to 370 degrees centigrade. This
requires soldering equipment capable of accurate temperature control coupled with a good heat recovery characteristics.
requires soldering equipment capable of accurate temperature control coupled with a good heat recovery characteristics.
For more information on the use of Lead Free Solder, please refer to http://www.sony-training.com
r
e
b
m
u
n
t
r
a
P
r
e
t
e
m
a
i
D
s
k
r
a
m
e
R
9
1
-
5
0
0
-
0
4
6
-
7
m
m
3
.
0
g
K
5
2
.
0
0
2
-
5
0
0
-
0
4
6
-
7
m
m
4
.
0
g
K
0
5
.
0
1
2
-
5
0
0
-
0
4
6
-
7
m
m
5
.
0
g
K
0
5
.
0
2
2
-
5
0
0
-
0
4
6
-
7
m
m
6
.
0
g
K
5
2
.
0
3
2
-
5
0
0
-
0
4
6
-
7
m
m
8
.
0
g
K
0
0
.
1
4
2
-
5
0
0
-
0
4
6
-
7
m
m
0
.
1
g
K
0
0
.
1
5
2
-
5
0
0
-
0
4
6
-
7
m
m
2
.
1
g
K
0
0
.
1
6
2
-
5
0
0
-
0
4
6
-
7
m
m
6
.
1
g
K
0
0
.
1
- 4 -
KP-51PX3
RM-943
L
E
D
O
M
M
E
T
I
m
e
t
s
y
S
n
o
i
s
i
v
e
l
e
T
m
e
t
s
y
S
o
e
r
e
t
S
e
g
a
r
e
v
o
C
l
e
n
n
a
h
C
m
e
t
s
y
S
r
o
l
o
C
P
E
A
L
,
I
,
K
/
D
,
H
/
G
/
B
M
A
C
I
N
/
N
A
M
R
E
G
o
e
r
e
t
S
2
1
-
2
0
E
:
F
H
V
Q
-
B
,
0
1
-
2
0
F
:
L
2
1
-
1
R
:
K
/
D
9
6
-
1
2
E
:
F
H
U
9
6
F
-
1
2
F
:
L
9
6
-
1
2
R
:
K
/
D
9
6
-
1
2
B
:
I
0
2
S
-
1
S
:
V
T
E
L
B
A
C
1
4
S
-
1
2
S
:
R
E
P
Y
H
M
A
C
E
S
,
L
A
P
8
5
.
3
C
S
T
N
,
3
4
.
4
C
S
T
N
)
N
I
O
E
D
I
V
(
e
m
a
N
l
e
d
o
M
m
e
t
I
3
X
P
1
5
-
P
K
b
m
o
C
l
a
P
F
F
O
P
A
P
N
O
y
t
i
r
o
i
r
P
B
G
R
N
O
x
o
B
r
e
f
o
o
W
N
O
1
t
r
a
c
S
N
O
2
t
r
a
c
S
N
O
3
t
r
a
c
S
N
O
)
4
(
n
i
t
n
o
r
F
N
O
4
t
r
a
c
S
F
F
O
r
o
t
c
e
j
o
r
P
N
O
G
/
B
m
r
o
N
N
O
I
m
r
o
N
N
O
K
/
D
m
r
o
N
N
O
S
U
A
m
r
o
N
F
F
O
L
m
r
o
N
N
O
T
A
S
m
r
o
N
F
F
O
M
m
r
o
N
F
F
O
t
x
e
t
e
l
e
T
N
O
o
e
r
e
t
S
m
a
c
i
N
N
O
e
z
i
S
e
r
u
t
c
i
P
d
e
t
c
e
j
o
r
P
)
s
e
h
c
n
i
1
5
(
m
c
0
3
1
x
o
r
p
p
A
d
e
r
u
s
a
e
m
e
r
u
t
c
i
p
m
c
0
3
1
x
o
r
p
p
A
(
)
y
ll
a
n
o
g
a
i
d
t
u
p
t
u
o
d
n
u
o
S
r
e
k
a
e
p
s
t
f
e
L
d
n
a
t
h
g
i
R
r
e
f
o
o
W
b
u
S
)
S
M
R
(
W
0
1
x
2
)
r
e
w
o
P
c
i
s
u
M
(
W
0
2
x
2
)
S
M
R
(
W
0
2
x
1
)
r
e
w
o
P
c
i
s
u
M
(
W
0
4
x
1
]
R
A
E
R
[
s
l
a
n
i
m
r
e
T
t
u
p
t
u
O
/
t
u
p
n
I
s
n
o
i
t
a
c
i
f
i
c
e
p
S
l
a
r
e
n
e
G
r
o
t
c
e
n
n
o
c
o
r
u
E
n
i
p
-
1
2
:
1
)
d
r
a
d
n
a
t
s
C
E
L
E
N
E
C
(
.
s
l
a
n
g
i
s
o
e
d
i
V
d
n
a
o
i
d
u
A
r
o
f
s
t
u
p
n
I
.
B
G
R
r
o
f
s
t
u
p
n
I
.
s
l
a
n
g
i
s
o
i
d
u
A
d
n
a
o
e
d
i
V
V
T
f
o
s
t
u
p
t
u
O
s
t
n
e
m
e
r
i
u
q
e
R
r
e
w
o
P
V
0
4
2
-
0
2
2
/
n
o
i
t
p
m
u
s
n
o
C
r
e
w
o
P
y
b
d
n
a
t
S
W
0
7
1
r
o
t
c
e
n
n
o
c
o
r
u
E
n
i
p
-
1
2
:
2
.
s
l
a
n
g
i
s
o
e
d
i
V
d
n
a
o
i
d
u
A
r
o
f
s
t
u
p
n
I
.
B
G
R
r
o
f
s
t
u
p
n
I
.
s
l
a
n
g
i
s
o
i
d
u
A
d
n
a
o
e
d
i
V
V
T
f
o
s
t
u
p
t
u
O
)
t
u
O
r
o
t
i
n
o
M
(
s
n
o
i
s
n
e
m
i
D
m
m
6
1
6
x
5
6
2
1
x
3
4
2
1
x
o
r
p
p
A
t
h
g
i
e
W
g
k
7
6
x
o
r
p
p
A
r
o
t
c
e
n
n
o
c
o
r
u
E
n
i
p
-
1
2
:
3
.
s
l
a
n
g
i
s
o
e
d
i
V
d
n
a
o
i
d
u
A
r
o
f
s
t
u
p
n
I
)
e
l
b
a
t
c
e
l
e
S
(
.
o
e
d
i
V
S
r
o
f
s
t
u
p
n
I
k
n
i
L
V
A
s
e
i
r
o
s
s
e
c
c
A
d
e
il
p
p
u
S
)
1
(
r
e
d
n
a
m
m
o
C
e
t
o
m
e
R
3
4
9
-
M
R
)
2
(
y
r
e
t
t
a
b
6
R
d
e
t
a
n
g
i
s
e
d
C
E
I
s
k
c
a
J
o
n
o
h
P
o
i
d
u
A
r
o
f
e
l
b
a
i
r
a
v
s
r
o
t
c
e
n
n
o
C
t
u
p
t
u
O
s
l
a
n
g
i
S
s
e
r
u
t
a
e
F
r
e
h
t
O
,
s
u
l
P
l
a
t
i
g
i
D
,
t
x
e
t
e
l
e
T
,
P
A
P
,
F
C
D
-
D
3
,
z
H
0
0
1
o
t
u
A
,
I
C
A
,
w
e
i
V
t
x
e
N
,
E
B
B
,
y
b
l
o
D
l
a
u
t
r
i
V
t
a
m
r
o
F
]
E
D
I
S
[
s
l
a
n
i
m
r
e
T
t
u
p
t
u
O
/
t
u
p
n
I
l
o
r
t
n
o
C
d
e
r
a
r
f
n
I
:
m
e
t
s
y
S
l
o
r
t
n
o
C
e
t
o
m
e
R
k
c
a
j
e
n
o
h
p
d
a
e
H
k
c
a
j
i
n
i
m
o
e
r
e
t
s
s
t
n
e
m
e
r
i
u
q
e
r
r
e
w
o
P
c
d
V
3
n
o
i
t
a
n
g
i
s
e
d
C
E
I
s
e
i
r
e
t
t
a
b
2
)
A
A
e
z
i
s
(
6
R
s
t
u
p
n
i
o
i
d
u
A
s
k
c
a
j
o
n
o
h
p
s
t
u
p
n
i
o
e
d
i
V
s
k
c
a
j
o
n
o
h
p
t
u
p
n
i
o
e
d
i
V
S
N
I
D
n
i
p
4
.
e
c
i
t
o
n
t
u
o
h
t
i
w
e
g
n
a
h
c
o
t
t
c
e
j
b
u
s
e
r
a
s
n
o
i
t
a
c
i
f
i
c
e
p
s
d
n
a
n
g
i
s
e
D


