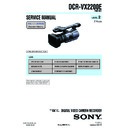
Sony DCR-VX2200E Service Manual ▷ View online
SERVICE MANUAL
Sony EMCS Co.
LEVEL
2
Link
SERVICE NOTE
SPECIFICATIONS
FRAME SCHEMATIC DIAGRAM
BLOCK DIAGRAMS
DISASSEMBLY
PRINTED WIRING BOARDS
REPAIR PARTS LIST
SCHEMATIC DIAGRAMS
Link
Revision History
Revision History
DCR-VX2200E_L2
Ver. 1.1 2010.02
DIGITAL VIDEO CAMERA RECORDER
2010B0800-1
© 2010.02
Published by Tokai TEC
9-852-720-32
RMT-831
E Model
DCR-VX2200E
N MECHANISM (MDX-N220)
The components identified by mark 0 or
dotted line with mark 0 are critical for safety.
Replace only with part number specified.
dotted line with mark 0 are critical for safety.
Replace only with part number specified.
— 2 —
DCR-VX2200E_L2
SPECIFICATIONS
These specifications are extracted from instruction manual of
DCR-VX2200E.
DCR-VX2200E.
AC Adaptor AC-L100/AC-L100C
Power requirements
AC 100 V - 240 V, 50 Hz/60 Hz
Current consumption
0.35 A - 0.18 A
Power consumption
18 W
Output voltage
DC 8.4 V***
Operating temperature
0
°
C to 40
°
C (32
°
F to 104
°
F)
Storage temperature
–20
°
C to +60
°
C (–4
°
F to +140
°
F)
Dimensions (approx.)
48
×
29
×
81 mm
(1 15/16
×
13/16
×
3 1/4 in.) (w/h/d)
excluding the projecting parts
Mass (approx.)
170 g (6.0 oz) excluding the power cord
(mains lead)
*** See the label on the AC Adaptor for other
specifications.
Design and specifications are subject to change
without notice.
without notice.
System
Video recording system
2 rotary heads, Helical scanning system
Still image recording system
Exif Ver. 2.2*
Audio recording system
Rotary heads, PCM system
Quantization: 12 bits
Fs32kHz (stereo1, stereo2)
Quantization: 16 bits
Fs48kHz (stereo)
Video signal
PAL color, CCIR standards
Usable cassette
Mini DV cassette with the mark
printed
Tape speed
SP: Approx. 18.831 mm/s
LP: Approx. 12.568 mm/s
Recording/playback time
SP: 60 min (using a DVM60 cassette)
LP: 90 min (using a DVM60 cassette)
Fast forward/rewind time
Approx. 2 min 40 s (using a DVM60
cassette and rechargeable battery pack)
Approx. 1 min 45 s (using a DVM60
cassette and AC Adaptor)
Viewfinder
Electric viewfinder (color)
Image device
6.0 mm (1/3 type) 3CMOS sensor
Recording Pixels (DV16:9 still
recording):
Max. 1.20 Mega (1 440
×
810) pixels**
Gross: Approx. 1 120 000 pixels
Effective (movie, 4:3):
Approx. 778 000 pixels
Effective (movie, 16:9):
Approx. 1 037 000 pixels
Effective (still, 4:3):
Approx. 778 000 pixels
Effective (still, 16:9):
Approx. 1 037 000 pixels
Lens
G Lens
20
×
(Optical), Approx. 30
×
(Digital,
when [D.EXTENDER] is set to [ON])
Focal length:
f= 4.1 - 82.0 mm (3/16 - 3 1/4 in.)
When converted to a 35 mm still
camera
36.1 - 722 mm (1 7/16 - 28 1/2 in.)
(4:3),
29.5 - 590 mm (1 3/16 - 23 1/4 in.)
(16:9)
F1.6 - 3.4
Filter diameter: 72 mm (2 7/8 in.)
Color temperature
Automatically
(one push) A/B
[INDOOR] (3 200 K)
[OUTDOOR] (5 800 K)
Minimum illumination
1.5 lx (lux) (Fixed Shutter Speed 1/25,
auto gain, auto iris) (F 1.6)
* “Exif” is a file format for still images,
established by the JEITA (Japan
Electronics and Information Technology
Industries Association). Files in this
format can have additional information
such as your camcorder’s setting
information at the time of recording.
** The unique pixel array of Sony’s
ClearVid CMOS sensor and image
processing system (Enhanced Imaging
Processor) allows for still image
resolution equivalent to the sizes
described.
Output connectors
A/V Remote Connector
10-pin connector
When A/V connecting cable is
connected
Video signal: 1 Vp-p, 75
Ω (ohms)
Luminance signal: 1 Vp-p, 75
Ω (ohms)
Chrominance signal: 0.3 Vp-p (burst
signal), 75
Ω (ohms)
Audio signal: 327 mV (at load
impedance 47 k
Ω (kilohms)), Output
impedance with less than 2.2 k
Ω
(kilohms)
i (headphones) jack
Stereo-minijack (Ø 3.5 mm)
Input/Output connectors
LANC jack
Stereo mini-minijack (Ø 2.5 mm)
DV jack
i.LINK interface (IEEE 1394, 4-pin
connector S100)
MIC (PLUG IN POWER) jack
Stereo-minijack (Ø 3.5 mm)
LCD screen
Picture
8.0 cm (3.2 type, aspect ratio 16:9)
Total dot number
921 600 (1 920
×
480)
General
Power requirements
DC 7.2 V (battery pack)
DC 8.4 V (AC Adaptor)
Average power consumption
During camera recording using the
viewfinder with normal brightness:
5.8 W
During camera recording using the
LCD with normal brightness:
6.0 W
Operating temperature
0
°
C to 40
°
C (32
°
F to 104
°
F)
Storage temperature
–20
°
C to +60
°
C (–4
°
F to +140
°
F)
Dimensions (approx.)
169
×
178
×
349 mm
(6 3/4
×
7 1/8
×
13 3/4 in.) (w/h/d)
including the projecting parts except for
the grip belt
Mass (approx.)
2.1 kg (4 lb 10 oz) including the lens
hood with lens cover
— 3 —
DCR-VX2200E_L2
SAFETY-RELATED COMPONENT WARNING!!
COMPONENTS IDENTIFIED BY MARK
0
OR DOTTED LINE WITH
MARK
0
ON THE SCHEMATIC DIAGRAMS AND IN THE PARTS
LIST ARE CRITICAL TO SAFE OPERATION. REPLACE THESE
COMPONENTS WITH SONY PARTS WHOSE PART NUMBERS
APPEAR AS SHOWN IN THIS MANUAL OR IN SUPPLEMENTS
PUBLISHED BY SONY.
COMPONENTS WITH SONY PARTS WHOSE PART NUMBERS
APPEAR AS SHOWN IN THIS MANUAL OR IN SUPPLEMENTS
PUBLISHED BY SONY.
1.
Check the area of your repair for unsoldered or poorly-soldered
connections. Check the entire board surface for solder splashes
and bridges.
connections. Check the entire board surface for solder splashes
and bridges.
2.
Check the interboard wiring to ensure that no wires are
"pinched" or contact high-wattage resistors.
"pinched" or contact high-wattage resistors.
3.
Look for unauthorized replacement parts, particularly
transistors, that were installed during a previous repair. Point
them out to the customer and recommend their replacement.
transistors, that were installed during a previous repair. Point
them out to the customer and recommend their replacement.
4.
Look for parts which, through functioning, show obvious signs
of deterioration. Point them out to the customer and
recommend their replacement.
of deterioration. Point them out to the customer and
recommend their replacement.
5.
Check the B+ voltage to see it is at the values specified.
6.
Flexible Circuit Board Repairing
• Keep the temperature of the soldering iron around 270˚C
during repairing.
• Do not touch the soldering iron on the same conductor of the
circuit board (within 3 times).
• Be careful not to apply force on the conductor when soldering
or unsoldering.
SAFETY CHECK-OUT
After correcting the original service problem, perform the following
safety checks before releasing the set to the customer.
Unleaded solder
Boards requiring use of unleaded solder are printed with the lead-
free mark (LF) indicating the solder contains no lead.
(Caution: Some printed circuit boards may not come printed with
the lead free mark due to their particular size.)
free mark (LF) indicating the solder contains no lead.
(Caution: Some printed circuit boards may not come printed with
the lead free mark due to their particular size.)
: LEAD FREE MARK
Unleaded solder has the following characteristics.
• Unleaded solder melts at a temperature about 40
• Unleaded solder melts at a temperature about 40
°C higher than
ordinary solder.
Ordinary soldering irons can be used but the iron tip has to be
applied to the solder joint for a slightly longer time.
Soldering irons using a temperature regulator should be set to
about 350
Ordinary soldering irons can be used but the iron tip has to be
applied to the solder joint for a slightly longer time.
Soldering irons using a temperature regulator should be set to
about 350
°C.
Caution: The printed pattern (copper foil) may peel away if the
heated tip is applied for too long, so be careful!
heated tip is applied for too long, so be careful!
• Strong viscosity
Unleaded solder is more viscous (sticky, less prone to flow) than
ordinary solder so use caution not to let solder bridges occur such
as on IC pins, etc.
ordinary solder so use caution not to let solder bridges occur such
as on IC pins, etc.
• Usable with ordinary solder
It is best to use only unleaded solder but unleaded solder may
also be added to ordinary solder.
also be added to ordinary solder.
CAUTION
Danger of explosion if battery is incorrectly replaced.
Replace only with the same or equivalent type.
Dispose of used batteries according to the instructions.
Replace only with the same or equivalent type.
Dispose of used batteries according to the instructions.
1-1
DCR-VX2200E_L2
1. SERVICE NOTE
1-1. POWER SUPPLY DURING REPAIRS
In this unit, about 10 seconds after power is supplied to the battery terminal using the regulated power supply (8.4V), the power is shut off so
that the unit cannot operate.
These following method is available to prevent this.
that the unit cannot operate.
These following method is available to prevent this.
Method:
Use the AC adaptor (AC-L100/L100C).
1-2. TO TAKE OUT A CASSETTE WHEN NOT EJECT (FORCE EJECT)
1
Remove the Power supply.
2
Remove two screws and the CS lid (25001) assy.
3
Supply +4.5V from the DC power supply to the loading motor and unload.
1-3. SETTING THE “FORCED POWER ON” MODE
It is possible to turn on power by adjustment remote commander (RM-95 or NEW LANC JIG).
Operate the VTR function using the adjustment remote commander.
Operate the VTR function using the adjustment remote commander.
1-3-1. Setting the “Forced Camera Power ON” Mode
1) Select page: 0, address: 01, and set data: 01.
2) Select page: A, address: 10, set data: 01 and press the “PAUSE (Write) ” button of the adjustment remote commander.
2) Select page: A, address: 10, set data: 01 and press the “PAUSE (Write) ” button of the adjustment remote commander.
1-3-2. Setting the “Forced VTR Power ON” Mode
1) Select page: 0, address: 01, and set data: 01.
2) Select page: A, address: 10, set data: 02 and press the “PAUSE (Write) ” button of the adjustment remote commander.
2) Select page: A, address: 10, set data: 02 and press the “PAUSE (Write) ” button of the adjustment remote commander.
1-3-3. Exiting the “Forced Power ON” Mode
1) Select page: 0, address: 01, and set data: 01.
2) Select page: A, address: 10, set data: 00 and press the “PAUSE (Write) ” button of the adjustment remote commander.
3) Select page: 0, address: 01, and set data: 00.
2) Select page: A, address: 10, set data: 00 and press the “PAUSE (Write) ” button of the adjustment remote commander.
3) Select page: 0, address: 01, and set data: 00.
Loading motor
DC power supply
(+ 4.5 Vdc)
(+ 4.5 Vdc)
CS lid (25001) assy


