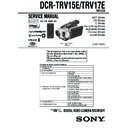
Sony DCR-TRV15E / DCR-TRV17E Service Manual ▷ View online
DIGITAL VIDEO CAMERA RECORDER
The information that is not described in this
Service Manual is described in the LEVEL 2
Service Manual.
When repairing, use this manual together with
LEVEL 2 Service Manual.
Service Manual is described in the LEVEL 2
Service Manual.
When repairing, use this manual together with
LEVEL 2 Service Manual.
Contents of LEVEL 2 Service Manual
SERVICE NOTE
1. GENERAL
2. DISASSEMBLY
1. GENERAL
2. DISASSEMBLY
3. BLOCK DIAGRAMS
4. PRINTED WIRING BOARDS AND
SCHEMATIC DIAGRAMS
5. ADJUSTMENTS
6. REPAIR PARTS LIST
OVERALL
POWER
CD-303 BOARD
FP-100, FP-228, FP-102 FLEXIBLE BOARD
FP-305 BOARD
CONTROL SWITCH BLOCK (PS-1700)
MS-070 BOARD
LB-069 BOARD
CK-101 BOARD
CONTROL SWITCH BLOCK (KP-1700)
FB-218 BOARD
JK-204 BOARD
MA-403 BOARD
FP-309, FP-310, FP-311 FLEXIBLE BOARD
PD-143 BOARD
POWER
CD-303 BOARD
FP-100, FP-228, FP-102 FLEXIBLE BOARD
FP-305 BOARD
CONTROL SWITCH BLOCK (PS-1700)
MS-070 BOARD
LB-069 BOARD
CK-101 BOARD
CONTROL SWITCH BLOCK (KP-1700)
FB-218 BOARD
JK-204 BOARD
MA-403 BOARD
FP-309, FP-310, FP-311 FLEXIBLE BOARD
PD-143 BOARD
EXPLODED VIEWS
ELECTRICAL PARTS LIST
ELECTRICAL PARTS LIST
SERVICE MANUAL
AEP Model
UK Model
E Model
Hong Kong Model
Australian Model
Chinese Model
Tourist Model
SERVICE MANUAL
J MECHANISM
Level 3
DCR-TRV15E/TRV17E
RMT-814
Photo : DCR-TRV17E
RMT-814
Ver 1.0 2001. 04
— 2 —
SAFETY-RELATED COMPONENT WARNING!!
COMPONENTS IDENTIFIED BY MARK
0
OR DOTTED LINE WITH
MARK
0
ON THE SCHEMATIC DIAGRAMS AND IN THE PARTS
LIST ARE CRITICAL TO SAFE OPERATION. REPLACE THESE
COMPONENTS WITH SONY PARTS WHOSE PART NUMBERS
APPEAR AS SHOWN IN THIS MANUAL OR IN SUPPLEMENTS
PUBLISHED BY SONY.
COMPONENTS WITH SONY PARTS WHOSE PART NUMBERS
APPEAR AS SHOWN IN THIS MANUAL OR IN SUPPLEMENTS
PUBLISHED BY SONY.
1.
Check the area of your repair for unsoldered or poorly-soldered
connections. Check the entire board surface for solder splashes
and bridges.
connections. Check the entire board surface for solder splashes
and bridges.
2.
Check the interboard wiring to ensure that no wires are
"pinched" or contact high-wattage resistors.
"pinched" or contact high-wattage resistors.
3.
Look for unauthorized replacement parts, particularly
transistors, that were installed during a previous repair. Point
them out to the customer and recommend their replacement.
transistors, that were installed during a previous repair. Point
them out to the customer and recommend their replacement.
4.
Look for parts which, through functioning, show obvious signs
of deterioration. Point them out to the customer and
recommend their replacement.
of deterioration. Point them out to the customer and
recommend their replacement.
5.
Check the B+ voltage to see it is at the values specified.
6.
Flexible Circuit Board Repairing
• Keep the temperature of the soldering iron around 270˚C
during repairing.
• Do not touch the soldering iron on the same conductor of the
circuit board (within 3 times).
• Be careful not to apply force on the conductor when soldering
or unsoldering.
Unleaded solder
Boards requiring use of unleaded solder are printed with the lead-
free mark (LF) indicating the solder contains no lead.
(Caution: Some printed circuit boards may not come printed with
the lead free mark due to their particular size.)
free mark (LF) indicating the solder contains no lead.
(Caution: Some printed circuit boards may not come printed with
the lead free mark due to their particular size.)
: LEAD FREE MARK
Unleaded solder has the following characteristics.
• Unleaded solder melts at a temperature about 40°C higher than
• Unleaded solder melts at a temperature about 40°C higher than
ordinary solder.
Ordinary soldering irons can be used but the iron tip has to be
applied to the solder joint for a slightly longer time.
Soldering irons using a temperature regulator should be set to
about 350°C.
Caution: The printed pattern (copper foil) may peel away if the
heated tip is applied for too long, so be careful!
• Strong viscosity
Unleaded solder is more viscous (sticky, less prone to flow) than
ordinary solder so use caution not to let solder bridges occur such
as on IC pins, etc.
ordinary solder so use caution not to let solder bridges occur such
as on IC pins, etc.
• Usable with ordinary solder
It is best to use only unleaded solder but unleaded solder may
also be added to ordinary solder.
also be added to ordinary solder.
SAFETY CHECK-OUT
After correcting the original service problem, perform the following
safety checks before releasing the set to the customer.
TABLE OF CONTENTS
4.
PRINTED WIRING BOARDS AND
SCHEMATIC DIAGRAMS
SCHEMATIC DIAGRAMS
4-2.
PRINTED WIRING BOARDS AND
SCHEMATIC DIAGRAMS ·········································· 4-11
SCHEMATIC DIAGRAMS ·········································· 4-11
• VC-260 (CAMERA A/D CONV., TIMING
GENERATOR, CAMERA SIGNAL PROCESS,
IRIS/FOCUS/ZOOM DRIVE, DV SIGNAL PROCESS,
DV INTERFACE, RF AMP, VIDEO A/D CONV.,
LASER AVLINK, HI/CAMERA CONTROL,
MECHA CONTROL, DRUM/CAPSTAN DRIVE,
EVF VIDEO, AUDIO, IN/OUT, AUDIO A/D, D/A,
STEADY SHOT, CONNECTOR, DC IN, CHARGE,
DC-DC CONVERTER)
IRIS/FOCUS/ZOOM DRIVE, DV SIGNAL PROCESS,
DV INTERFACE, RF AMP, VIDEO A/D CONV.,
LASER AVLINK, HI/CAMERA CONTROL,
MECHA CONTROL, DRUM/CAPSTAN DRIVE,
EVF VIDEO, AUDIO, IN/OUT, AUDIO A/D, D/A,
STEADY SHOT, CONNECTOR, DC IN, CHARGE,
DC-DC CONVERTER)
PRINTED WIRING BOARD ······················· 4-11
• VC-260 (CAMERA A/D CONV., TIMING
GENERATOR)(1/18)
SCHEMATIC DIAGRAM ···························· 4-15
• VC-260 (CAMERA SIGNAL PROCESS)(2/18)
SCHEMATIC DIAGRAM ···························· 4-17
• VC-260 (IRIS/FOCUS/ZOOM DRIVE)(3/18)
SCHEMATIC DIAGRAM ···························· 4-19
• VC-260 (DV SIGNAL PROCESS)(4/18)
SCHEMATIC DIAGRAM ···························· 4-21
• VC-260 (DV INTERFACE)(5/18)
SCHEMATIC DIAGRAM ···························· 4-23
• VC-260 (RF AMP)(6/18)
SCHEMATIC DIAGRAM ···························· 4-25
• VC-260 (VIDEO IN/OUT)(7/18)
SCHEMATIC DIAGRAM ···························· 4-27
• VC-260 (VIDEO A/D CONV.)(8/18)
SCHEMATIC DIAGRAM ···························· 4-29
• VC-260 (LASER AVLINK)(9/18)
SCHEMATIC DIAGRAM ···························· 4-31
• VC-260 (HI/CAMERA CONTROL)(10/18)
SCHEMATIC DIAGRAM ···························· 4-33
• VC-260 (MECHA CONTROL)(11/18)
SCHEMATIC DIAGRAM ···························· 4-35
• VC-260 (DRUM/CAPSTAN DRIVE)(12/18)
SCHEMATIC DIAGRAM ···························· 4-37
• VC-260 (EVF VIDEO)(13/18)
SCHEMATIC DIAGRAM ···························· 4-39
• VC-260 (AUDIO, IN/OUT, AUDIO A/D, D/A)(14/18)
SCHEMATIC DIAGRAM ···························· 4-41
• VC-260 (STEADY SHOT)(15/18)
SCHEMATIC DIAGRAM ···························· 4-43
• VC-260 (CONNECTOR)(16/18)
SCHEMATIC DIAGRAM ···························· 4-45
• VC-260 (DC IN, CHARGE)(17/18)
SCHEMATIC DIAGRAM ···························· 4-47
• VC-260 (DC-DC CONVERTER)(18/18)
SCHEMATIC DIAGRAM ···························· 4-49
4-3.
WAVEFORMS ······························································ 4-93
4-4.
MOUNTED PARTS LOCATION ································· 4-95
6.
REPAIR PARTS LIST
6-2.
ELECTRICAL PARTS LIST ········································ 6-17
SECTION 4
PRINTED WIRING BOARDS AND SCHEMATIC DIAGRAMS
DCR-TRV15E/TRV17E
DCR-TRV15E/TRV17E
VC-260
CAMERA PROCESS, LENS DRIVE,
DV PROCESSOR, VIDEO, AUDIO,
HI/CAMERA CONTROL, SERVO,
DC-DC CONVERTER
CAMERA PROCESS, LENS DRIVE,
DV PROCESSOR, VIDEO, AUDIO,
HI/CAMERA CONTROL, SERVO,
DC-DC CONVERTER
For printed wiring board
• Refer to pages 4-95 for parts location.
• This board consists of multiple layers. However, only
• Refer to pages 4-95 for parts location.
• This board consists of multiple layers. However, only
the sides (layers) A and B are shown.
• Chip parts
Transistor
Diode
There are a few cases that the part printed on
this diagram isn’t mounted in this model.
this diagram isn’t mounted in this model.
5
6
4
2
1
3
8
5
1
4
3
2
1
3
2
1
1
2
4
3
4-12
CAMERA PROCESS, LENS DRIVE, DV PROCESSOR, VIDEO, AUDIO, HI/MECHA CONTROL, SERVO, DC-DC CONVERTER
VC-260
VC-260 (CAMERA A/D CONV., TIMING GENERATOR, CAMERA SIGNAL PROCESS, IRIS/FOCUS/ZOOM DRIVE, DV SIGNAL PROCESS, DV INTERFACE, RF AMP, VIDEO A/D CONV.,
LASER AVLINK, HI/CAMERA CONTROL, MECHA CONTROL, DRUM/CAPSTAN DRIVE, EVF VIDEO, AUDIO, IN/OUT, AUDIO A/D, D/A, STEADY SHOT, CONNECTOR, DC IN, CHARGE, DC-DC CONVERTER)
PRINTED WIRING BOARD
PRINTED WIRING BOARD
— Ref. No. VC-260 Board; 20,000 Series —
4-2. PRINTED WIRING BOARDS AND SCHEMATIC DIAGRAMS
D
S
G
•
: Uses unleaded solder.

