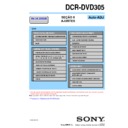
Sony DCR-DVD305 Service Manual ▷ View online
MANUAL DE SERVIÇO
LEVEL
3
Link
PLACAS DE CIRCUITO IMPRESSOS
DIAGRAMAS ESQUEMÁTICOS LISTA DE PEÇAS PARA REPARO
Sony EMCS Co.
© 2006.02
Publicado por Sony Brasil Ltda.- Engenharia de Qualidade
Instruções
Acrobat Reader
Ver 1.0 2006.02
DIGITAL VIDEO CAMERA RECORDER
Os componentes identificados
com a marca 0 são criticos
para a segurança. Somente os
substitua por peças especificadas
nesse manual.
com a marca 0 são criticos
para a segurança. Somente os
substitua por peças especificadas
nesse manual.
DCR-DVD305
Foto: DCR-DVD305
Brazilian Model
9-890-023-11
— 3 —
DCR-DVD305
SAFETY-RELATED COMPONENT WARNING!!
COMPONENTS IDENTIFIED BY MARK
0
OR DOTTED LINE WITH
MARK
0
ON THE SCHEMATIC DIAGRAMS AND IN THE PARTS
LIST ARE CRITICAL TO SAFE OPERATION. REPLACE THESE
COMPONENTS WITH SONY PARTS WHOSE PART NUMBERS
APPEAR AS SHOWN IN THIS MANUAL OR IN SUPPLEMENTS
PUBLISHED BY SONY.
COMPONENTS WITH SONY PARTS WHOSE PART NUMBERS
APPEAR AS SHOWN IN THIS MANUAL OR IN SUPPLEMENTS
PUBLISHED BY SONY.
1.
Check the area of your repair for unsoldered or poorly-soldered
connections. Check the entire board surface for solder splashes
and bridges.
connections. Check the entire board surface for solder splashes
and bridges.
2.
Check the interboard wiring to ensure that no wires are
"pinched" or contact high-wattage resistors.
"pinched" or contact high-wattage resistors.
3.
Look for unauthorized replacement parts, particularly
transistors, that were installed during a previous repair. Point
them out to the customer and recommend their replacement.
transistors, that were installed during a previous repair. Point
them out to the customer and recommend their replacement.
4.
Look for parts which, through functioning, show obvious signs
of deterioration. Point them out to the customer and
recommend their replacement.
of deterioration. Point them out to the customer and
recommend their replacement.
5.
Check the B+ voltage to see it is at the values specified.
6.
Flexible Circuit Board Repairing
• Keep the temperature of the soldering iron around 270˚C
during repairing.
• Do not touch the soldering iron on the same conductor of the
circuit board (within 3 times).
• Be careful not to apply force on the conductor when soldering
or unsoldering.
Unleaded solder
Boards requiring use of unleaded solder are printed with the lead-
free mark (LF) indicating the solder contains no lead.
(Caution: Some printed circuit boards may not come printed with
the lead free mark due to their particular size.)
free mark (LF) indicating the solder contains no lead.
(Caution: Some printed circuit boards may not come printed with
the lead free mark due to their particular size.)
: LEAD FREE MARK
Unleaded solder has the following characteristics.
• Unleaded solder melts at a temperature about 40
• Unleaded solder melts at a temperature about 40
°
C higher than
ordinary solder.
Ordinary soldering irons can be used but the iron tip has to be
applied to the solder joint for a slightly longer time.
Soldering irons using a temperature regulator should be set to
about 350
Ordinary soldering irons can be used but the iron tip has to be
applied to the solder joint for a slightly longer time.
Soldering irons using a temperature regulator should be set to
about 350
°
C.
Caution: The printed pattern (copper foil) may peel away if the
heated tip is applied for too long, so be careful!
heated tip is applied for too long, so be careful!
• Strong viscosity
Unleaded solder is more viscous (sticky, less prone to flow) than
ordinary solder so use caution not to let solder bridges occur such
as on IC pins, etc.
ordinary solder so use caution not to let solder bridges occur such
as on IC pins, etc.
• Usable with ordinary solder
It is best to use only unleaded solder but unleaded solder may
also be added to ordinary solder.
also be added to ordinary solder.
VERIFICAÇÃO GERAL DE SEGURANÇA
After correcting the original service problem, perform the following
safety checks before releasing the set to the customer.
ATTENTION AU COMPOSANT AYANT RAPPORT
À LA SÉCURITÉ!
LES COMPOSANTS IDENTIFÉS PAR UNE MARQUE
0
SUR LES
DIAGRAMMES SCHÉMATIQUES ET LA LISTE DES PIÈCES SONT
CRITIQUES POUR LA SÉCURITÉ DE FONCTIONNEMENT. NE
REMPLACER CES COMPOSANTS QUE PAR DES PIÈSES SONY
DONT LES NUMÉROS SONT DONNÉS DANS CE MANUEL OU
DANS LES SUPPÉMENTS PUBLIÉS PAR SONY.
CRITIQUES POUR LA SÉCURITÉ DE FONCTIONNEMENT. NE
REMPLACER CES COMPOSANTS QUE PAR DES PIÈSES SONY
DONT LES NUMÉROS SONT DONNÉS DANS CE MANUEL OU
DANS LES SUPPÉMENTS PUBLIÉS PAR SONY.
WARNING!!
WHEN SERVICING, DO NOT APPROACH THE LASER
EXIT WITH THE EYE TOO CLOSELY. IN CASE IT IS
NECESSARY TO CONFIRM LASER BEAM EMISSION,
BE SURE TO OBSERVE FROM A DISTANCE OF MORE
THAN 30 cm FROM THE SURFACE OF THE
OBJECTIVE LENS ON THE OPTICAL PICK-UP BLOCK.
EXIT WITH THE EYE TOO CLOSELY. IN CASE IT IS
NECESSARY TO CONFIRM LASER BEAM EMISSION,
BE SURE TO OBSERVE FROM A DISTANCE OF MORE
THAN 30 cm FROM THE SURFACE OF THE
OBJECTIVE LENS ON THE OPTICAL PICK-UP BLOCK.
CAUTION :
Danger of explosion if battery is incorrectly replaced.
Replace only with the same or equivalent type.
Danger of explosion if battery is incorrectly replaced.
Replace only with the same or equivalent type.
CAUTION
Use of controls or adjustments or perfor mance
procedures other than those specified herein may
result in hazardous radiation exposure.
Use of controls or adjustments or perfor mance
procedures other than those specified herein may
result in hazardous radiation exposure.
CAUTION:
The use of optical instrument with this product will increase eye
hazard.
hazard.
— 4 —
DCR-DVD305
INDICE
4. PLACAS DE CIRCUITO IMPRESSO E
DIAGRAMAS ESQUEMÁTICOS
4-1.
Schematic Diagrams ························································ 4-1
4-2.
Printed Wiring Boards ··················································· 4-57
4-3.
Waveforms ····································································· 4-82
4-4.
Mounted Parts Location ················································ 4-88
5. LISTA DE PEÇAS PARA REPARO
5-2.
Electrical Parts List ······················································· 5-13
Section
Title
Page
DCR-DVD305
VC-423
PLACA (2/17) (LENS DRIVE)
VC-423
PLACA (1/17)
(A/D CONVERTER, TIMING GENERATOR)
VC-423
PLACA (12/17)
(ASPECT RATIO CONVERTER)
VC-423
PLACA (13/17) (VIDEO, AUDIO I/O)
VC-423
PLACA (11/17)
(DVD MECHA DRIVE)
VC-423
PLACA (4/17) (CAMERA CONTROL)
VC-423
PLACA (5/17) (VIDEO/AUDIO DSP)
VC-423
BOARD (6/17)
(DVD CODEC, USB I/F, DS/HI CONTROL)
VC-423
PLACA (7/17) (FLASH, SDRAM)
VC-423
PLACA (8/17) (DVD DSP)
VC-423
PLACA (3/17)
(CAMERA SIGNAL PROCESS)
VC-423
PLACA (14/17) (MIC AMP)
VC-423
PLACA (15/17) (5.1CH AUDIO DSP)
VC-423
PLACA (16/17) (LCD/EVF DRIVE)
DD-246
PLACA (1/2) (HI CONTROL)
DD-246
PLACA (2/2) (DC/DC CONVERTER)
VC-423
PLACA (17/17) (CONNECTOR)
VC-423
PLACA (10/17)
(DVD DRIVE CONTROL)
VC-423
PLACA (9/17) (RF PROCESS)
Link
4-1. DIAGRAMAS ESQUEMÁTICOS
FORMAS DE ONDAS
NOTAS COMUNS PARA DIAGRAMAS ESQUEMÁTICOS
4. PLACAS DE CIRCUITO IMPRESSO E DIAGRAMAS ESQUEMÁTICOS

