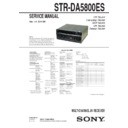
Sony STR-DA5800ES Service Manual ▷ View online
STR-DA5800ES
4
5-68. Printed Wiring Board - D-VIDEO Board (Side B) - ...... 125
5-69. Printed Wiring Board - NETWORK Board (Side A) - ... 126
5-70. Printed Wiring Board - NETWORK Board (Side B) - ... 127
5-71. Schematic Diagram - NETWORK Board (1/11) - .......... 128
5-72. Schematic Diagram - NETWORK Board (2/11) - .......... 129
5-73. Schematic Diagram - NETWORK Board (3/11) - .......... 130
5-74. Schematic Diagram - NETWORK Board (4/11) - .......... 131
5-75. Schematic Diagram - NETWORK Board (5/11) - .......... 132
5-76. Schematic Diagram - NETWORK Board (6/11) - .......... 133
5-77. Schematic Diagram - NETWORK Board (7/11) - .......... 134
5-78. Schematic Diagram - NETWORK Board (8/11) - .......... 135
5-79. Schematic Diagram - NETWORK Board (9/11) - .......... 136
5-80. Schematic Diagram - NETWORK Board (10/11) - ........ 137
5-81. Schematic Diagram - NETWORK Board (11/11) - ........ 138
5-82. Printed Wiring Board - D-AU CONNECT Board - ........ 139
5-83. Schematic Diagram - D-AU CONNECT Board - ........... 139
5-84. Printed Wiring Board
- CONTROL Board (Component Side) - ........................ 140
5-85. Printed Wiring Board
- CONTROL Board (Conductor Side) - .......................... 141
5-86. Schematic Diagram - CONTROL Board (1/2) - ............. 142
5-87. Schematic Diagram - CONTROL Board (2/2) - ............. 143
5-88. Schematic Diagram - HAT Board - ................................. 144
5-89. Schematic Diagram - PANEL Section - .......................... 145
5-90. Printed Wiring Boards - IR/PANEL Section - ................ 146
5-91. Printed Wiring Board - DISPLAY Board - ..................... 147
5-92. Schematic Diagram - DISPLAY Board (1/2) - ............... 148
5-93. Schematic Diagram - DISPLAY Board (2/2) - ............... 149
5-94. Schematic Diagram - DCDC2 Board - ........................... 150
5-95. Schematic Diagram - DCDC Board - ............................. 151
5-96. Printed Wiring Boards
- DC/DC CONVERTER Section - .................................. 152
5-97. Printed Wiring Boards - POWER SUPPLY Section - .... 153
5-98. Schematic Diagram - ACDC Board - ............................. 154
5-99. Schematic Diagram - STBY Board - .............................. 155
5-98. Schematic Diagram - ACDC Board - ............................. 154
5-99. Schematic Diagram - STBY Board - .............................. 155
6.
EXPLODED VIEWS
6-1. Overall
Section
...............................................................
224
6-2. SUB D-VIDEO, HAT Board Section.............................. 225
6-3. D-VIDEO Board Section ................................................ 226
6-4. D-AUDIO Board Section ................................................ 227
6-5. NETWORK Board Section ............................................. 228
6-6. CONTROL, A-VIDEO Board Section ........................... 229
6-7. DCDC2, A AUDIO Board Section ................................ 230
6-8. DCDC, STBY Board Section.......................................... 231
6-9. Power
Transformer
Section
............................................
232
6-10. SPTM Board Section ...................................................... 233
6-11. Power AMP Section ........................................................ 234
6-12. Heat Sink Section ............................................................ 235
6-13. E-VOL Board Section ..................................................... 236
6-14. DISPLAY Board Section ................................................ 237
6-15. Front Panel Section ......................................................... 238
6-16. MAIN Board Section ...................................................... 239
7.
ELECTRICAL PARTS LIST
............................... 240
Accessories are given in the last of the electrical parts list.
SECTION 1
SERVICING NOTES
UNLEADED SOLDER
Boards requiring use of unleaded solder are printed with the lead-
free mark (LF) indicating the solder contains no lead.
(Caution: Some printed circuit boards may not come printed with
Boards requiring use of unleaded solder are printed with the lead-
free mark (LF) indicating the solder contains no lead.
(Caution: Some printed circuit boards may not come printed with
the lead free mark due to their particular size)
: LEAD FREE MARK
Unleaded solder has the following characteristics.
• Unleaded solder melts at a temperature about 40 °C higher
• Unleaded solder melts at a temperature about 40 °C higher
than ordinary solder.
Ordinary soldering irons can be used but the iron tip has to be
applied to the solder joint for a slightly longer time.
applied to the solder joint for a slightly longer time.
Soldering irons using a temperature regulator should be set to
about 350 °C.
Caution: The printed pattern (copper foil) may peel away if
about 350 °C.
Caution: The printed pattern (copper foil) may peel away if
the heated tip is applied for too long, so be careful!
• Strong
viscosity
Unleaded solder is more viscous (sticky, less prone to fl ow)
than ordinary solder so use caution not to let solder bridges
occur such as on IC pins, etc.
than ordinary solder so use caution not to let solder bridges
occur such as on IC pins, etc.
•
Usable with ordinary solder
It is best to use only unleaded solder but unleaded solder may
also be added to ordinary solder.
also be added to ordinary solder.
Reverting back to the
factory default settings
You can clear all memorized settings and
revert the receiver back to the factory default
settings by performing the following
procedure. This procedure can also be used to
initialize the receiver before you use it for the
first time.
revert the receiver back to the factory default
settings by performing the following
procedure. This procedure can also be used to
initialize the receiver before you use it for the
first time.
1
Press ?/1 to turn off the
receiver.
receiver.
2
While holding down the TONE
and 2CH/A.DIRECT, press ?/1
to turn on the receiver.
and 2CH/A.DIRECT, press ?/1
to turn on the receiver.
3
Release the TONE and 2CH/
A.DIRECT after a few seconds.
A.DIRECT after a few seconds.
The “MEMORY CLEARING...” appears
on the display window for a while, then
changes to “MEMORY CLEARED!”
Changes or adjustments made to the
settings are now reset to the defaults.
on the display window for a while, then
changes to “MEMORY CLEARED!”
Changes or adjustments made to the
settings are now reset to the defaults.
Note
It takes about a few minutes for the memory to be
cleared completely. Do not turn the receiver off until
“MEMORY CLEARED!” appears on the display.
cleared completely. Do not turn the receiver off until
“MEMORY CLEARED!” appears on the display.
?/1
TONE
2CH/A.DIRECT
You can check the status of the receiver by the
message. See the following to solve the
problem. If any problem persists, consult your
nearest Sony dealer.
message. See the following to solve the
problem. If any problem persists, consult your
nearest Sony dealer.
PROTECTOR
The receiver is covered and ventilation holes
are blocked. The receiver will automatically
turn off after a few seconds. Remove the
object covering the upper panel of the
receiver and turn on the power again.
are blocked. The receiver will automatically
turn off after a few seconds. Remove the
object covering the upper panel of the
receiver and turn on the power again.
SPEAKER SHORTED
Irregular current is output to the speakers
due to a short circuit on the speaker
terminals. The receiver will automatically
turn off after a few seconds. If the protective
device on the receiver is activated due to a
short-circuit problem, turn off the receiver.
Check the connection of the speakers and
turn on the power again.
due to a short circuit on the speaker
terminals. The receiver will automatically
turn off after a few seconds. If the protective
device on the receiver is activated due to a
short-circuit problem, turn off the receiver.
Check the connection of the speakers and
turn on the power again.
FAN STOPPED
Check that the ventilation hole on the top of
the receiver is not blocked.
the receiver is not blocked.
“A new software version is available.
Please go to the “Setup” section of the
menu and select “Network Update” to
perform the update.” appears on the TV
screen.
Please go to the “Setup” section of the
menu and select “Network Update” to
perform the update.” appears on the TV
screen.
See “Network Update” to update the
receiver to a newer software version.
receiver to a newer software version.
Video cannot be output from this jack.
s If you use the receiver in the main zone,
connect the receiver to a TV via an HDMI
cable.
cable.
s If you connect the receiver to a TV via a
video cord, set “Playback Resolution” to
“480i/576i”.
“480i/576i”.
s If you connect the receiver to a TV via a
component video cord, set “Playback
Resolution” to a parameter appropriate to
your TV.
Resolution” to a parameter appropriate to
your TV.
Error messages
Refer to SUPPLEMENT-1 for the MAIN board of printed wiring
board, schematic diagram and electrical parts list of Taiwan mod-
el.
Refer to SUPPLEMENT-2 for the AMP_CONNECT-1, D-VIDEO,
E-VOL, PROTECTOR_FC, PROTECTOR_FH, PROTECTOR_
SR, SUB_D-VIDEO and USB-DDC boards of printed wiring board,
schematic diagram and electrical parts list of Taiwan model.
board, schematic diagram and electrical parts list of Taiwan mod-
el.
Refer to SUPPLEMENT-2 for the AMP_CONNECT-1, D-VIDEO,
E-VOL, PROTECTOR_FC, PROTECTOR_FH, PROTECTOR_
SR, SUB_D-VIDEO and USB-DDC boards of printed wiring board,
schematic diagram and electrical parts list of Taiwan model.
ABOUT THE USB-CONNECT BAORD
(AEP and UK models only)
(AEP and UK models only)
The USB-CONNECT board installed in AEP and UK models has been
deleted in the midway of production, and the D-AUDIO and USB-DDC
boards have been changed into connection with the wire.
Note: Taiwan model does not use USB-CONNECT board in the fi rst time
deleted in the midway of production, and the D-AUDIO and USB-DDC
boards have been changed into connection with the wire.
Note: Taiwan model does not use USB-CONNECT board in the fi rst time
of production, and the D-AUDIO and USB-DDC boards are con-
nection with the wire.
nection with the wire.
Ver. 1.2
STR-DA5800ES
5
NOTE OF REPLACING THE IC1410 ON THE DCDC
BOARD
IC1410 on the DCDC board cannot exchange with single. When
this part is damaged, exchange the complete mounted board.
BOARD
IC1410 on the DCDC board cannot exchange with single. When
this part is damaged, exchange the complete mounted board.
NOTE OF REPLACING THE IC3903 AND IC3904 ON
THE DCDC2 BOARD
IC3903 and IC3904 on the DCDC2 board cannot exchange with
single. When these parts are damaged, exchange the complete
mounted board.
THE DCDC2 BOARD
IC3903 and IC3904 on the DCDC2 board cannot exchange with
single. When these parts are damaged, exchange the complete
mounted board.
NOTE OF REPLACING THE IC3500 AND IC3700 ON
THE D-VIDEO BOARD
IC3500 and IC3700 on the D-VIDEO board cannot exchange with
single. When these parts are damaged, exchange the complete
mounted board.
THE D-VIDEO BOARD
IC3500 and IC3700 on the D-VIDEO board cannot exchange with
single. When these parts are damaged, exchange the complete
mounted board.
NOTE OF REPLACING THE IC3505 AND IC3506 ON
THE D-VIDEO BOARD
Replacement of IC3505 and IC3506 on the D-VIDEO board used
in this unit requires a special tool.
THE D-VIDEO BOARD
Replacement of IC3505 and IC3506 on the D-VIDEO board used
in this unit requires a special tool.
NOTE OF REPLACING THE IC101, IC501 AND IC2601
ON THE NETWORK BOARD
IC101, IC501 and IC2601 on the NETWORK board cannot ex-
change with single. When these parts are damaged, exchange the
complete mounted board.
ON THE NETWORK BOARD
IC101, IC501 and IC2601 on the NETWORK board cannot ex-
change with single. When these parts are damaged, exchange the
complete mounted board.
NOTE OF REPLACING THE IC106, IC107, IC206 AND
IC207 ON THE NETWORK BOARD
Replacement of IC106, IC107, IC206 and IC207 on the NET-
WORK board used in this unit requires a special tool.
IC207 ON THE NETWORK BOARD
Replacement of IC106, IC107, IC206 and IC207 on the NET-
WORK board used in this unit requires a special tool.
NOTE OF REPLACING THE IC101 AND IC102 ON
THE USB-DDC BOARD (AEP, UK and Taiwan models
only)
IC101 and IC102 on the USB-DDC board cannot exchange with
single. When these parts are damaged, exchange the complete
mounted board.
THE USB-DDC BOARD (AEP, UK and Taiwan models
only)
IC101 and IC102 on the USB-DDC board cannot exchange with
single. When these parts are damaged, exchange the complete
mounted board.
NOTE OF REPLACING THE IC100 ON THE USB-DDC
BOARD (AEP, UK and Taiwan models only)
Replacement of IC100 on the USB-DDC board used in this unit
requires a special tool.
BOARD (AEP, UK and Taiwan models only)
Replacement of IC100 on the USB-DDC board used in this unit
requires a special tool.
MODEL IDENTIFICATION
Distinguish the model by part number on back panel.
Distinguish the model by part number on back panel.
– Back Panel –
US and Canadian models:
4-422-950-0s
4-422-950-0s
AEP and UK models:
4-422-950-1s
Taiwan model:
4-422-950-3s
4-422-950-1s
Taiwan model:
4-422-950-3s
CAPACITOR ELECTRICAL DISCHARGE PROCESSING
When checking the board, for the electric shock prevention, con-
nect the resistors to both ends of respective capacitors (C905 on
the ACDC board) to discharge the capacitors (C905 on the ACDC
board).
When checking the board, for the electric shock prevention, con-
nect the resistors to both ends of respective capacitors (C905 on
the ACDC board) to discharge the capacitors (C905 on the ACDC
board).
– ACDC Board (Conductor Side) –
C905
800
:/2 W
ADVANCE PREPARATION OF REPAIR
(US and Canadian models only)
This unit in US and Canadian models can perform “PRO-UP-
GRADE” by C4 (Control4) dealer.
When the user is performing “PRO-UPGRADE”, GUI of C4
(Control4) world is displayed.
Display GUI in the following procedure and confi rm the state of
displayed GUI.
(US and Canadian models only)
This unit in US and Canadian models can perform “PRO-UP-
GRADE” by C4 (Control4) dealer.
When the user is performing “PRO-UPGRADE”, GUI of C4
(Control4) world is displayed.
Display GUI in the following procedure and confi rm the state of
displayed GUI.
Connection:
STR-
DA5800ES
monitor
D-VIDEO board
HDMI OUT A ARC connector
(CN3502)
HDMI OUT A ARC connector
(CN3502)
HDMI cable
Procedure:
1. Press the [
1. Press the [
?/1
] button to turn on the main power.
2. Press the [HDMI OUT A/B/OFF] button to select “HDMI A”.
3. Press the [HOME] button of remote commander.
4. “PRO-UPGRADE” is not performed when the following
3. Press the [HOME] button of remote commander.
4. “PRO-UPGRADE” is not performed when the following
screen is displayed.
Note: If the following processing is performed to this unit by which
“PRO-UPGRADE” was performed, this unit returns to the state
before “PRO-UPGRADE” is performed.
before “PRO-UPGRADE” is performed.
•
Complete NETWORK board replacing
•
Factory
reset
Since the change to C4 (Control4) world can perform only by
C4 (Control4) dealer, fully work carefully.
C4 (Control4) dealer, fully work carefully.
Ver. 1.2
STR-DA5800ES
6
CONFIRMATION OF NETWORK OPERATION
Note: When this confi rmation is executed, IP address is changed.
Necessary machinery and materials:
•
•
PC (Windows XP/Vista)
• Router
(Transmission rate is 100 Mbps or more, built-in DHCP server
function)
function)
•
Two LAN cables
(Category 5 cable, normal type or shield type)
• Monitor
•
•
Supplied remote commander (RM-AAU154)
(US and Canadian models)
•
Supplied multifunction remote commander (RM-AAL042)
(AEP, UK and Taiwan models)
Connection:
(The router need not be connected with the internet)
(The router need not be connected with the internet)
LAN cable
router
PC
STR-
DA5800ES
monitor
NETWORK board
jack (CN2502)
D-VIDEO board
HDMI OUT A ARC connector
(CN3502)
HDMI OUT A ARC connector
(CN3502)
HDMI cable
Procedure:
1. The setting of LAN of PC is setting to the automatic IP address
1. The setting of LAN of PC is setting to the automatic IP address
assignment.
It changes to the setting that displays the image in the monitor.
2. Perform connection with reference to connection fi gure.
3. The power supply of the router is turn on, next, the power sup-
3. The power supply of the router is turn on, next, the power sup-
ply of PC and this unit is turn on.
4. Press the [HOME] button of the remote commander, the home
menu is displayed in the monitor.
5. The “Settings” is selected on the home menu, and press the [
]
button of remote commander.
6. The “Network Settings” is selected , and press the [
] button
of remote commander.
7. The “Internet Settings” is selected , and press the [
] button of
remote commander.
8. The “Network Setup” is selected , and press the [
] button of
remote commander.
9. The “Auto” is selected , and press the [
] button of remote
commander.
10. The “The network will be confi gured with the following set-
tings.” is displayed, and press the [
,
] button of remote com-
mander.
11. The “Save & Connect” is selected , and press the [
] button of
remote commander.
12. The automatically connect function is performed.
13. Confi rm that the “Internet Access: OK” has been displayed,
13. Confi rm that the “Internet Access: OK” has been displayed,
and press the [
] button of remote commander.
14. Press the [\/1] button to turn off the main power.
NOTE OF REPLACING THE COMPLETE NETWORK
BOARD
When the complete NETWORK board is exchanged, the MAC ad-
dress has been changed.
Please print and cut out the following explanations, and return it
with the unit that completes the repair.
BOARD
When the complete NETWORK board is exchanged, the MAC ad-
dress has been changed.
Please print and cut out the following explanations, and return it
with the unit that completes the repair.
MAC address of this receiver has been changed by this repair.
The customer who uses the MAC address fi ltering function of
connected access point equipment please set it again. MAC ad-
dress is possible to confi rm it on the System Information screen
of this unit. Please refer to “Adjusting Settings” on the operating
instructions for details.
The customer who uses the MAC address fi ltering function of
connected access point equipment please set it again. MAC ad-
dress is possible to confi rm it on the System Information screen
of this unit. Please refer to “Adjusting Settings” on the operating
instructions for details.
NOTE OF REPLACING THE COMPLETE USB-DDC
BOARD (AEP, UK and Taiwan models only)
When this unit is connected with PC, this unit is recognized as a
USB audio device on PC. At this time, the manufacture maker’s
information, etc. (USB descriptor) are transmitted to PC from this
unit. The USB descriptor is stored in the IC102 on the USB-DDC
board, and it is written in at the factory.
When the complete USB-DDC board is exchanged, do the follow-
ing work.
1. Preparation
Prepare the following before beginning work.
Prepare the following before beginning work.
•
Windows PC (Windows XP)
Note 1: Vendor does not guarantee operation by other OS’s.
•
Driver software for STR-DA5800ES
Note 2: Install this driver software in the above PC in advance. Confi rm
the method of obtaining the driver software to each service head-
quarters.
•
USB cable (A type plug to B type plug)
•
Writing utility software (.exe fi le)
•
USB descriptor defi nition fi le (.hex fi le)
Note 3: Confi rm the method of obtaining the writing utility software and
USB descriptor defi nition fi le to each service headquarters.
2. Writing
method
Procedure:
1. Assemble new USB-DDC board to this unit.
2. Connect PC and this set with USB cable.
1. Assemble new USB-DDC board to this unit.
2. Connect PC and this set with USB cable.
PC
USB cable
This unit
(rear side view)
(rear side view)
3. Press the [\/1] button on this unit to turn on the main power.
(It is not necessary to wait for memory clearing)
4. Run
the
writing utility software on PC.
5. Select the “USB\Vid_0d8c&Pid_5200&Rev_0100” on “De-
vice menu” pull-down list of the writing utility software.
USB/Vid_0d8c&Pid_5200&Rev_0100
Ver. 1.2
STR-DA5800ES
7
6. Click the “Update FW” button of the writing utility software
on PC and open the USB descriptor defi nition fi le.
USB/Vid_0d8c&Pid_5200&Rev_0100
Update FW
Update Firmware
Release_0605
6631-XXXX-SonySTR-ALL.hex
Firmware File
6631-XXXX-SonySTR-ALL.hex
Open
7. “Update Firmware” window appears, and click the “OK” but-
ton.
Cancel
OK
Start To Update Firmware.
Old Version: New Version:XXXX
Old Version: New Version:XXXX
8. After “Update Firmware” window disappears, wait for about 5
to 10 seconds.
9. After about 5 to 10 seconds, “FWUpdate” window appears,
and click the “OK” button.
OK
Firmware Update Finished
Device will be reset.
10. The writing of the USB descriptor to the IC102 on the USB-
DDC board is completed.
3. Checking
method
Procedure:
1. Open the Device Manager of windows on PC.
2. Expand the “Sound, video and game controllers”, and right-
1. Open the Device Manager of windows on PC.
2. Expand the “Sound, video and game controllers”, and right-
click on the “AV Amplifi er/Receiver” and select the “Proper-
ties”.
ties”.
SSF0250
AV Amplifier/Receiver
Properties
Update Driver...
Scan for hardware changes
3. Click the “Details” tab, and select the “Hardware Ids” from pull-
down list on Property. Check that the part surrounded by the
dotted line of the following fi gure is “VID_054C&PID_06CF”.
dotted line of the following fi gure is “VID_054C&PID_06CF”.
Property
Value
Hardware Ids
USB\VID_054C&PID_06CF&REV_0103&MI_00
USB\VID_054C&PID_06CF&MI_00
USB\VID_054C&PID_06CF&MI_00
Audio Amplifier/Receiver
4. The checking was completed.
XXXX: Version display
XXXX: Version display


