Sharp VC-MH732HM (serv.man31) Service Manual / Technical Bulletin ▷ View online
VCR2001 08 01
Month of Issue:
May 2003
Classification:
White
VIDEO TECHNICAL BULLETIN
Page 2 of 2
Sharp Electronics (UK) Limited
Reference AVW10 08 2001-3
Revision 2
White – Carry out as required
Yellow – Carry out as required and whenever the unit comes in for service
Red – Carry out on all units
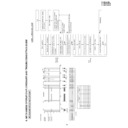
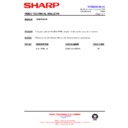
To change the JP locations to a ‘0’, press the CLEAR button on the remote control (JP number will
be static)
be static)
To change the JP locations to a ‘1’, press the DISPLAY button on the remote control (JP number
will flash)
will flash)
After programming, a quick check can be made to see if the data has been entered correctly. On
the data table, the row at the bottom indicates a checksum, which can be used for this purpose. As
this is a ten-figure number it cannot be displayed all at the same time, therefore it has to be done in
two parts.
the data table, the row at the bottom indicates a checksum, which can be used for this purpose. As
this is a ten-figure number it cannot be displayed all at the same time, therefore it has to be done in
two parts.
To display the lower seven digits press the FF button on the remote control.
To display the upper three digits press the STOP button on the remote control.
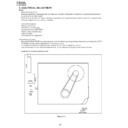
1. Enter the test mode as shown above.
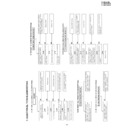
2. Press the CHANNEL (+) or CHANNEL (-) buttons until the tape speed indicator is lit (either
2. Press the CHANNEL (+) or CHANNEL (-) buttons until the tape speed indicator is lit (either
SP, LP or EP). The display will read either n or p (NTSC or PAL), first digit next to this letter
represents luminance preset number, the second, the chrominance preset level. See below
represents luminance preset number, the second, the chrominance preset level. See below
sp
P 3
5
Luminance preset level
Tape speed
Chrominance preset level
System
3. To change the values, press the number keys on the remote control. In the above example
the keys ‘3’ then ‘5’ would be pressed to give ‘35’. Note that only numbers 0 to 7 can be
entered.
entered.
CHANNEL (-) buttons on the front of the unit to move onto the other levels.
5. When complete, short-circuit the test point P802 again to exit the test mode.
Display

