Sharp LC-52XL2E (serv.man10) User Manual / Operation Manual ▷ View online
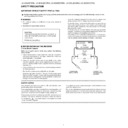
SPECIAL NOTE FOR USERS IN THE U.K.
The mains lead of this product is fi tted with a non-rewireable (moulded) plug incorporating a 13A fuse. Should the
fuse need to be replaced, a BSI or ASTA approved BS 1362 fuse marked
fuse need to be replaced, a BSI or ASTA approved BS 1362 fuse marked
or
ASA
and of the same rating as above,
which is also indicated on the pin face of the plug, must be used.
Always refi t the fuse cover after replacing the fuse. Never use the plug without the fuse cover fi tted.
In the unlikely event of the socket outlet in your home not being compatible with the plug supplied, cut off the mains
plug and fi t an appropriate type.
Always refi t the fuse cover after replacing the fuse. Never use the plug without the fuse cover fi tted.
In the unlikely event of the socket outlet in your home not being compatible with the plug supplied, cut off the mains
plug and fi t an appropriate type.
DANGER:
The fuse from the cut-off plug should be removed and the cut-off plug destroyed immediately and disposed of in a
safe manner.
Under no circumstances should the cut-off plug be inserted elsewhere into a 13A socket outlet, as a serious electric
shock may occur.
To fi t an appropriate plug to the mains lead, follow the instructions below:
IMPORTANT:
The wires in the mains lead are coloured in accordance with the following code:
The wires in the mains lead are coloured in accordance with the following code:
Blue: Neutral
Brown: Live
Brown: Live
As the colours of the wires in the mains lead of this product may not correspond with the coloured markings
identifying the terminals in your plug, proceed as follows:
• The wire which is coloured blue must be connected to the plug terminal which is marked N or coloured black.
• The wire which is coloured brown must be connected to the plug terminal which is marked L or coloured red.
Ensure that neither the brown nor the blue wire is connected to the earth terminal in your three-pin plug.
Before replacing the plug cover make sure that:
• If the new fi tted plug contains a fuse, its value is the same as that removed from the cut-off plug.
• The cord grip is clamped over the sheath of the mains lead, and not simply over the lead wires.
IF YOU HAVE ANY DOUBT, CONSULT A QUALIFIED ELECTRICIAN.
( 15°)
( 15°)
( 1004.0 ) / [ 1101.0 ] / [[ 1237.0 ]]
( 1004,0 ) / [ 1101,0 ] / [[ 1237,0 ]]
( 1004,0 ) / [ 1101,0 ] / [[ 1237,0 ]]
( 933.2 ) / [ 1023.4 ] / [[ 1157.0 ]]
( 933,2 ) / [ 1023,4 ] / [[ 1157,0 ]]
( 933,2 ) / [ 1023,4 ] / [[ 1157,0 ]]
(
646.0
)
/
[
698.0
]
/
[[
774.0
]]
(
646,0
)
/
[
698,0
]
/
[[
774,0
]]
(
408.1
)
/
[
433.9
]
(
408,1
)
/
[
433,9
]
/
[[
472.0
]]
/
[[
472,0
]]
(
200.0
)
/
[
175.0
]
(
200,0
)
/
[
175,0
]
/
[[
137.0
]]
/
[[
137,0
]]
( 305.0 ) / [ 325.0 ]
( 305,0 ) / [ 325,0 ]
( 305,0 ) / [ 325,0 ]
/ [[ 325.0 ]]
/ [[ 325,0 ]]
/ [[ 325,0 ]]
( 112.5 ) / [ 122.3 ]
( 112,5 ) / [ 122,3 ]
/ [[ 122.3 ]]
/ [[ 122,3 ]]
/ [[ 122,3 ]]
(
708.0
)
/
[
760.0
]
/
[[
836.0
]]
(
708,0
)
/
[
760,0
]
/
[[
836,0
]]
62.0
62,0
550.0
550,0
550,0
95.8
95,8
95,8
400.0
400,0
400,0
400.0
400,0
(
526.2
)
/
[
575.6
]
(
526,2
)
/
[
575,6
]
/
[[
651.6
]]
/
[[
651,6
]]
:LC-42XL2E/LC-42XL2S
( ) : LC-42XL2E/LC-42XL2S
[ ] : LC-46XL2E/LC-46XL2S
[[ ]] : LC-52XL2E/LC-52XL2S
:
LC-42XL2E/LC-42XL2S
LC-46XL2E/LC-46XL2S
LC-52XL2E/LC-52XL2S
OPERATION MANUAL
Contents .........................................................................................1
Introduction ....................................................................................2
Introduction ....................................................................................2
Dear SHARP customer .............................................................2
Important Safety Precautions ....................................................2
Trademarks ...............................................................................2
Remote control unit...................................................................3
TV (Front view) ..........................................................................4
TV (Rear view) ...........................................................................4
Preparation ....................................................................................5
Supplied accessories ................................................................5
Attaching the stand unit ............................................................5
Inserting the batteries ................................................................6
Using the remote control unit ....................................................6
Attaching the stand unit ............................................................5
Inserting the batteries ................................................................6
Using the remote control unit ....................................................6
Cautions regarding the remote control unit ...........................6
Quick guide ....................................................................................7
Initial installation overview ..........................................................7
Before turning on the power......................................................8
Before turning on the power......................................................8
Bundling the cables .............................................................8
Initial auto installation ................................................................9
Checking signal strength and channel strength ....................9
Watching TV .................................................................................10
Daily operation ........................................................................10
Switching on/off .................................................................10
Switching between analogue and digital broadcasts ..........10
Changing channels ............................................................10
Selecting external video source ..........................................10
Selecting Sound mode ......................................................10
Switching between analogue and digital broadcasts ..........10
Changing channels ............................................................10
Selecting external video source ..........................................10
Selecting Sound mode ......................................................10
EPG (Electronic Programme Guide) .........................................11
EPG Overview .........................................................................11
Useful settings for using EPG ..................................................11
Selecting a programme using EPG..........................................12
Timer recording using EPG .....................................................13
Cancelling the timer recording .................................................13
Teletext ...................................................................................14
Using the MHEG5 application (UK only) ..................................14
Connecting external devices ......................................................15
Introduction to connections .....................................................15
HDMI connection ...............................................................16
Component connection .....................................................16
S-VIDEO/VIDEO connection ..............................................16
SCART connection ............................................................17
Controlling devices with SCART using AV Link ..................17
Speaker/amplifier connection .............................................18
Inserting a CA Card .................................................................19
AQUOS LINK ................................................................................20
Controlling HDMI devices using AQUOS LINK .........................20
AQUOS LINK connection ........................................................21
AQUOS LINK Setup ................................................................21
Operating an AQUOS LINK device ..........................................22
AQUOS LINK connection ........................................................21
AQUOS LINK Setup ................................................................21
Operating an AQUOS LINK device ..........................................22
Menu operation............................................................................23
What is the Menu? ..................................................................23
Common operations ..........................................................23
Basic adjustment .........................................................................24
Picture Settings .......................................................................24
AV Mode ............................................................................25
Audio Settings ........................................................................25
Power Save Settings ...............................................................25
Channel Settings .....................................................................26
Power Save Settings ...............................................................25
Channel Settings .....................................................................26
Auto Installation .................................................................26
Digital channel settings ......................................................26
Analogue channel settings .................................................27
Password/Parental lock settings ........................................28
Digital channel settings ......................................................26
Analogue channel settings .................................................27
Password/Parental lock settings ........................................28
Language Settings (language, subtitle, multi audio) .................28
Useful Viewing functions ............................................................29
Selecting the WSS picture size automatically .....................29
Selecting the WSS picture size manually ............................29
Selecting the picture size manually .....................................29
Selecting the recording picture size manually .....................30
Selecting the HDMI picture size automatically ....................30
Selecting the WSS picture size manually ............................29
Selecting the picture size manually .....................................29
Selecting the recording picture size manually .....................30
Selecting the HDMI picture size automatically ....................30
Other Picture and audio settings .............................................30
Adjusting image position ....................................................30
Reducing noise on the screen ............................................30
Automatic volume adjustment ............................................30
Clear Voice ........................................................................30
Audio Only .........................................................................30
Display Settings ......................................................................31
Channel display .................................................................31
Time and Title display ........................................................31
Time and Title display ........................................................31
Other useful features ..................................................................32
Setting when using external devices .......................................32
Input source settings .........................................................32
Skipping specified input .....................................................32
Colour system settings ......................................................32
Skipping specified input .....................................................32
Colour system settings ......................................................32
Additional features ..................................................................32
Connecting a PC ..........................................................................33
Connecting a PC ....................................................................33
Displaying a PC image on the screen ......................................33
Displaying a PC image on the screen ......................................33
Selecting the picture size ...................................................33
Adjusting the PC image automatically ................................34
Adjusting the PC image manually .......................................34
Adjusting the PC image automatically ................................34
Adjusting the PC image manually .......................................34
Selecting input resolution ........................................................34
RS-232C port specifications ...................................................35
PC compatibility chart .............................................................36
RS-232C command list...........................................................36
RS-232C port specifications ...................................................35
PC compatibility chart .............................................................36
RS-232C command list...........................................................36
Appendix ......................................................................................37
Troubleshooting ......................................................................37
Using the universal remote control ..........................................38
Updating your TV via DVB-T ...................................................42
Reset ......................................................................................42
Identification............................................................................42
Specifications .........................................................................43
Optional accessory .................................................................43
End of life disposal ..................................................................44
ENGLISH
Contents
• The illustrations and on-screen displays in this operation manual are for explanation purposes and may vary slightly from the
actual operations.
• The examples used throughout this manual are based on the LC-42XL2E model.
ENGLISH
1
LC-42XL2E-gb.indd 1
LC-42XL2E-gb.indd 1
2007/09/04 15:57:22
2007/09/04 15:57:22
• “HDMI, the HDMI logo and High-Definition Multimedia Interface are trademarks or registered trademarks of HDMI
Licensing LLC.”
Introduction
• Cleaning—Unplug the AC cord from the AC outlet before cleaning the product. Use a damp cloth to clean the product.
Do not use liquid cleaners or aerosol cleaners.
• Water and moisture—Do not use the product near water, such as bathtub, washbasin, kitchen sink, laundry tub,
swimming pool and in a wet basement.
• Do not place vases or any other water-filled containers on this product.
The water may spill onto the product causing fire or electric shock.
• Stand—Do not place the product on an unstable cart, stand, tripod or table. Doing so can cause the
The water may spill onto the product causing fire or electric shock.
• Stand—Do not place the product on an unstable cart, stand, tripod or table. Doing so can cause the
product to fall, resulting in serious personal injuries as well as damage to the product. Use only a cart,
stand, tripod, bracket or table recommended by the manufacturer or sold with the product. When
mounting the product on a wall, be sure to follow the manufacturer’s instructions. Use only the mounting
hardware recommended by the manufacturer.
stand, tripod, bracket or table recommended by the manufacturer or sold with the product. When
mounting the product on a wall, be sure to follow the manufacturer’s instructions. Use only the mounting
hardware recommended by the manufacturer.
• When relocating the product placed on a cart, it must be moved with utmost care. Sudden stops,
excessive force and uneven floor surface can cause the product to fall from the cart.
• Ventilation—The vents and other openings in the cabinet are designed for ventilation. Do not cover or
block these vents and openings since insufficient ventilation can cause overheating and/or shorten the
life of the product. Do not place the product on a bed, sofa, rug or other similar surface, since they
can block ventilation openings. This product is not designed for built-in installation; do not place the
product in an enclosed place such as a bookcase or rack, unless proper ventilation is provided or the
manufacturer’s instructions are followed.
• The LCD panel used in this product is made of glass. Therefore, it can break when the product is
dropped or impact applied. If the LCD panel is broken, be careful not to be injured by broken glass.
• Heat sources—Keep the product away from heat sources such as radiators, heaters, stoves and other heat-generating
products (including amplifiers).
• To prevent fire, never place any type of candle or naked flames on the top or near the TV set.
• To prevent fire or shock hazard, do not place the AC cord under the TV set or other heavy items.
• Do not display a still picture for a long time, as this could cause an afterimage to remain.
• There is power consumption always if main plug is connected.
• Servicing—Do not attempt to service the product yourself. Removing covers can expose you to high
voltage and other dangerous conditions. Request a qualified person to perform servicing.
The LCD panel is a very high technology product, giving you fine picture details.
Due to the very large number of pixels, occasionally a few non-active pixels may appear on the screen as a
fixed point of blue, green or red.
This is within product specifications and does not constitute a fault.
Due to the very large number of pixels, occasionally a few non-active pixels may appear on the screen as a
fixed point of blue, green or red.
This is within product specifications and does not constitute a fault.
Precautions when transporting the TV
When transporting the TV, never carry it by holding onto the speakers. Be sure to always carry the TV by two
people holding it with two hands — one hand on each side of the TV.
people holding it with two hands — one hand on each side of the TV.
Thank you for your purchase of the SHARP LCD colour TV product. To ensure safety and many years of trouble-
free operation of your product, please read the Important Safety Precautions carefully before using this product.
free operation of your product, please read the Important Safety Precautions carefully before using this product.
• Manufactured under license from Dolby Laboratories.
• “Dolby” and the double-D symbol are trademarks of Dolby Laboratories.
• “Dolby” and the double-D symbol are trademarks of Dolby Laboratories.
• The “HD ready 1080P” Logo is a trademark of EICTA.
• The DVB logo is the registered trademark of the Digital Video Broadcasting - DVB - project.
WARNING:
This is a Class A product. In a domestic environment this product may cause radio interference in which case
the user may be required to take adequate measures.
the user may be required to take adequate measures.
Trademarks
Important Safety Precautions
Dear SHARP customer
• TruSurround XT, SRS and
h symbol are trademarks of SRS Labs, Inc.
2
LC-42XL2E-gb.indd 2
LC-42XL2E-gb.indd 2
2007/09/04 15:57:23
2007/09/04 15:57:23
Introduction
1
4
5
6
7
8
7
8
9
10
11
12
13
14
15
16
17
16
17
18
19
19
20
21
22
2
3
1 TV
B (TV Standby/On) (Page 10)
2 LIGHT
D 8 9 0
When pressed, buttons that are frequently
used (P
used (P
r/s, i
k/l, 0 - 9 numeric
buttons,
A and b) will light. The lighting
will turn off if no operations are performed
within about 5 seconds. This button is
used for performing operations in low-light
situations.
within about 5 seconds. This button is
used for performing operations in low-light
situations.
3 FUNCTION
8 9 0
Press this button briefly (for more than 0.2
second), and the remote control switches
for DVD, SetTopBox or VCR operation
and currently controlled devices will be
indicated in the LCD window.
second), and the remote control switches
for DVD, SetTopBox or VCR operation
and currently controlled devices will be
indicated in the LCD window.
See page 38 for how to use this unit as a
universal remote control.
universal remote control.
4 LCD
window
8 9 0
This screen shows which device you are
currently controlling. (TV, DVD, STB or
VCR)
currently controlling. (TV, DVD, STB or
VCR)
5
0 - 9 numeric buttons
9
Set the channel.
Enter desired numbers.
Set the page in teletext mode.
6
A (Flashback)
Press to return to the previous image in
normal viewing mode.
normal viewing mode.
7 ATV
Press to access conventional analogue TV
mode.
mode.
8 DTV
Press to access DTV mode.
9
i (
k/l) (Volume)
Increase/decrease TV volume.
10
e (Mute)
TV sound on/off.
11 R/G/Y/B (Colour) buttons
On the menu screen, the coloured buttons
are correspondingly used to select the
coloured items on the screen. (e.g. EPG,
MHEG-5, TELETEXT)
are correspondingly used to select the
coloured items on the screen. (e.g. EPG,
MHEG-5, TELETEXT)
12
a/b/c/d (Cursor) 8
Select a desired item on the setting
screen.
screen.
OK
8 9
ATV/DTV/DVD/STB: Execute a command
within the menu screen.
within the menu screen.
ATV/DTV: Display the programme list
when no other menu screen is running.
when no other menu screen is running.
13 END
Exit the menu screen.
15
b (INPUT SOURCE)
Select an input source. (TV, EXT1, EXT2,
EXT3, EXT4, EXT5, EXT6, EXT7, EXT8)
(Page 10)
EXT3, EXT4, EXT5, EXT6, EXT7, EXT8)
(Page 10)
16 RADIO
DTV: Switch between Radio and Data
mode.
mode.
• When only data broadcasting (no radio
broadcasting) is transmitted by DVB,
the radio broadcasting will be skipped.
the radio broadcasting will be skipped.
17 EPG
DTV: Display the EPG screen.
(Pages 11 - 13)
(Pages 11 - 13)
18 P (
r/s) 8 9 0
Select the TV channel.
In analogue TV mode, external sources
can also be selected.
can also be selected.
19 MENU
8
ATV/DTV: Menu screen on/off.
DVD: Title menu on/off.
20
6 (Return)
Return to the previous menu screen.
21 Buttons for other useful features
Flip open the remote control cover on the
front.
front.
p (Display information)
Press to display the station information
(channel number, signal, etc.) in the upper
right corner of the screen. (Page 31)
(channel number, signal, etc.) in the upper
right corner of the screen. (Page 31)
P.
INFO
Press to display programme information
which is transmitted through digital video
broadcasting in the upper left corner of
the screen. (DTV only)
which is transmitted through digital video
broadcasting in the upper left corner of
the screen. (DTV only)
7 (Sound mode)
Select the sound multiplex mode. (Page 10)
AV
MODE
Select a video setting. (Page 25)
DEMO
Demonstrate the 100 Hz effects in a dual
screen format. (Page 24)
screen format. (Page 24)
f (WIDE MODE)
Select the wide mode. (Pages 29 and 33)
22 AQUOS LINK buttons
8 9 0
TV mode: If external equipment such as a
AQUOS BD Player is connected via HDMI
cables and is AQUOS LINK compatible,
you can use these AQUOS LINK buttons.
See pages 20 and 22 for details.
AQUOS BD Player is connected via HDMI
cables and is AQUOS LINK compatible,
you can use these AQUOS LINK buttons.
See pages 20 and 22 for details.
DVD/VCR mode: Press OPTION to pause
the picture.
the picture.
• The buttons except OPTION are
correspondingly used to select the
items on the screen.
items on the screen.
STB mode: Only the
B button can be
used to operate on STB.
14 Buttons for useful operations
1 (Subpage) (Page14)
m (Teletext)
ATV: Display analogue teletext. (Page 14)
DTV: Select MHEG-5 and teletext for DTV.
(Page 14)
(Page 14)
3 (Freeze/Hold)
Press to freeze a moving image on the
screen.
screen.
TELETEXT: Stop updating Teletext pages
automatically or release the hold mode.
automatically or release the hold mode.
k (Reveal hidden Teletext) (Page 14)
[ (Subtitle)
ATV/DTV/External: Switch subtitle
languages on/off. (Pages 14 and 28)
languages on/off. (Pages 14 and 28)
v (Top/Bottom/Full)
Set the area of magnification in teletext
mode. (Page 14)
mode. (Page 14)
Remote control unit
NOTE
• The symbols
• The symbols
8, 9 and 0 indicate that the buttons become available in respective operating mode when using
as a universal remote control.
3
LC-42XL2E-gb.indd 3
LC-42XL2E-gb.indd 3
2007/09/04 15:57:23
2007/09/04 15:57:23

