Sharp LC-52LE831E (serv.man5) Service Manual ▷ View online
LC-52/60LE830E,RU/831E,S/833E
4 – 1
LC52LE830E
Service Manual
CHAPTER 4.
REMOVING OF MAJOR PARTS
[1] REMOVING OF MAJOR PARTS (LC-52LE830E,RU/831E,S/833E)
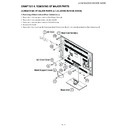
1. Removing of Stand Unit and Rear Cabinet Ass’y.
1. Remove the 1 lock screw and detach the Stand Support Cover .
2. Remove the 4 lock screws and detach the Stand Unit .
3. Remove the 1 lock screw and detach the AC Cord Cover .
4. Disconnect AC Cord .
5. Remove the 4 Vesa Hole Covers , 7 lock screws and 13 lock screws and 3 lock screws and detach the Rear Cabinet Ass’y .
3
9
5
8
2
10
Stand Support Cover
1
4
Stand Unit
10
AC Cord
7
Rear Cabinet Ass'y
11
6
AC Cord Cover
10
12
LC-52/60LE830E,RU/831E,S/833E
4 – 2
2. Removing of Speaker-L/R.
1. Remove the 8 lock screws and detach the Stand T-CON Angle .
2. Detach the Bottom Cover .
3. Disconnect SP wire.
4. Detach the Speaker-L , Speaker-R .
MAIN Unit
[SP]
[SP]
1
3 Bottom Cover
2 Stand T-CON Angle
4
Speaker-L
5
Speaker-R
LC-52/60LE830E,RU/831E,S/833E
4 – 3
3. Removing of Speaker-L/R.
1. Disconnect the following connectors from the MAIN Unit. (SB, PD, LW, PL, RC, CI)
2. Disconnect the following connectors from the POWER SUPPLY Unit. (PD, L1, AS)
3. Disconnect the following connectors from the LCD Control Unit. (LW, PL)
MAIN Unit
POWER SUPPLY Unit
[PD]
[L1]
[PL]
[LW]
LCD Control Unit
MAIN Unit
[SB]
[PD]
[CI]
[RC]
[PL]
[LW]
[AS]
LC-52/60LE830E,RU/831E,S/833E
4 – 4
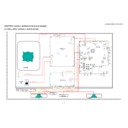
4. Removing of MAIN Unit, POWER/LED Drive Unit, Speaker (Sub Woofer), 52” LCD Panel Module Unit.
1. Remove the 5 lock screws and detach the Main PWB Shield .
2. Remove the 2 lock screws and detach the MAIN Unit .
3. Remove the Hexagon screw and detach the Terminal Angle Bottom and Earth Spring .(Only LC-52LE830E,RU)
4. Remove the 6 lock screws and detach the POWER SUPPLY Unit and Insulator Sheet .
5. Remove the 2 lock screws and detach the Speaker (Sub Woofer) .
6. Remove the 12 lock screws and detach the Center Angle-L , Center Angle-R .
7. Detach the 12 Fixing Metal Angles .
8. Remove the 9 Hooks and detach the 52” LCD Panel Module Unit .
9. Remove the 1 lock screw and detach the ECO-SW .
7
15
Insulator Sheet
52" LCD Panel
Module Unit
Module Unit
14
12
Fixing Metal
Angle
11 Center
Angle-R
10 Center
Angle-L
6
POWER SUPPLY Unit
12
Fixing Metal
Angle
12
Fixing Metal
Angle
12
Fixing Metal
Angle
12
Fixing
Metal Angle
Metal Angle
12
Fixing
Metal Angle
Metal Angle
12
Fixing
Metal Angle
Metal Angle
12
Fixing Metal
Angle
12 Fixing Metal Angle
9
9
8
Speaker
(Sub Woofer)
[SB]
5
1
3
Terminal Angle
Bottom
Bottom
4 MAIN Unit
2
Main
PWB Shield
13 Hook
13 Hook
13 Hook
17
16
20 Earth Spring
18
19 ECO-SW
[AS]

