Sharp LC-46LE700E (serv.man6) Service Manual ▷ View online
LC-32/40/46LE700E/RU/S,LU700E/S,LX700E/RU,LC-52LE700E/RU/S
4 – 4
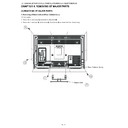
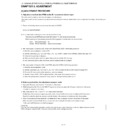
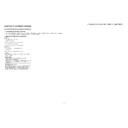
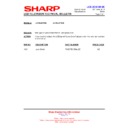
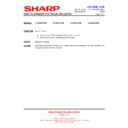
3. Removing of Connectors, R/C, LED Unit, ICON Unit and Control Button Ass’y.
1. Disconnect the following connectors from the MAIN Unit. (RA, LB, PD, KM, LP, LW)
2. Disconnect the following connectors from the POWER Unit. (PD, PL, LB, AS LA1, LA2, LA3 (except for 32/40 inch models))
3. Disconnect the following connectors from the LCD Control Unit. (LP, LW, PL)
4. Detach the R/C, LED Unit
.
5. Detach the ICON Unit
.
6. Disconnect the following connectors from the R/C, LED Unit. (RA, IM)
7. Disconnect the following connector from the ICON Unit. (IM)
8. Detach the Control Button Ass’y
.
9. Disconnect the KEY Unit
from the Control Button Ass’y
and disconnect the connection cord from the KM Connector.
䎮䎰
䰘䰎
䰘䰜
䰜䰐
䎵䎤
䎬䎰
䎵䎤
䎮䎰
䰘䰜
䰜䰘
䰘䰣
䰘䰣
䰜䰘
䰜䰐
䰘䰎
䎬䎰
䎮䎨䎼䎃䎸䏑䏌䏗
䎦䏒䏑䏗䏕䏒䏏䎃䎥䏘䏗䏗䏒䏑
䎤䏖䏖䎊䏜
䎤䏖䏖䎊䏜
䎗
䎖
䎵䎒䎦䎏䎃䎯䎨䎧䎃䎸䏑䏌䏗
䎬䎦䎲䎱䎃䎸䏑䏌䏗
䎔
䎕
䰘䎤䎔
䰘䎤䎕
䰘䎤䎖
䰘䎤䎖
䎤䎶
䎤䎶
䎖䎕䎒䎗䎓䎃䏌䏑䏆䏋䎃䏐䏒䏇䏈䏏䏖
䎖䎋䎕䎃䏌䏑䏆䏋䎃䏐䏒䏇䏈䏏䏖䎌
䎋䎖䎕䎃䏌䏑䏆䏋䎃䏐䏒䏇䏈䏏䏖䎌
䎋䎗䎓䎒䎗䎙䎒䎘䎕䎃
䏌䏑䏆䏋䎃䏐䏒䏇䏈䏏䏖䎌
䎋䎗䎓䎒䎗䎙䎒䎘䎕䎃
䏌䏑䏆䏋䎃䏐䏒䏇䏈䏏䏖䎌
䏈䏛䏆䏈䏓䏗
LC-32/40/46LE700E/RU/S,LU700E/S,LX700E/RU,LC-52LE700E/RU/S
4 – 5
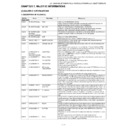
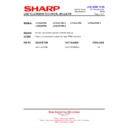
4. Removing of POWER Unit and MAIN Unit.
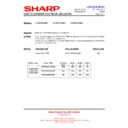
1. Remove the 4 lock screws (32 inch models)
, 6 lock screws (40/46/52 inch models)
and detach the POWER Unit .
2. Remove the 3 lock screws
and detach the MAIN Unit
.
䎳䎲䎺䎨䎵䎃䎸䏑䏌䏗
䎰䎤䎬䎱䎃䎸䏑䏌䏗
䎔
䎔
䎔
䎖
䎗
䎕
䎕
䎕
䎗䎙䎒䎘䎕䎃䏌䏑䏆䏋䎃䏐䏒䏇䏈䏏䏖
䎖䎕䎃䏌䏑䏆䏋䎃䏐䏒䏇䏈䏏䏖
䎗䎓䎃䏌䏑䏆䏋䎃䏐䏒䏇䏈䏏䏖
䎳䎲䎺䎨䎵䎃䎸䏑䏌䏗
䎳䎲䎺䎨䎵䎃䎸䏑䏌䏗
LC-32/40/46LE700E/RU/S,LU700E/S,LX700E/RU,LC-52LE700E/RU/S
4 – 6
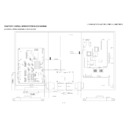
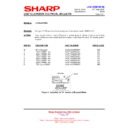
5. Precautions on replacing the POWER Unit on 32 inch models.
Before replacing the power unit (RUNTKA619WJQZ) or doing similar jobs on the 32 inch models, be sure to get C7015 discharged first. Because oth-
erwise residual voltage may be still in the PFC circuit.
erwise residual voltage may be still in the PFC circuit.
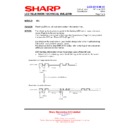
(Getting C7015 discharged)
Keep a discharge resistance (2.2K
Ω/10W) in contact between the terminals A and B of C7015 for 2-3 seconds (see below). In so doing, the C7015
will get discharged.
Discharge resistance (2.2K
Ω/10W) => VRW-KQ4AC222J
(Discharge the capacitor with a resistance as close to the above as possible.)
C7105
A
B
LC-32/40/46LE700E/RU/S,LU700E/S,LX700E/RU,LC-52LE700E/RU/S
4 – 7
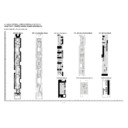
6. Removing of Support Angle.
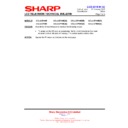
32/40 inch models
1. Remove the 6 lock screws (32 inch models)
, 16 lock screws (40 inch models) and detach the Support Angle
.
2. Remove the 8 hooks (32 inch models), 7 hooks (40 inch models) and detach the LCD Panel Module Unit.
46/52 inch models
3. Remove the 4 lock screws and 8 lock screws and detach the VESA Angle
and Support Angle .
4. Remove the 4 hooks (46 inch models), 4 hooks (52 inch models) and detach the LCD Panel Module Unit.
䎗䎙䎒䎘䎕䎃䏌䏑䏆䏋䎃䏐䏒䏇䏈䏏䏖
䎖䎕䎃䏌䏑䏆䏋䎃䏐䏒䏇䏈䏏䏖
䎶䏘䏓䏓䏒䏕䏗䎃䎤䏑䏊䏏䏈
䎔
䎔
䎔
䎔
䎶䏘䏓䏓䏒䏕䏗䎃䎤䏑䏊䏏䏈 䎗
䎗
䎶䏘䏓䏓䏒䏕䏗䎃䎤䏑䏊䏏䏈 䎗
䎔
䎔
䎹䎨䎶䎤䎃䎤䏑䏊䏏䏈 䎖
䎹䎨䎶䎤䎃䎤䏑䏊䏏䏈 䎖
䎕
䎕
䎗䎓䎃䏌䏑䏆䏋䎃䏐䏒䏇䏈䏏䏖
䎫䏒䏒䏎䎃
䎋䎖䎕䎒䎗䎓䎃䏌䏑䏆䏋䎃䏐䏒䏇䏈䏏䏖䎌
䎫䏒䏒䏎䎃
䎋䎖䎕䎒䎗䎓䎃䏌䏑䏆䏋䎃䏐䏒䏇䏈䏏䏖䎌
䎫䏒䏒䏎䎃
䎋䎗䎙䎒䎘䎕䎃䏌䏑䏆䏋䎃䏐䏒䏇䏈䏏䏖䎌
䎫䏒䏒䏎䎃
䎋䎗䎙䎒䎘䎕䎃䏌䏑䏆䏋䎃䏐䏒䏇䏈䏏䏖䎌
䎫䏒䏒䏎䎃
䎋䎗䎓䎃䏌䏑䏆䏋䎃䏐䏒䏇䏈䏏䏖䎌
䎫䏒䏒䏎䎃
䎋䎗䎓䎃䏌䏑䏆䏋䎃䏐䏒䏇䏈䏏䏖䎌
䎫䏒䏒䏎䎃
䎋䎗䎓䎃䏌䏑䏆䏋䎃䏐䏒䏇䏈䏏䏖䎌
䎫䏒䏒䏎䎃
䎋
䎖䎕䎃䏌䏑䏆䏋䎃䏐䏒䏇䏈䏏䏖
䎌
䎫䏒䏒䏎䎃
䎋
䎖䎕䎃䏌䏑䏆䏋䎃䏐䏒䏇䏈䏏䏖
䎌
䎫䏒䏒䏎䎃
䎋䎗䎓䎃䏌䏑䏆䏋䎃䏐䏒䏇䏈䏏䏖䎌
䎯䎦䎧䎃
䎳䏄䏑䏈䏏䎃䎰䏒䏇䏘䏏䏈䎃䎸䏑䏌䏗
䎫䏒䏒䏎䎃
䎋䎖䎕䎒䎗䎙䎒䎘䎕䎃䏌䏑䏆䏋䎃䏐䏒䏇䏈䏏䏖䎌
䎫䏒䏒䏎䎃
䎋䎖䎕䎒䎗䎙䎒䎘䎕䎃䏌䏑䏆䏋䎃䏐䏒䏇䏈䏏䏖䎌
䎫䏒䏒䏎䎃
䎋䎗䎓䎃䏌䏑䏆䏋䎃䏐䏒䏇䏈䏏䏖䎌

