Sharp LC-37XD10E (serv.man2) Service Manual ▷ View online
LC-37XD10E/RU
2 – 5
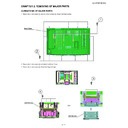
9. Remove the 2 lock screws
. Detach the Mini Unit.
10.Remove all the connectors from PWBs.
12
Wire "RA", "MS", "SP" to WH
Wire "RA" (to RA)
Wire "MS" (to RA)
Wire "MS" to WH
Wire "RA", "MS" to WH
SP R
RA
Wire "SP" to Pin
Never overlap the boss by wire
MINI UNIT
Wire "SP" curve like this
12
Wire "LV" to WH
Wire "LB" to WH
Wire "LV" (to LB)
Wire "LB" (to LB)
Wire "LB" (to LB)
Wire "LA" (to LA)
Wire "LB", "LV" to WH
HOLDER
About
HOLDE
About
Wire "LA" to WH
Never overlap this here
LC-37XD10E/RU
2 – 6
11.Remove the 5 lock screws
. Detach the Chassis Tray Unit.
13
13
Chassis Tray Unit
LC-37XD10E/RU
2 – 7
12.Remove the 14 lock screws
, and 4 lock screws
. Detach the LCD Angle.
14
15
14
Base of LCD Panel
positioning
15
37 LCD PANEL
KS-FRONT CAB
Base of LCD Panel
positioning
LCD ANG A
LCD ANG B
LCD ANG TOP-C
LC-37XD10E/RU
2 – 8
13.Remove the 2 lock screws
. Detach the D-Tuner Unit.
14.Remove the 1 lock screw
. Detach the Terminal Cover.
15.Remove the 2 lock screws
. Detach the R/C, LCD Unit.
16
17
Wire "LV" (to LV)
GASKET
D-Tuner Unit
Terminal Cover
17
16
18
18
18
Pull wire out to bottom side
Bottom
R/C, LED Unit
Wire "RA"
Connect
R/C, LED Unit
LED PWB must be insert
to gide Pin of the LED
COVER
Click on the first or last page to see other LC-37XD10E (serv.man2) service manuals if exist.

