Sharp LC-37P70E (serv.man6) Service Manual ▷ View online
23
LC-26GA5E
LC-32GA5E
LC-26P70E
LC-32P70E
LC-37P70E
22
LC-26GA5E
LC-32GA5E
LC-26P55E
LC-32P55E
LC-37P55E
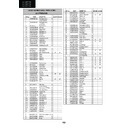
M GAMMA IN 1
160
M GAMMA IN 2
320
M GAMMA IN 3
480
M GAMMA IN 4
640
M GAMMA IN 5
800
M GAMMA IN 6
960
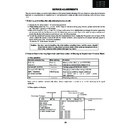
1- Display the current adjustment status at point 6. (Page 9/11 of process adjustment)
The pattern for checking the adjustment status is toggled by pressing the “6” button on the remote control.(Normal
OSD display -> “6” -> pattern for check (OSD disappears) -> “6” -> normal OSD display -> …)
2- Read the value of the luminance meter.
3- Change M GAMMA R6/M GAMMA B6 (adjustment offset value) on page 9/11 of process adjustment so that the
values of the luminance meter approach
x = 0.2757 and y = 0.2825.
(Basically, G is not changed. If adjustment fails only with R and B, then G should be reduced. In this case, the weaker
of R and B must be fixed.)
4- If G is changed in step “3”, change the values of M GAMMA G1 - M GAMMA G5 on pages 8/11 and 9/11 of process
adjustment as follows. When not changed, go to step “5”.
Offset value of M GAMMA G1 = (Offset value of M GAMMA G6)*(160/960)
Offset value of M GAMMA G2 = (Offset value of M GAMMA G6)*(320/960)
Offset value of M GAMMA G3 = (Offset value of M GAMMA G6)*(480/960)
Offset value of M GAMMA G4 = (Offset value of M GAMMA G6)*(640/960)
Offset value of M GAMMA G5 = (Offset value of M GAMMA G6)*(800/960)
5-Display the adjustment status of the current point 5. (Each time the “5” button on the remote control is pressed, the
adjustment status check pattern is toggled.)
(Normal OSD display -> “5” -> Pattern display (OSD disappears) -> “5” -> Normal OSD display ->…)
Change M GAMMA R5/M GAMMA B5 (adjustment offset value) on page 9/11 of process adjustment so that the va-
lues of the luminance meter approach
x = 0.272 and y = 0.277.
6- Repeat step “5” for GAMMA points 4, 3, 2, and 1.
7 QS Temperature NVM Data Confirmation
If during servicing of the LCD TV set, by software upgrading or by clearing NVM, it’s necessary check QS Temperature
data following the method described below:
Enter in Service Mode (Factory A).
Enter in Factory B page 1/25, by pressing “i+” key in normal R/C.
Go to page 24/25 by pressing twice “Cursor UP” key.
Verify and in case necessary modify according the attached list, “QS_D1” to “QS_D7” values, depending of the screen
size.
26 inch
32 inch
37 inch
QS_D1
58
74
51
QS_D2
76
89
72
QS_D3
92
101
90
QS_D4
105
112
106
QS_D5
118
123
121
QS_D6
254
133
254
QS_D7
255
255
255
NOTE:
-Use “P UP” or “P DOWN” for moving “up” or “down” inside the Service page.
-Use “VOL +” or “VOL -” for modifying data in “+1” or “-1” unit inside the Service page.
-Use “CURSOR RIGHT” or “CURSOR LEFT” for modifying data in “+10” or “-10” units inside the Service page.
24
LC-26GA5E
LC-32GA5E
LC-26P70E
LC-32P70E
LC-37P70E
23
LC-26GA5E
LC-32GA5E
LC-26P55E
LC-32P55E
LC-37P55E
8 Initialization to factory settings
��������������������������������������
���������������
���������������������
��������������������
�
����������������
��������������������
� ����������������������������������
� ����������������������������������������������������
� ����������������� ����������������������������������������������
���������������������������������������������������������
�������������� ��������������������������������������������������������
������������
����� �����������������������������������������������
�������������� ��������������������������������������������������������
������������
����� �����������������������������������������������
����������������������������������������������������������
����������������
��������������������������������������������
����������������
����������������������������������������������������
�������������������������������������������������������������������������������������������������������������
��������������������������������������������������������������������������������������������������������
���������������������������������������������������������������
�������������������������������������������������������������������������������������������������������������
��������������������������������������������������������������������������������������������������������
���������������������������������������������������������������
�������� ����������������������������������������������������������������������������������������������������
����������������������������������������������������������������������������������������������������
��������������������������������������
��������������������������������������
9 Lamp error detection
9.1. Functional description
This LCD colour television has a function (lamp error detection) to be turned OFF automatically for safety when the
lamp or lamp circuit is abnormal.
If the lamp or lamp circuit is abnormal, or some other errors happen, and the lamp error detection is executed, the
following occur.
1- The main unit of television is turned OFF 5 seconds after it is turned ON. (The power LED on the front side of TV
turns from green to red.)
2 - If the situation “1” happens 5 times sequentially, television can not be turned ON. (The power LED remains red.)
9.2 Countermeasures
When television is turned OFF by the lamp error detection mentioned above, it enters the adjustment process with
the power LED red. Entering the adjustment process turns OFF the error detection and turns ON TV. This enables
the operation check to detect errors in the lamp or lamp circuit.
Check whether “L ERROR RESET” on point 7, page 10/11 of the adjustment process is 1 or more. If it is 1 or more,
it indicates the lamp error detection was executed. After confirming that the lamp or lamp circuit is normal, reset the
lamp error counter pushing “OK” in the R/C. After resetting counter the label “***OK***” appears on Screen.
9.3. Reset standby cause error list
After confirming that the lamp error counter has been erased, select “STAND BY CAUSE RESET” on point 3, page
10/11 of the adjustment process and select ON using the right cursor. For execute press “OK” in the R/C and the
label “***OK***” appears on Screen.
25
LC-26GA5E
LC-32GA5E
LC-26P70E
LC-32P70E
LC-37P70E
24
LC-26GA5E
LC-32GA5E
LC-26P55E
LC-32P55E
LC-37P55E
10. Public Mode (Hotel Mode)
10.1 How to Enter in the Public Mode (Hotel Mode).
Turn on the power and enter in the Adjustment Process mode (ADJ1 or Service Mode) as usual.
In the [INIT], Page 2/11 of Service, turns ON the Public Mode option.
Turn off TV by pressing Main Power switch.
While pressing “VOL+”and “P^” keys at the same time, press Main Power switch for more than 2 seconds.
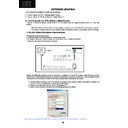
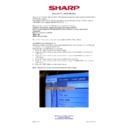
After this sequence the TV will turn on showing the Public Mode setting screen as follows:
Is possible to select each item of function by pressing cursor UP/DOWN keys on the remote control or CH(∧)(∨) keys
on the LCD TV.
The setting position of each item of functions is made by pressing cursor RIGHT/LEFT keys on the remote control
or VOL(+)(-) keys on the LCD TV.
Select ENTER position after you set all function, and press cursor RIGHT/LEFT keys on the remote control or
VOL(+)/(-) keys on the LCD TC for confi rmation.
10.2. Public Mode Settings.
1. POWER ON FIXED [
VARIABLE �FIXED]
When it is set to “FIXED” the TV is impossible to be switch off by Main Switch or Remote Control.
2. MAXIMUM VOLUME [
0 � 60]
Is possible to set the maximum volume at limited level.
3. VOLUME FIXED [
VARIABLE � FIXED]
Is possible to fi x the sound volume at limited level.
When “FIXED” is selected the sound volume before limited is fi xed.
4.VOLUME FIXED LEVEL [
0 � 60]
If “FIXED” has been selected, is possible to set a fi xed volume at the level that is choosen.
5. RC BUTTON [
RESPOND � NO RESPOND]
If “NO RESPOND” is selected, the remote control keys are inoperative.
6. PANEL BUTTON [
RESPOND � NO RESPOND]
If “NO RESPOND” has been selected, the set´s keys remain deactivated (Except POWER key).
7. MENU BUTTON [
RESPOND � NO RESPOND]
If “NO RESPOND” has been selected, “MENU” keys, both on the set and remote control, are inoperative.
8. ON SCREEN DISPLAY [YES
�
NO]
If “NO” has been selected, the On Screen Display does not appear.
9. INPUT MODE START [
NORMAL�TV (X)�INPUT1 �INPUT2�INPUT3 � INPUT4 � INPUT5 �]
When any other item than “NORMAL” has been selected, the sets will start in a selected input mode at the next
power-on.
10. INPUT MODE FIXED [
VARIABLE �FIXED]
If “FIXED” has been selected, any channels and input modes other than those selected at the start mode cannot be
picked up.
11. RESET
Cancel all Public Mode settings. (It returns to the factory settings)
12. EXECUTE
After select this item, all positions that has been selected will not be set.
MAXIMUM VOLUME [60]
VOLUME FIXED [VARIABLE]
VOLUME FIXED LEVEL [0]
RC BUTTON [RESPOND]
PANEL BUTTON [RESPOND]
MENU BUTTON [RESPOND]
ON SCREEN DISPLAY [YES]
INPUT MODE START [NORMAL]
INPUT MODE FIXED [VARIABLE]
RESET
EXECUTE
EXECUTE
POWER ON FIXED
[VARIABLE]
Public Mode
Display

