Sharp LC-37GA9EK (serv.man7) Service Manual ▷ View online
31
LC-26GA5E
LC-32GA5E
LC-32GA9E/LC-32BV9E
LC-37GA9E/LC-37BV9E
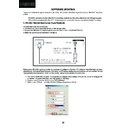
To start updating process follow next instructions.
1. Set Autoread in ON option.
2. Click on “GO” button.
3. Wait until “40” appears in Bootloader Version field.
4. Close DOS popup windows pressing any key (“Press any key to continue…”.).
5. Click on the “Erase flash” button and wait for a seconds and set the AutoRead to OFF.
6. Check in the desired software version is selected in the “Load Bin�Flash” option. If it’s
not the correct one, please double click on the file name and select it. The first time this
software is use it’s necessary to confirm writte Addressing margin as from 0x0 to 0x7ffff.
7. Click on the “Load Bin � Flash” to start updating process.
8. When the updating process finishes, the “Progress” popup window automatically closes.
If appears some problem during the updating process a error label appears in the
filename information line.
�� If the TV has problem to enters in the “Bootloader mode”, it’s possible to force it by
hardware method. This alternative method is described below:
1. Switch off TV set or hold VCTp RESET line to GND.
2. Pull down SCL line (pin 1) to GND (pin 3) in P2306 connector.
3. Switch on TV set or release VCTp RESET line.
4. Release SCL pull down after minimum of 2 seconds.
5. Check if VCTp is in bootloader mode with Autoread setting in ON.
6. Wait until “40” appears in Bootloader Version field.
7. Follow instruction from item 5 on software method.
�� Sometimes, depending on the PC hardware, the progress bar runs very fast (Normal
time: 1 minute) or some error message appears in the filename information line. This
means it’s necessary to modify some parameter of LPT port, for this reason select “LPT
Preferences” on the “File\Preferences…” menu and increase Delay from “0” to “
1” or “2”
(normally, these values are the best choice).
7. Click on the “Load Bin à Flash” to start updating process.
To start updating process follow next instructions.
1. Set Autoread in ON option.
2. Click on “GO” button.
3. Wait until “40” appears in Bootloader Version field.
4. Close DOS popup windows pressing any key (“Press any key to continue…”.).
5. Click on the “Erase flash” button and wait for a seconds and set the AutoRead to OFF.
6. Check in the desired software version is selected in the “Load Bin�Flash” option. If it’s
not the correct one, please double click on the file name and select it. The first time this
software is use it’s necessary to confirm writte Addressing margin as from 0x0 to 0x7ffff.
7. Click on the “Load Bin � Flash” to start updating process.
8. When the updating process finishes, the “Progress” popup window automatically closes.
If appears some problem during the updating process a error label appears in the
filename information line.
�� If the TV has problem to enters in the “Bootloader mode”, it’s possible to force it by
hardware method. This alternative method is described below:
1. Switch off TV set or hold VCTp RESET line to GND.
2. Pull down SCL line (pin 1) to GND (pin 3) in P2306 connector.
3. Switch on TV set or release VCTp RESET line.
4. Release SCL pull down after minimum of 2 seconds.
5. Check if VCTp is in bootloader mode with Autoread setting in ON.
6. Wait until “40” appears in Bootloader Version field.
7. Follow instruction from item 5 on software method.
�� Sometimes, depending on the PC hardware, the progress bar runs very fast (Normal
time: 1 minute) or some error message appears in the filename information line. This
means it’s necessary to modify some parameter of LPT port, for this reason select “LPT
Preferences” on the “File\Preferences…” menu and increase Delay from “0” to “
1” or “2”
(normally, these values are the best choice).
8. When the updating process finishes, the “Progress” pop up window automatically closes. If appears some problem
during the updating process a error label appears in the filename information line.
If the TV has problem to enters in the “Bootloader mode”, it’s possible to force it by hardware method. This alternative
method is described below:
1.Switch off TV set or hold VCTp RESET line to GND.
2.Pull down SCL line (pin 1) to GND (pin 3) in P2306 connector.
3.Switch on TV set or release VCTp RESET line.
4.Release SCL pull down after minimum of 2 seconds.
5.Check if VCTp is in bootloader mode with Autoread setting in ON.
6.Wait until “40” appears in Bootloader Version field.
7.Follow instruction from item 5 on software method.
Sometimes, depending on the PC hardware, the progress bar runs very fast (Normal time: 1 minute) or some error mes-
sage appears in the filename information line. This means it’s necessary to modify some parameter of LPT port, for this
reason select “LPT Preferences” on the “File\Preferences…” menu and increase Delay from “0” to “1” or “2” (normally,
these values are the best choice).
these values are the best choice).
RS-232C METHOD DESCRIPTION.
The hardware tools requirement are:
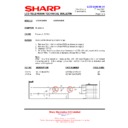
1. A Modem-null (Cross type) DB9 female to DB9 female cable.
2. An adaptor DB9 male to mini-Din 9 pin male cable (Sharp Code: QCNWGA015WJPZ)
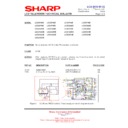
3. Make the connections as indicated in the figure:
Before using RS-232C updating method is necessary to configure a Terminal PC software.
HyperTerminal has been selected as a Terminal software because it’s include in all Windows
versions as an accessory, and you can find it inside “Accessories\Communications” folder. For
this reason, please follow carefully the next steps:
1. First time HyperTerminal is used, it’s necessary to
configure some settings. Follows next action to configure
two connection: low speed (9600bps) and high speed
(115200bps).
2. Create a New Connection file with name “P55_9600bps”.
3. Select a free COM port and select the Port Settings
properties as follows:
Computer
TV set

