Sharp LC-37GA3E (serv.man27) User Manual / Operation Manual ▷ View online
34
Using external equipment
DVD player
Component cable
(commercially available)
(commercially available)
When using component cable,
select “COMPONENT” for “Input
Select” in the menu.
select “COMPONENT” for “Input
Select” in the menu.
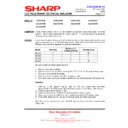
Connecting a DVD player
You can use the INPUT 3 terminal when connecting to a DVD player and other audiovisual equipment.
Game console/Camcorder
Composite video cable
(commercially available)
(commercially available)
S-video cable
(commercially available)
(commercially available)
Connecting a game console or camcorder
A game console, camcorder and some other audiovisual equipment are conveniently connected using the
INPUT 4 terminals.
INPUT 4 terminals.
NOTE
• The S-video terminal has priority over the video terminals.
• You can also connect the game console to INPUT 1 or 3 terminals to enjoy clearer picture.
• When using INPUT 4 terminals, select “INPUT 4”, then “AV Input” in the “Option” menu (see page 45).
• You can also connect the game console to INPUT 1 or 3 terminals to enjoy clearer picture.
• When using INPUT 4 terminals, select “INPUT 4”, then “AV Input” in the “Option” menu (see page 45).
To watch an image from this input terminal, you
may select the input source (see page 38) and
the input signal type (see page 43).
may select the input source (see page 38) and
the input signal type (see page 43).
To watch an image from this input terminal, you
may select the input source (see page 38) and
the input signal type (see page 43).
may select the input source (see page 38) and
the input signal type (see page 43).
Connect a
commercially available
SCART cable for audio
SCART cable for audio
output.
or
LC-37GA3E(E)-g
04.6.25, 8:00 AM
34
35
Using external equipment
NOTE
• Macintosh adaptor may be required for use for some Macintosh computers.
• When connecting to a PC, the correct input signal type is automatically detected. (See page 43.) If the PC image does
• When connecting to a PC, the correct input signal type is automatically detected. (See page 43.) If the PC image does
not come in clearly, you may need to set the Auto Sync. adjustment in the “Setup” menu. (See page 37.)
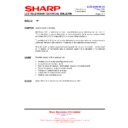
Connecting a PC
Use the INPUT5 terminals to connect a PC.
NOTE
• The PC input terminals are DDC1/2B-compatible.
• Refer to page 52 for a list of PC signals compatible with the TV.
• Refer to page 52 for a list of PC signals compatible with the TV.
ø 3.5 mm stereo minijack cable
(commercially available)
(commercially available)
PC
ø 3.5 mm stereo minijack cable
(commercially available)
(commercially available)
RGB/DVI conversion cable (commercially available)
DVI cable
(commercially available)
(commercially available)
To watch the image from this
input terminal, you may
select input source (see
page 38) and input signal
type (see page 43).
input terminal, you may
select input source (see
page 38) and input signal
type (see page 43).
PC
LC-37GA3E(E)-g
04.6.25, 8:00 AM
35
36
Rear view
Using external equipment
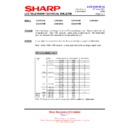
Connecting external speakers
Make sure to connect the speaker terminal and
cable polarity (L, +) properly.
cable polarity (L, +) properly.
• The speaker terminals have plus (L) and minus (+)
polarity.
• Plus is red and minus is black.
• The cables are also divided into plus and minus.
• When connecting the left/right speakers, be sure to
• The cables are also divided into plus and minus.
• When connecting the left/right speakers, be sure to
connect the plus/minus terminals with the correct cables.
NOTE
• Unplug the AC cord from the AC outlet before installing
the speakers.
CAUTION
• Make sure external speakers have 4 ohm and 10 watt
specifications.
• Connect the plus/minus terminals with the correct cables.
Incorrect connection may cause a short.
How to connect the
speaker cable
Pull up the
lid.
lid.
Insert the
edge of the
cable.
edge of the
cable.
1
1
1
1
1
2
2
2
2
2
3
3
3
3
3
Put the lid
back
down.
back
down.
Make sure to disconnect the connected speaker
cables in advance when connecting external
speakers.
cables in advance when connecting external
speakers.
External Audio Bypass
External Audio Bypass automatically optimises the
audio quality to suit internal (supplied) speaker.
audio quality to suit internal (supplied) speaker.
Press MENU and the MENU screen displays.
Press c/d to select “Setup”.
1
2
Press c/d to select “Yes” or “No”, and then
press OK.
press OK.
5
Press a/b to select “Speaker Setup”, and
then press OK.
then press OK.
3
Press a/b to select “External Audio
Bypass”, and then press OK.
Bypass”, and then press OK.
4
NOTE
• External Audio Bypass is greyed out when Dolby Virtual
is set to “On”.
• When Dolby Virtual is on, External Audio Bypass
automatically sets to “Yes”.
Description
Sets the optimum audio for the internal
(supplied) speaker.
(supplied) speaker.
When you are using your own speakers,
output the original sound.
output the original sound.
Selected item
No
Yes
LC-37GA3E(E)-g
04.6.25, 8:00 AM
36
37
Useful adjustment settings
1
2
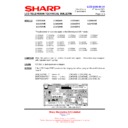
Image position (for TV/AV input mode)
For adjusting a picture’s horizontal and vertical
position.
position.
Press MENU and the MENU screen displays.
Press c/d to select “Setup”.
Description
Centres the image by moving it to the left or
right.
right.
Centres the image by moving it up or down.
Selected item
H-Pos.
V-Pos.
4
5
3
Press a/b to select “Position”, and then
press OK.
press OK.
Press a/b to select “H-Pos.” or “V-Pos.”.
Reset
H-Pos.
[0]
–10
+10
V-Pos.
[0]
–20
+20
Press c/d to adjust the item to your desired
position.
position.
NOTE
• For resetting all adjustment items to the factory preset
values, press a/b to select “Reset”, and then press OK.
• Adjustments are stored separately according to input
source.
• This function is available for AV input mode and TV tuner
mode.
4
Press c/d to select “On”, and then press
OK.
OK.
Press MENU and the MENU screen displays.
Press c/d to select “Option”.
Press a/b to select “Audio Only”, and then
press OK.
press OK.
1
2
3
Audio Only
When listening to music from a music programme, you
can set the Display off and enjoy audio only.
can set the Display off and enjoy audio only.
Description
Audio is output without screen image.
Both screen images and audio are output.
Selected item
On
Off
1
2
Auto Sync. adjustment (PC input
mode only)
mode only)
For automatically adjusting the PC image.
Press MENU and the MENU screen displays.
3
Press a/b to select “Auto Sync.”, and then
press OK.
press OK.
Press c/d to select “Yes”, and then press
OK.
OK.
• Auto Sync. starts and “Adjusting the image”
displays.
NOTE
• When Auto Sync. is successful, “Auto Sync completed
successfully” displays. If not, Auto Sync. failed.
• Auto Sync. may fail even if “Auto Sync completed
successfully” displays.
• Auto Sync. is likely to succeed when an input PC image
has wide vertical stripes (ex. pattern with high contrast
stripes, or cross-hatched).
It may fail when an input PC image is solid (low contrast).
stripes, or cross-hatched).
It may fail when an input PC image is solid (low contrast).
• Be sure to connect the PC to the TV and switch it on before
starting Auto Sync.
30%
4
Press c/d to select “Setup”.
LC-37GA3E(E)-h
04.6.25, 8:02 AM
37


