Sharp LC-37D65 (serv.man3) Service Manual ▷ View online
LC-32D65E/RU, LC-37D65E/RU
2 – 5
12.Remove the 2 lock screws
, 4 hooks and detach the LCD Panel Module.
13.Remove the 4 lock screws
, and detach the LCD Holder A, B.
14.Remove the 6 lock screws
and detach the Panel Support Angle.
1
2
3
Panel Support Angle
Panel Support Angle
LCD Holder A
LCD Panel
Module
LCD Holder B
LCD Holder B
LCD Holder A
Hook
Hook
Hook
Hook
Hook
2
1
1
3
3
2
2
2
LC-32D65E/RU, LC-37D65E/RU
2 – 6
15.Remove the 10 lock screws
10 lock screws
, 5 lock screws
and Bezel Ass’y.
16.Detach the TFT LCD Panel, Lens Sheet and Diffusion Plate.
17.Detach the Panel Chassis Ass’y Lamp Holder (L), Lamp holder (R) and the Lamp Unit.
18.Remove the 4 lock screws
and GND-PWBs
1
2
3
4
TFT LCD PANEL
Lens Sheet
Diffusion Plate
Bezel Ass'y
Panel Chassis Ass'y
Back Light Chassis Ass'y
Lamp Holder(L)
Lamp Holder(R)
Lamp Socket
Lamp Unit
GND-PWB
GND-PWB
3
3
3
2
1
3
3
3
4
LC-32D65E/RU, LC-37D65E/RU
2 – 7
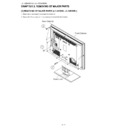
[2] REMOVING OF MAJOR PARTS (LC-37D65E, LC-37D65RU)
1. Remove the 4 lock screws
and detach the Stand Unit.
2. Remove the 4 lock screws
, 7 lock screws
, 1 lock screw
and detach the Rear Cabinet.
1
2
3
4
Front Cabinet
Rear Cabinet
Stand Unit
2
3
4
1
LC-32D65E/RU, LC-37D65E/RU
2 – 8
3. Remove the 6 lock screws
, 2 lock screws
, 2 lock screws
, 2 lock screws
, 1 lock screw
and detach the Full Shield.
4. Disconnect all the connectors from all the PWBs.
1
2
3
4
5
[LB]
[BtoB]
[SP]
[RA]
[LP] [LW]
Full Shield
MAIN unit
POWER unit
INVERTER unit
LCD Control unit
1
2
3
4
5
[LB]
[PD]
[PD]
[LW]
[LP]
Click on the first or last page to see other LC-37D65 (serv.man3) service manuals if exist.

