Sharp LC-37AD1E (serv.man5) Service Manual ▷ View online
5
LC-37AD1E
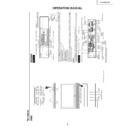
OPERATION MANUAL
P
a
rt
names
OP
C in
di
ca
to
r*
ST
AN
DB
Y/
ON
i
n
d
ic
a
to
r
MA
IN
P
O
W
E
R
bu
tt
on
(
)
OP
C se
ns
or
Displ
a
y
ST
AN
DB
Y/
ON
b
u
tt
o
n
(
)
IN
PU
T
bu
tt
on
VO
LU
ME
b
u
tt
o
n
s
(
–
/
+
)
CH
AN
NE
L bu
tt
on
s
(C
H
/
)
Re
mo
te
c
o
n
tr
ol
se
ns
or
*O
PC
: Op
ti
ca
l Pi
ct
ur
e
Co
nt
ro
l
IN
PU
T 1
te
rm
in
a
l
(S
CA
R
T
)
IN
PU
T 3 te
rm
in
a
ls
(
Y
,
P
B
(C
B
)
,
P
R
(C
R
))
IN
PU
T 2
te
rm
in
a
l
(S
CA
R
T
)
DI
SP
LA
Y OU
TP
UT
3
te
rm
in
a
l
DI
SP
LA
Y OU
TP
UT
1 te
rm
in
a
l
A
C
IN
PU
T te
rm
in
al
CL
EA
R
*
PO
WE
R bu
tt
on
RS
-2
32
C te
rm
in
a
l
IN
PU
T 4 te
rm
in
a
l (S
-V
ID
EO
)
PC
I
N
P
U
T
t
e
rm
in
a
l
(A
UD
IO
)
IN
PU
T 4 te
rm
in
a
ls
(
A
U
D
IO
)
IN
PU
T
3 te
rm
in
a
l
(S
CA
R
T
)
A
V
OU
TP
UT
t
e
rm
in
a
l
(V
ID
EO
)
A
V
OU
TP
UT
te
rm
in
al
s
(A
UD
IO
)
P
C
IN
PU
T te
rm
in
al
(A
NA
LO
G RG
B)
*
If
the
A
VC
Sys
tem
is
swi
tch
ed
on
but
it
doe
s
not
app
ear
to
be
ope
rat
ing
corr
ectl
y, it
may
nee
d
rese
tti
ng.
In
thi
s
cas
e, pr
ess
CLE
AR
, s
how
n i
n
t
he
dia
gra
m,
lig
htl
y
w
ith
th
e e
nd
of
a b
a
llpoi
nt
pen
or
ot
her
po
int
ed
obj
ect
.
Thi
s w
ill
r
eset
th
e S
yst
em
as
sho
wn
bel
ow
.
•
A
V
MO
DE
r
ese
ts
t
o
US
ER
.
•
An
al
og
ue
T
V
ch
an
ne
l
reset
s
to
c
h
a
n
n
e
l 1
.
•
Du
al
s
c
reen
r
e
s
e
ts
to
n
o
rm
a
l.
•
Au
di
o
se
tt
in
g in
it
ia
lise
s.
•
Do
lb
y V
ir
tu
a
l
re
s
e
ts
to
O
ff.
•
Im
ag
e po
si
ti
on
i
s
in
it
ia
lise
d.
•
In
pu
t La
be
l is
i
n
it
ia
lis
e
d
.
**
The
pr
oduct
may
not
fun
c
ti
on whe
n r
ece
ivi
ng str
ong
noi
se (e.
g
. exc
ess
ive
sta
tic
ele
c
tr
ici
ty
, pow
er
sur
ge
or
abn
or
mal
vol
tag
e
due
to lig
htn
ing
) or if ope
rat
ion
s ar
e per
for
med
inc
orr
ect
ly
. In suc
h cas
e, pr
ess
DIG
IT
A
L
RES
ET and
tr
y o
per
ati
ng
aga
in.
NO
T
E
•
Pr
essing
CLEAR
will not work if the System is in standby mode (indicator lights r
ed).
•
Pr
essing
CLEAR
will not delete channel pr
eset and PIN. See page for r
esetting the PIN when you know it. See page for
initialising to the factor
y pr
eset values when you forget your PIN.
AN
TE
NN
A IN
PU
T te
rm
in
a
l
A
VC Sy
stem
ST
AN
DB
Y/
ON
in
di
ca
to
r
DI
SP
LA
Y OU
TP
UT
2
te
rm
in
a
l
IN
PU
T 4 te
rm
in
a
l (V
ID
EO
)
(H
ow
t
o
op
en
t
h
e
d
o
o
r)
Fr
ont vie
w
Rear
vie
w
He
ad
ph
on
e
D
C
OU
TP
UT
te
rm
in
al
*
(W
he
n
co
nn
ec
ti
ng
h
e
a
d
p
h
o
n
e
s
, t
h
e
so
un
d fr
om
th
e sp
ea
ke
rs
i
s
mu
te
d.
)
DI
GI
T
A
L
R
E
S
E
T
**
DI
GI
T
A
L
-A
U
D
IO
OU
TP
UT
te
rm
in
al
**
EX
TE
RN
AL
S
P
E
AK
ER
te
rm
in
a
ls
DI
GI
T
A
L
A
N
T
E
N
N
A
IN
PU
T te
rm
in
a
l
DI
GI
T
A
L
AN
TE
NN
A
OU
TP
UT
t
e
rm
in
a
l
RS
-2
32
C
te
rm
in
a
l*
*T
er
mi
na
l fo
r ex
pa
nd
ed
f
u
n
c
ti
o
n
a
lit
y
i
n
th
e ne
ar
f
u
tu
re
.
**
Co
nn
ec
t a di
gi
ta
l au
di
o eq
ui
pm
en
t.
CO
MM
ON
IN
TE
RF
AC
E sl
ot
6
LC-37AD1E
P
a
rt
names
3
2
4
5
6
7
8
9
15
10
11
12
13
14
18
19
17
11
6
20
22
21
23
24
25
26
27
28
29
30
31
NO
T
E
•
Wh
en
us
in
g th
e r
emot
e co
nt
rol
un
it
, po
in
t it
at
th
e Di
sp
la
y.
Remot
e con
tr
ol un
it
1
(S
T
A
ND
BY
/O
N)
To
sw
it
ch
t
h
e
p
o
w
e
r o
n
an
d
of
f.
2
(
R
e
v
ea
l
hi
d
d
e
n
f
o
r
TE
LE
TE
XT
)
TEL
ETE
XT mod
e: Dis
p
la
y
hid
den
cha
rac
ter
s.
3
(
S
U
B
T
IT
L
E
f
o
r
TE
LE
TE
XT
)
An
al
og
ue
TV
: T
o
tu
rn
th
e su
bt
it
le
s on
an
d of
f.
Di
gi
ta
l mo
de
: Di
sp
la
y th
e su
bt
it
le
s
e
le
c
ti
o
n
s
c
re
e
n
.
4
(F
RE
EZ
E/
HO
LD
)
TV
/E
xt
er
na
l
in
pu
t
mo
de
:
Ch
an
ge
t
h
e
s
ti
ll
i
m
a
g
e
m
o
d
e
.
TE
LE
TE
XT
mo
de
:
Fr
ee
ze
a
mu
lt
i-
pa
ge
on
sc
reen
wh
il
e
ot
he
r
pa
ge
s ar
e
au
to
ma
ti
ca
ll
y up
da
te
d.
Pr
es
s
ag
ai
n
to
r
e
tu
rn
to
th
e no
rm
al
i
m
a
g
e
.
5
(D
U
A
L sc
re
en
)
Set the dual
pict
ur
e mode
.
Pr
ess
agai
n to
re
tur
n
to
nor
mal
vi
ew
.
6
(W
ID
E MO
DE
/
T
/B
/F
)
TV
/E
xt
er
na
l in
pu
t mo
de
: Ch
an
ge
th
e wi
de
im
ag
e mo
de
.
TE
LE
TE
XT
mo
de
: Se
t th
e ar
ea
of
ma
gn
if
ic
at
io
n.
(f
ul
l/
up
pe
r
ha
lf
/l
ow
er
h
a
lf
)
7
A
V MO
DE
Se
le
ct
a
vi
de
o
se
tt
in
g:
A
V
MO
DE
(S
T
A
N
D
A
R
D
,
DY
NA
MI
C,
MO
VI
E,
GA
ME
,
US
ER
),
PC
MO
DE
(S
T
A
N
D
A
R
D
,
US
ER
)
8
S
OU
ND
S
e
le
c
t th
e so
un
d mu
lt
ip
le
x mo
de
.
9
Se
le
ct
V
ir
tu
a
l D
o
lb
y
S
u
rr
oun
d
se
tt
in
gs
.
10
(F
la
sh
ba
c
k
)
Pr
es
s to
r
e
tu
rn
to
th
e pr
ev
io
us
ch
an
ne
l in
no
rm
a
l vi
ew
in
g
mo
de
.
Pr
es
s
to
r
e
tu
rn
to
t
h
e
p
revi
ou
s
pa
ge
i
n
TE
LE
TE
XT
m
o
d
e
.
11
–
/
+
(V
OL
UM
E)
Se
t th
e vo
lu
me
.
12
LI
ST
Di
gi
ta
l
mo
de
:
Di
sp
la
y
th
e
f
a
v
o
u
ri
te
d
ig
it
a
l p
rog
ra
mm
e
li
st
.
13
GU
ID
E
Di
gi
ta
l mo
de
: T
o
Di
sp
la
y EP
G (E
le
ct
ronic
Pr
og
ra
mm
e Gu
id
e)
sc
reen
.
14
DT
V ME
NU
Di
gi
ta
l mo
de
: Di
sp
la
y th
e di
gi
ta
l TV
m
e
n
u
sc
reen
.
15
EN
D/
EX
IT
Di
gi
ta
l mo
de
: T
u
rn
of
f
th
e On
S
c
re
e
n
Di
sp
la
y.
An
al
og
ue
mo
de
:
T
u
rn
of
f th
e
an
al
og
ue
me
nu
sc
re
e
n
an
d
di
sp
la
y th
e ch
an
ne
l in
fo
rm
a
ti
o
n
.
16
(D
IS
PL
A
Y
I
N
F
O
R
M
A
T
IO
N)
log
ue
TV
:
Dis
p
la
y
the
pr
ogram
me
num
ber
and
tim
e.
Di
gi
ta
l TV
: Di
sp
la
y th
e pr
og
ra
mm
e in
fo
rm
a
ti
o
n
.
17
(
IN
P
U
T
SO
UR
CE
)
Se
le
ct
an
in
pu
t so
ur
ce
. (T
V
, DT
V
, IN
PU
T 1,
IN
PU
T 2,
IN
PU
T
3
, IN
PU
T 4,
P
C
)
18
(
T
OP
O
v
e
rvi
e
w
f
or
TE
LE
TE
XT
)
TE
LE
TE
XT
mo
de
: Di
sp
la
y an
in
de
x pa
ge
fo
r CE
EF
AX
/F
LO
F
in
fo
rm
a
ti
o
n
. TO
P Ov
er
vi
ew
fo
r TO
P pr
og
ra
mm
e.
19
(T
EL
ET
EX
T)
Sel
ect
the
TEL
ETE
XT
mod
e.
(al
l TV
ima
ge,
DTV
/DA
T
A
ima
ge,
al
l TE
XT
i
m
a
g
e
, TV
/T
EX
T im
ag
e)
Di
gi
ta
l
mo
de
:
Se
le
ct
DT
V
da
ta
br
oa
dc
as
ti
ng
an
d
TE
LE
TE
XT
.
20
SE
LE
CT
To
se
le
ct
e
it
h
e
r
sc
reen
t
o
be
a
c
ti
v
e
in
D
u
a
l
sc
reen
m
o
d
e
.
21
R
O
T
A
TE
Se
t
th
e
or
ie
nt
at
io
n
of
t
h
e
p
ic
tu
re.
Wh
en
yo
u
pr
es
s
RO
T
A
TE
th
e
cu
rr
ent
mo
de
di
sp
la
ys
.
Wh
il
e
th
e in
di
ca
to
r di
sp
la
ys
, ea
ch
t
im
e
yo
u pr
es
s th
e bu
tt
on
i
t wi
ll
ch
an
ge
a
s
fo
ll
ow
s:
No
rm
a
l
→
Mi
rr
or
→
Up
si
de
Do
wn
→
Ro
ta
te
22
0 –
9
TV
/D
TV
/E
xt
er
na
l in
pu
t mo
de
: Se
t th
e ch
an
ne
l.
TE
LE
TE
XT
m
o
d
e
: S
e
t t
h
e
p
a
g
e
.
23
DT
V
Sw
it
ch
f
rom
th
e Di
gi
ta
l-
TV
m
o
d
e
an
d ot
he
r in
pu
t so
ur
ce
.
Fo
r
ex
am
pl
e,
wh
en
vi
ew
in
g
an
im
ag
e
fr
om
IN
PU
T2
,
pr
es
s
DT
V
to
sw
it
ch
to
th
e
Di
gi
ta
l-
TV
mo
de
.
Pr
es
s
DT
V
ag
ai
n
to
re
tu
rn
to
I
N
P
U
T
2
sc
reen
.
24
Co
lo
ur
(
R
E
D
/G
R
E
E
N
/Y
E
L
L
O
W/
BL
UE
)
TE
LE
TE
XT
m
o
d
e
: S
e
le
c
t
a
pa
ge
.
DTV mode: The colour
ed buttons ar
e used to select
co
rr
es
po
nd
in
gl
y
to
t
h
e
c
o
lo
u
red
it
em
s
in
t
h
e
m
e
n
u
sc
re
e
n
.
25
CH
/
CH
TV
/E
xt
er
na
l
in
pu
t
mo
de
:
Se
le
ct
t
h
e
c
h
a
n
n
e
l.
TE
LE
TE
XT
m
o
d
e
: S
e
t t
h
e
p
a
g
e
.
26
SL
EE
P
Se
t th
e Sl
ee
p ti
me
r.
27
(M
UT
E)
M
u
te
th
e so
un
d.
28
ME
NU
Di
sp
la
y
th
e
an
al
og
ue
T
V
me
nu
s
c
re
e
n
.
29
OK
Ex
ec
ut
e a co
mm
an
d.
30
RE
TU
RN
ME
NU
m
o
d
e
: R
e
tu
rn
to
t
h
e
p
revi
ou
s
me
nu
s
c
re
e
n
.
31
/
/
/
(
C
u
rsor
)
S
e
le
c
t a de
si
re
d
it
em
o
n
th
e se
tt
in
g sc
re
e
n
.
DT
V
mo
de
:
Se
le
ct
t
h
e
c
h
a
n
n
e
l w
it
h
/
.
Select the pr
ogramme infor
mation ar
ea when EPG is
di
sp
la
ye
d.
7
LC-37AD1E
Preparation
Where
to p
lace
the S
ystem
“Sy
ste
m
”
mea
ns
the
Di
spl
ay
and
A
VC
Sys
tem
. F
irs
t s
e
le
ct
the
lo
cat
ion
wh
er
e t
o
p
lac
e t
he
Sys
tem
.
1
2
Selecting the location of the System
•
Select a place with no dir
ect sunlight and good ventilation.
•
The Display and the A
VC System ar
e connected by the system cable.
Setting the System in place
Handling the Displa
y
CA
UTION
•
When using the
TV with the supplied stand attac
hed,
do not
remo
ve the speaker
. Doing so ma
y disturb the balance
leading to pr
oduct dama
g
e
or per
sonal injur
y
.
•
Do not r
emove the stand and speaker fr
om the Display unless
using an optional bracket to mount it.
•
Keep enough space above and behind the Display
.
•
The Display weighs about 25kg. Move it with two or mor
e
people.
Handling the A
VC System
CA
UTION
•
Do not put a VCR or other device on the A
VC System.
•
Keep enough space above and on the sides of the A
VC System.
•
Do not block the ventilation openings on the top and left side, and
the exhaust fan on the right side.
•
Do not spr
ead a thick cloth beneath the A
VC System, or cover it
with one, as this can cause overheating and r
esult in malfunction.
Sy
st
em
c
a
b
le
Di
sp
la
y
A
V
C Sy
st
em
If you want to keep a longer distance between the
Display and A
VC System, please pur
chase the optional
system cable AN-07SC1 (about 7 meters).
IMPOR
TANT
•
Y
ou cannot use e
xternal speaker
s when y
ou are using the optional
system cab
le (AN-07SC1).
CA
UTION
Ad
ju
st
th
e
sc
re
en
wi
th
bo
th
ha
nd
s.
Pu
t
on
e
ha
nd
on
th
e
Di
sp
la
y an
d ti
lt
th
e sc
re
en
wh
il
e st
ea
d
y
in
g th
e st
an
d
wi
th
y
o
ur
ot
he
r
ha
nd
.
Y
o
u ca
n ad
ju
st
th
e sc
re
en
ve
rt
ic
al
ly
up
to
4
de
gr
ee
s
fo
rw
ar
d or
6 de
gr
ee
s ba
ck
-
wa
rd
,
or
r
o
ta
te
10
de
gr
ee
s
ho
ri
zo
nt
al
ly
.
10
c
m
or
m
o
re
5 cm
o
r mo
re
5 cm or mor
e
on both sides
Ke
ep
e
n
o
u
g
h
sp
ac
e
Th
er
e i
s
an
e
x
h
a
u
s
t f
a
n
o
n
th
e ri
gh
t si
de
.
Sy
st
em
c
a
b
le
A
VC
Sys
tem
(r
ear
vi
e
w
)
AC
c
o
rd
Dis
p
la
y (r
ear
v
ie
w
)
AC
c
o
rd
Sy
st
em
c
a
b
le
(G
RE
Y)
Co
nn
ec
t th
e pl
ug
f
ir
m
ly
un
ti
l th
e ho
ok
s on
b
o
th
si
de
s cl
ic
k.
(W
HI
TE
)
Co
nn
ec
t th
e pl
ug
i
n
to
th
e te
rm
in
a
l an
d se
cu
re
it
b
y
ti
gh
te
ni
ng
t
h
e
th
um
b sc
rews
.
Setti
ng th
e Sys
tem
After putting the Display and the A
VC System in place, connect the system cables and AC cor
ds. Use the
cable clamps for bundling the cables.
Pre
ss do
wn
the
tw
o
upp
er hoo
ks to rem
o
ve
the
co
ver
to
war
d y
ou.
Conn
ecti
ng t
he s
yste
m ca
b
le and
the
A
C
co
rd
to
the
Dis
pla
y
1
2
3
Remo
ving th
e te
rmin
al c
o
ver
Conn
ecti
ng t
he s
yste
m ca
b
le and
the
A
C
co
rd
to
the
A
VC S
yste
m
CA
UTION
•
T
O
PR
EV
EN
T
RI
SK
OF
EL
EC
TR
IC
SH
OC
K,
DO
NO
T
T
O
U
C
H
UN
-I
NS
UL
A
T
E
D
P
A
R
TS
OF
AN
Y
CA
BL
ES
WI
TH
TH
E
A
C
CO
RD
C
O
N
N
E
C
T
E
D
.
Pre
ss
the
tw
o ho
oks
to
war
d the
ce
ntr
e
o
f t
h
e
Dis
p
la
y an
d r
emo
ve t
h
e
co
ver t
o
ward y
ou.
(G
RE
Y)
(W
HI
TE
)
(B
LA
CK
)
(B
LA
CK
)
8
LC-37AD1E
Preparation
4
5
Attac
hing the c
lamps and b
undling the cab
les with the c
lamp
Closing the terminal co
ver
Cab
le c
lamp (Lar
g
e
)
Inser
t the cable
clamp in the hole
on the Display leg
as shown.
Cab
le c
lamp (Small)
Peel of
f the seal
on the back and
attach as shown.
Displa
y (rear vie
w)
Cab
les come out
fr
om the small
opening.
Remo
ving
the s
tand
and s
peake
r
This
unit
has d
etac
hab
le ty
pe sp
eaker
.
Y
ou
can
de
tac
h
t
he
sys
tem
sp
eak
er
whe
n u
s
in
g e
x
te
rnal
sp
eak
er
.
Bef
or
e r
emov
ing
(or
att
ach
ing
) sp
eak
er
, un
plu
g
th
e AC
cor
d fr
om th
e AC
out
let
and
the
sys
tem
cab
le f
rom t
h
e
Dis
p
la
y.
CA
UTION
•
Do
not
re
mo
ve th
e s
tan
d a
nd
spe
ake
r f
rom
the
Di
spl
a
y
u
n
le
ss
usi
ng
an
opt
ion
a
l
bra
c
ket
to
mo
unt
it
.
•
Whe
n usi
ng
the
TV
wit
h
the
sup
pli
ed
sta
nd
att
a
c
hed,
do
not
rem
o
ve
the
spe
ake
r.
Doi
ng
so
ma
y
dis
tur
b
the
ba
lan
ce
lea
d
in
g t
o
p
rodu
ct
dam
a
g
e o
r p
e
rsona
l i
n
ju
ry
.
Bef
ore atta
c
hing/re
mo
ving
spe
aker
•
Bef
or
e per
for
m
in
g w
o
rk
ma
ke
sur
e to
tu
rn
o
ff t
he
Sys
tem
.
•
Bef
or
e pe
rf
or
min
g
wor
k
spr
ead
c
ush
ion
ing
o
ver
t
he
bas
e
ar
ea
to
lay
t
he
Dis
p
la
y
on.
T
h
is
w
ill
p
reve
nt
it
fr
om
bei
ng dam
age
d.
CA
UTION
•
Th
e
sp
ea
ke
r
te
rm
in
a
ls
o
n
th
e
Di
sp
la
y
ar
e o
n
ly
fo
r
th
e
at
ta
ch
ed
s
p
e
a
k
e
r.
Do
n
o
t c
o
n
n
e
c
t a
n
y
t
h
ir
d
pa
rt
y
p
lu
g
or
s
p
e
a
k
e
r
to
th
e te
rm
in
al
.
•
In
se
rt
th
e
sp
ea
ke
r
pl
ug
c
o
m
p
le
te
ly
in
to
t
h
e
t
e
rm
in
a
l.
NO
T
E
•
To
at
ta
ch
t
h
e
s
p
e
a
k
e
r a
n
d
s
ta
n
d
,
pe
rf
o
rm
th
e
ab
ov
e
st
ep
s
in
r
e
v
e
rs
e
o
rde
r.
2
34
Unf
ast
en
the
scr
ews
use
d to
sec
ur
e
the
spe
ake
r in
pla
ce.
Take hold of the speaker and slowly slide it
sid
ewa
ys.
(Th
e
spe
ake
r plu
gs ar
e
sti
ll ins
e
rt
ed
, so mak
e
sur
e no
t t
o
p
u
ll th
e s
pea
ker
to
o f
a
r.
)
Rem
ove
the
spe
ake
r plu
gs
fr
om
the
ter
m
in
al
on
the
Dis
p
la
y.
(Do
no
t r
emov
e t
he
plu
g
b
y
p
u
lling
th
e c
o
rd
.)
Now the speaker can be r
emoving fr
om the Display
.
Sp
ea
ke
r pl
ug
1
Unf
ast
en the
scr
ews
use
d
to sec
ur
e the
sta
n
d
in
pla
ce,
and
the
n
det
ach
the
sta
nd
fr
om
the
Dis
p
la
y.
(Hold
the
stand
so
it
will
not
dr
op
the
stand
fr
om
the
ed
ge
of
the
ba
se
ar
ea.)
Display

