Sharp LC-32XL8E (serv.man3) Service Manual ▷ View online
LC-32XL8E/S/RU, LC-37XL8E/S/RU
3 – 13
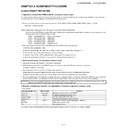
7. PC signal adjustment (ANALOG D-sub15PIN)
8. RGB adjustment (SCART)
10. White Balance Adjustment
For white balance adjustment, adjust the offset values on pages 12/14.
[Condition of the unit for inspection]: PC mode, backlight (+16), colour temp (High)
[Input signal condition] : HDMI 1080i 15IRE(LO), 78IRE(HI)
[Adjustment reference device] : Minolta CA-210
[Input signal condition] : HDMI 1080i 15IRE(LO), 78IRE(HI)
[Adjustment]
1) Display the current adjustment status at point HI. (Page 12/14 of process adjustment)
Feed the 78IRE signal.
2) Read the value of the luminance meter. x=0.272, y =0.277
3) Change R GAIN(HI)/ B GAIN(HI) (Adjustment offset value) on page 12/14 of process adjustment so that the values of the luminance meter
approach x=0.272 and y =0.277.
(Basically, G is not changed. If adjustment fails with R and B, change G. When G is lowered, the weaker of R and B must be fixed.)
4) Display the adjustment status of the current point LO.
Feed the 15IRE signal
Change R GAIN(LO)/ B GAIN(LO) (adjustment offset value) on page 12/14 of process adjustment so that the values of the luminance meter
approach x =0.272 and y = 0.277.
approach x =0.272 and y = 0.277.
5) Both HI and LO are repeating the step from 1 to 4 until becoming an aim value.
[Adjustment reference standard value]
Adjustment spec
± 0.002 Inspection spec ± 0.004 (point LO)
Adjustment spec
± 0.001 Inspection spec ± 0.002 (point HI)
11. Confirmation item
1. Magi-Link Inspection
The thing that the Magi-Link circuit operates is confirmed.
2. HDMI-CEC Inspection
The thing that the HDMI-CEC circuit operates is confirmed.
Adjustment point
Adjustment Conditions
Adjustment procedure
1
Setting
[Signal]
XGA 60Hz
100% Full Field Colour Bar sig-
nal
XGA 60Hz
100% Full Field Colour Bar sig-
nal
[Terminal]
EXT7 PC IN
EXT7 PC IN
• Feed the XGA 60Hz 100% full field colour bar signal (100% colour satura-
tion) to EXT7 PC IN.
2
Auto adjustment
performance
performance
Page 8/14
Bring the cursor on [ANALOG PC ADJ] and press [OK]
[ANALOG PC ADJ OK] appears when finished.
[ANALOG PC ADJ OK] appears when finished.
Adjustment point
Adjustment Conditions
Adjustment procedure
1
Setting
[Signal]
RGB15K, 50Hz
100% Full Field Colour Bar sig-
nal
RGB15K, 50Hz
100% Full Field Colour Bar sig-
nal
[Terminal]
EXT1 SCART IN
EXT1 SCART IN
• Feed the RGB15k 50Hz 100% full field colour bar signal (100% colour satu-
ration) to EXT1 SCART IN.
2
Auto adjustment
performance
performance
Page 9/14
Bring the cursor on [SCART RGB ADJ] and press [OK]
[SCART RGB ADJ OK] appears when finished.
[SCART RGB ADJ OK] appears when finished.
100% white
Black
100% white
Black
LC-32XL8E/S/RU, LC-37XL8E/S/RU
3 – 14
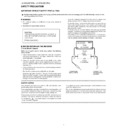
12. Initialization to factory settings
13. Upgrading the software
1. Turn off the AC power (Unplug the AC power cord).
2. Insert the upgrading USB flash memory for upgrade into the service slot.
3. While holding down the power button, plug in the AC power cord of the main unit to turn on the power.
4. Upgrade begins automatically.
After the set starts, the upgrade screen like the figure below is displayed.
5. If any of the procedures fails, the following upgrade failure screen shows up. For the failing procedure, the “NG” marking turns red.
NOTE: In such case, try to upgrade the software again. If it still fails, the hardware may be in trouble.
CAUTION: When the factory settings have been made, all user setting data, including the channel settings, are initialized.
(The adjustments done in the adjustment process mode are not initialized.) Keep this in mind when initializing these settings.
Adjustment item
Adjustment conditions
Adjustment procedure
1
Factory settings
It ends by the AC power-off.
(See to below caution)
(See to below caution)
• Enter the adjustment process mode.
• Move the cursor to [INDUSTRY INIT] on page 2/14.
• Use the R/C key to select a region from [EUROPE/RUSSIA/SWEDEN] and press the
• Move the cursor to [INDUSTRY INIT] on page 2/14.
• Use the R/C key to select a region from [EUROPE/RUSSIA/SWEDEN] and press the
[OK] key.
• “EXECUTING” display appears.
• After a while, “INDUSTRY INIT SUCCESS” display appears, the setting is completed.
• After a while, “INDUSTRY INIT SUCCESS” display appears, the setting is completed.
When succeeding: Background color (green)
When failing: Background color (red)
The following items are initialized in the factory setting.
1) User settings
2) Channel data (e.g. broadcast frequencies)
3) Maker option setting
4) Password data
When failing: Background color (red)
The following items are initialized in the factory setting.
1) User settings
2) Channel data (e.g. broadcast frequencies)
3) Maker option setting
4) Password data
After adjustments, exit the adjustment process mode.
To exit the adjustment process mode, unplug the AC power cord from the outlet to forcibly turn off the power.
When the power is turned off with the remote control, unplug the AC power cord and plug it back in (wait approximately 10 seconds before plugging
in the AC power cord)
Please execute the initialized in the factory setting again when you turn on the power supply after the initialized in the factory setting is set.
<S Y S T EM U P G R A D E>
System Version: E0804071
B A N K 1
B A N K 2
S T A T U S
30%
0%
<S Y S T EM U P G R A D E>
System Version: E0804071
B A N K 1
O K
B A N K 2
S T A T U S
100%
44%
LC-32XL8E/S/RU, LC-37XL8E/S/RU
3 – 15
6. When all the procedures are complete, the following upgrade success screen shows up. The new software version can be confirmed on screen.
The version number appears when each item has been successfully upgraded. Finally the main version number appears on screen.
7. Turn off the AC power (Unplug the AC power cord). Take out the upgrading USB flash memory.
8. Now the software has been upgraded.
NOTE: Then get the set started and call the process adjustment screen 1/14 to check the main software version.
CAUTION
1) Do not take out and put in the USB flash memory during formatting.
2) It takes about one minute to the rewriting completion.
Please confirm the upgrade status on the screen becomes 100%.
<S Y S T EM U P G R A D E>
System Version: E0804071
B A N K 1
O K
B A N K 2
O K
S T A T U S
U P G R A D E C O M P LET E
100%
100%

