Sharp LC-20B6E (serv.man8) Service Manual ▷ View online
21
LC-20B6E
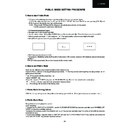
PUBLIC MODE SETTING PROCEDURE
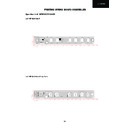
1. How to start Public Mode
1.1.There are the following two ways to get the public mode setup screen displayed.
1.1.1.In the adjustment process mode, turn on “PUBLIC MODE”. Switch off the TV set and pressing [CH UP] and
[VOL+] keys on the set at once, turn on the power.
1.1.2. • Press the [INPUT] and [VOL+] keys on the set at once and turn on the power.
• Get the password input screen displayed.
[VOL+] keys on the set at once, turn on the power.
1.1.2. • Press the [INPUT] and [VOL+] keys on the set at once and turn on the power.
• Get the password input screen displayed.
1.2. Procedure password input
• The input starts with the leftmost digit.
• Use the numeric keys [1] thru [9] and [10/0] keys on the remote controller. The other keys are not acceptable.
• With a numeric-key input, “–” will change to “
• The input starts with the leftmost digit.
• Use the numeric keys [1] thru [9] and [10/0] keys on the remote controller. The other keys are not acceptable.
• With a numeric-key input, “–” will change to “
“. The input position will move one digit to the right.
• With all the 3 digits entered, the password will be verified.
• The 3-digit password is now verified.
The password [0] [2] [7] provides for the public mode screen. (This screen comes on with whatever adjustment process
settings.)
With any other passwords, the screen changes to the normal mode.
The password [0] [2] [7] provides for the public mode screen. (This screen comes on with whatever adjustment process
settings.)
With any other passwords, the screen changes to the normal mode.
2. How to exit Public Mode
There are the following ways to quit the public mode setup screen.
•Turn off “PUBLIC MODE” in the adjustment process mode. # This way alone is not for quitting the setup screen, but for
quitting the mode itself.
• Turn off the power with the power key. (
•Turn off “PUBLIC MODE” in the adjustment process mode. # This way alone is not for quitting the setup screen, but for
quitting the mode itself.
• Turn off the power with the power key. (
)
• Select “ENTER”. ( )
• Move the cursor to “RESET” and press the “FLASHBACK” key. (Back to the normal mode screen)( )
• Move the cursor to “RESET” and press the “FLASHBACK” key. (Back to the normal mode screen)( )
!
... “PUBLIC MODE” stays on in the adjustment process mode.
... The settings will be back to the factory ones.
3. Public Mode Setting Values
• With the factory settings made, the public mode settings get initialized. (The adjustment process remains intact.)
4. Public Mode Menu
The guidance is not displayed on screen.
Setup procedure
• To move the “CURSOR UP AND DOWN”, use the “CURSOR UP/DOWN” key (remote controller) and “CHANNEL UP/
DOWN” key (remote controller and set).
• To change the settings, use the “CURSOR RIGHT/LEFT” key (remote controller) and “VOLUME UP/DOWN” key (remote
controller and set).
• To save new settings, keep the cursor at “ENTER” and use the “CURSOR RIGHT/LEFT” key (remote controller) and
“VOLUME UP/DOWN” key (remote controller and set).
_ _ _
*
_ _
* * *
!
!
*
22
LC-20B6E
Public Mode
Power on fixed
Power on fixed
[Variable]
Maximun Volume
[ 60]
Volume Fixed
[Variable]
Level
[ 10]
RC Button
[Respond]
Menu Button
[Respond]
On Screen Display
[Yes ]
Input Mode Start
[Normal ]
Input Mode Fixed
[Variable ]
Sound Only Mode
[NO ]
RESET
ENTER
ENTER
5. On Setting Items
(1) MAXIMUM VOLUME
(2) VOLUME FIXED
(3) RC BUTTON
Selection
Default
Function
Exception
Remarks
Default
Function
Exception
Remarks
Adjustable from 1 to 60 (no loop)
60
The volume control is limited to an adjusted level (for the main speakers).
60
The volume control is limited to an adjusted level (for the main speakers).
»
The VOLUME setting can be freely adjusted to a desired level in the adjustment process mode.
»
The volume can be preset from
0 to 60 the adjusted level in the line output regardless of the adjusted setting.
»
The volume bar does not appear.
Selection
Default
Function
Default
Function
Exception
Keys
inoperative
except for
default setting
Remarks
Keys
inoperative
except for
default setting
Remarks
Selection between "VARIABLE" and "FIXED" (loop provided)
VARIABLE
"FIXED" setting:
1 The volume control is fixed at a level, not adjustable (for the main speakers).
VARIABLE
"FIXED" setting:
1 The volume control is fixed at a level, not adjustable (for the main speakers).
»
The VOLUME setting can be freely adjusted to a desired level in the adjustment process mode.
»
Volume up/down (VOL+/-) [on remote controller and set]
»
Mute (MUTE)
»
The volume can be preset from 0 to
60 in the line output regardless of this setting.
»
Priority is given to the volume fixed over the maximum volume.
Selection
Default
Function
Default
Function
Exception
Selection between "RESPOND", "LIMITED" and "NO RESPOND" (loop provided)
RESPOND
Setting the remote control functions
1 "NO RESPOND" setting: The remote control keys are inoperative in the usual way.
2 "LIMITED" setting: All the remote control keys other than power, channel up/down, volume up/down and
RESPOND
Setting the remote control functions
1 "NO RESPOND" setting: The remote control keys are inoperative in the usual way.
2 "LIMITED" setting: All the remote control keys other than power, channel up/down, volume up/down and
brightness are inoperative.
»
The adjustment process, factory setting, inspection process and public mode keys are operative regardless
of this setting.
of this setting.
»
The remote control is operative all the time on the adjustment process, inspection process and public mode
setting screens as well as during
setting screens as well as during
First installation regardless of this setting.
Power on fixed note: It’s necessary to set previ-
ously “Hotel Power Fix” to “on” in the “OTHERS 1”
page of the Service Mode in order to see this op-
tion. When it is set to “Fix” the TV is impossible to
be switch off by Main Switch or R/C. When the
user try to do, the labels A or B appear on the
screen:
ously “Hotel Power Fix” to “on” in the “OTHERS 1”
page of the Service Mode in order to see this op-
tion. When it is set to “Fix” the TV is impossible to
be switch off by Main Switch or R/C. When the
user try to do, the labels A or B appear on the
screen:
Power on fixed
cannot power off with
power button on remote control
Power on fixed
cannot power off with
main power button on TV.
Label
A
Label
B
23
LC-20B6E
(4) PANEL BUTTON
Note:
Inspection process start: Press “VOL-” and “INPUT” at once and turn on the power.
Public password start: Press “INPUT” and “VOL+” at once and turn on the power.
(5) MENU BUTTON
(6) ON SCREEN DISPLAY
(7) INPUT MODE START
Selection
Default
Function
Exception
Default
Function
Exception
Selection between "RESPOND" and "NO RESPOND" (loop provided)
RESPOND
Disabling the set's keys other than POWER
RESPOND
Disabling the set's keys other than POWER
»
The user control is operative at a start of inspection process, public password regardless of
this setting. (Note)
»
The user control is operative all the time on the adjustment process, inspection process and public mode
setting screens as well as during
setting screens as well as during
First installation regardless of this setting.
Selection
Default
Function
Exception
Default
Function
Exception
Selection between "RESPOND" and "NO RESPOND" (loop provided)
RESPOND
Disabling the MENU key both on the set and the remote controller
RESPOND
Disabling the MENU key both on the set and the remote controller
»
The MENU button is operative at a start of inspection process and public password regardless of this setting.
(See Note in (4) above.)
(See Note in (4) above.)
»
The MENU button is operative all the time in the adjustment process and inspection process modes as well
as during First installation regardless of this setting "OFF" and selection is made prohibited.
Selection
Default
Function
Exception
Function
Exception
The inspection process, factory setting adjustment process and public
Keys
inoperative
except for
default setting
Remarks
inoperative
except for
default setting
Remarks
Selection between "YES" and "NO" (loop provided)
YES
"NO" setting: The on-screen display does not appear.
"NO" setting: The on-screen display does not appear.
mode setting screens can appear regardless of this setting.
»
Menu (MENU) [on remote controller and set] (operative when applied in the above exception, however)
»
TIMER
»
DISPLAY
»
Subtitles
»
"NO" setting:
1 The off-timer (SLEEP TIMER) setting is cleared to --.
2 The no-signal power off (AUTO POWER OFF) setting is cleared to "OFF".
3 The sound mode (SOUND ONLY MODE) setting is changed to "NO" with selection disabled.
2 The no-signal power off (AUTO POWER OFF) setting is cleared to "OFF".
3 The sound mode (SOUND ONLY MODE) setting is changed to "NO" with selection disabled.
Selection
Default
Function
Function
Remarks
Selection between "NORMAL" and selectable input source/selectable channel (loop provided)
→[NORMAL]←→[AV1*] ←→[AV2] ← [PC] [TV CH1*]
~...The channel tunes in now.
*The italic-font sources and channels are not selectable depending on the setting.
NORMAL
With the power on, an input source or channel to start with is preset.
In the NORMAL mode, the last memory comes first.
→[NORMAL]←→[AV1*] ←→[AV2] ← [PC] [TV CH1*]
~...The channel tunes in now.
*The italic-font sources and channels are not selectable depending on the setting.
NORMAL
With the power on, an input source or channel to start with is preset.
In the NORMAL mode, the last memory comes first.
»
In the "NORMAL" setting, the "INPUT MODE FIXED" setting is forced to "NORMAL", which does not allow
the selection.
the selection.
24
LC-20B6E
BACKLIGHT: OFF
PRESS BACKLIGHT TO CANCEL
PRESS BACKLIGHT TO CANCEL
(8) INPUT MODE FIXED
(9) SOUND ONLY MODE
Sound only mode function specifications
1 Behavior of the remote control BACKLIGHT button.
BACKLIGHT [BRIGHT]
1 Behavior of the remote control BACKLIGHT button.
BACKLIGHT [BRIGHT]
$
BACKLIGHT [MEDIUM]
$
BACKLIGHT [DARK]
$
BACKLIGHT [AUTO (OPC)]
$
BACKLIGHT [OFF]
$
BACKLIGHT[BRIGHT]
(The “OFF” setting is added while the remote control BACKLIGHT button is effective.With “YES” selected in “SOUND
ONLY MODE”.)
ONLY MODE”.)
2 When the “OFF” mode is selected, the screen becomes mute, the following message appears and the time is
counted down. (Sound only mode setup process)
The time indication “IN 5 SEC” appearing in the message gets counted down.
IN 5 SEC
counted down. (Sound only mode setup process)
The time indication “IN 5 SEC” appearing in the message gets counted down.
IN 5 SEC
$
IN 4 SEC
$
IN 3 SEC
$
IN 2 SEC
$
IN 1 SEC
When the 5 seconds have passed, the backlight error detect function becomes off, the backlight turns off and the
message disappears. (Sound only mode process)
message disappears. (Sound only mode process)
At a temporary reset, the count-down does not take place and the following message appears. (In this case too, the
backlight error detect function becomes off, the backlight turns off and the message disappears in 5 seconds.)
backlight error detect function becomes off, the backlight turns off and the message disappears in 5 seconds.)
Selection
Default
Function
Default
Function
Keys
inoperative
except for
default setting
inoperative
except for
default setting
Remarks
Selection between "
VARIABLE" and "FIXED" (loop provided)
VARIABLE
In the "FIXED" setting, the "START MODE" setting is forced up, which disables the switching to other channels
and input sources.
In the "FIXED" setting, the "START MODE" setting is forced up, which disables the switching to other channels
and input sources.
»
Channel up/down (CH UP/DOWN) [on remote controller and set]
»
Direct channel buttons 1 thru 10/0
»
Flashback (FLASHBACK)
»
Input select (
INPUT) [on remote controller and set]
»
With the "START MODE" set at "NORMAL", this setting is disabled. (The setting will automatically be "NOR-
MAL".)
MAL".)
Selection
Default
Function
Remarks
Default
Function
Remarks
Selection between "NO" and "YES" (loop provided)
NO
Enabling or disabling the sound mode function
NO
Enabling or disabling the sound mode function
»
In the "YES" setting, the "OFF" status is added while the BACKLIGHT button is being pressed. This "OFF"
status provides for the sound mode function.
status provides for the sound mode function.
»
When the "ON SCREEN DISPLAY" setting is "NO", this setting is cancelled ("NO") and cannot be selected.
BACKLIGHT: OFF
TURNS OFF IN 5 SECS
TURNS OFF IN 5 SECS
Screen mute
Screen mute
Display

