Sharp 76GF-64H (serv.man12) User Manual / Operation Manual ▷ View online
38
Web-site: www.sharp.co.uk/support
Help Line (office hours only): 08705 274277
Your television already has a basic configuration stored in memory that should meet any of your essential needs in the
immediate future. However, the configuration must be revised every time that:
immediate future. However, the configuration must be revised every time that:
■
An automatic search is conducted.
■
Some change has been made in the way the information is transmitted or in the page numbers that contain the
information on each of the stations.
■
A new station is added.
Before we explain how to configure the system, several points about the teletext are worth clarifying:
■
Some broadcasting stations send teletext data and some do not. You can find out whether teletext is available
by pressing the TEXT/MIX button. If you see a black screen, there is no teletext.
■
The information that you receive in the TXT is presented in pages, each of which is associated with a number
that appears in the upper left-hand corner.
■
There are two kinds of pages that are of interest for correctly configuring the TV Guide:
a)
Rolling: pages which once they are requested, regularly change their content (about once every minute).
Usually these are identified by the appearance on-screen of one of the following character groups on one of the pages:
1/3 or 2/3 or 3/3 or 2/5 or 3/5 or 4/5...
In the above cases, the characters indicate that the page being displayed is the first, second or third page of a total set
of 3, or the second, third or fourth page of a total set of five.
b)
1/3 or 2/3 or 3/3 or 2/5 or 3/5 or 4/5...
In the above cases, the characters indicate that the page being displayed is the first, second or third page of a total set
of 3, or the second, third or fourth page of a total set of five.
b)
Non-rolling: pages whose content does not change.
■
If the station is transmitting teletext using the FLOF standard, a coloured line appears in the lower area of the text.
Pressing a colour key accesses new pages associated with these colours. (The allocation of page number to colour is
done by the broadcasting station, and the television automatically decodes it).
done by the broadcasting station, and the television automatically decodes it).
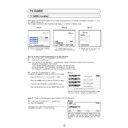
1. Items of Information and path
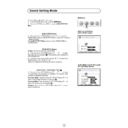
Press the MENU button, press BLUE button and press YELLOW button to see the TV GUIDE menu.
The name of a station will appear (on a white ground) with data to the right (on a red ground).
The meaning of this data is clarified by this example:
The name of a station will appear (on a white ground) with data to the right (on a red ground).
The meaning of this data is clarified by this example:
The first line describes the information that can be found on the station identified as XXX1. The two items (401 and
)
indicate the access path to the information and the third item (Rolling) indicates the type of page; finally, the last element
indicates that the information for the end user concerns the station XXX1.
The second line shows very similar data, indicating the access path and the type of page where the end-user information
on station XXX2 is found.
indicates that the information for the end user concerns the station XXX1.
The second line shows very similar data, indicating the access path and the type of page where the end-user information
on station XXX2 is found.
These data instruct the television how to proceed when the station XXX1 is being viewed (normal operation of the set).
In this particular case the TV will automatically request page 401 of the teletext and then the page associated with the
colours green and red (to access the programming information on XXX1 and XXX2).
In this particular case the TV will automatically request page 401 of the teletext and then the page associated with the
colours green and red (to access the programming information on XXX1 and XXX2).
Two important points should be stressed:
■
The information captured by the TV can only be effectively displayed if (in the example presented above) XXX1 and
XXX2 are stored in the memory of PR 1 to PR 4.
XXX2 are stored in the memory of PR 1 to PR 4.
■
The entire process described above is automatic once the system has been configured correctly. There is
nothing further that must be done.
nothing further that must be done.
Using the buttons
E
and
F
(up and down), you can move through all the elements on the list, noting that for
each station identification there are different page numbers and different access modes. For example:
All these data instruct the TV that, when XXX1 is being viewed, the search for the XXX1 programming information should
begin on page 301 (301 and
begin on page 301 (301 and
–
), and that this information is not in rolling format; that is, it will request the consecutive
pages from 301 on, up to a maximum of six pages. The procedure is identical for accessing information about XXX2.
Configuring the system (TV Guide)
Name of a station
page
green
type of page
first line
second line
red
39
The following sections explain how to make consistent changes in the parameters displayed on the screen, so that you
will be able to expand or modify the list of broadcasting stations in order to adapt it to any changes.
will be able to expand or modify the list of broadcasting stations in order to adapt it to any changes.
2.
After the automatic search is conducted, the Programs in Memory menu appears
Select those broadcasting stations whose names are repeated and delete any that you do not want, using the menu
option "Delete this programme".
Assign a correct name to those that remain, using the "Edit this programme" option on the menu. You will note that when
you change the first letter, the three following letters are sometimes written as well; it is advisable to use these names.
Assign those stations that you wish to use with the TV GUIDE to programmes PR 1, Pr 2, Pr 3 and Pr 4, through the "Go
to sorting mode" option.
Press the BLUE button to close the Stored programmes menu.
Press the MENU button, press BLUE button and press YELLOW button to see the TV Guide menu.
Make sure that each item of information displayed is correct for the stations selected in PR 1 through PR 4 (for an
explanation of the meaning, see the previous section). You may have top leave the menu and enter teletext in order to
make sure.
If it is all correct, press BLUE button to quit. If not, you can change:
■
the page numbers
■
the access colour (red, green, yellow, blue or none)
■
the page type (Rolling or Non-rolling)
■
the name of the station that each access mode corresponds to using the
C
/
I
and
E
/
F
buttons.
3. Adding new items to the station list
To enable a complete configuration of the system, the following situations have been provided for.
3.1
When a station stored in the memory sends information on a new station.
In this case, you must add an item in the station list that is contained in any given station.
To do this, press either the
C
or
I
buttons so that a letter or number starts to blink, and then select the option "Add
new broadcaster" pressing the RED button. You will see a new item created on the list, which has the following form:
Then enter the correct data for this new item.
By selecting the option "Delete this item", the item marked by the blinking cursor will be deleted. Use this option when
any previously stored station ceases to send information on a station or if an error has been made.
By selecting the option "Delete this item", the item marked by the blinking cursor will be deleted. Use this option when
any previously stored station ceases to send information on a station or if an error has been made.
3.2
When a new station is stored in the memory
Before proceeding, check to see if any of the previously stored stations also send information on this new station. If so,
first follow the procedure explained in section 3.1.
first follow the procedure explained in section 3.1.
To add a new station to the list, press either
C
or
I
buttons in such a way that no blinking cursor is on the screen.
Then select the option "Add new broadcaster". You will see that a new item has been created on the list, which has the
following form:
following form:
Then enter the correct data for this new item.
By selecting the option "Delete this item", the item marked by the blinking cursor will be deleted.
To delete a station completely, make sure that there is no blinking cursor on the screen. Use this option if you want to
eliminate a station or if an error has been made.
By selecting the option "Delete this item", the item marked by the blinking cursor will be deleted.
To delete a station completely, make sure that there is no blinking cursor on the screen. Use this option if you want to
eliminate a station or if an error has been made.
new item
blink
40
Web-site: www.sharp.co.uk/support
Help Line (office hours only): 08705 274277
Other Features
TV/Video selector button (TV/VIDEO)
The signal source can be selected from each of the input terminals in
this mode.
this mode.
1.
Press the TV/VIDEO button ● to see the TV/VIDEO Menu.
2.
Press the GREEN, YELLOW or BLUE button
to see the
REAR Menu, FRONT Menu or AV LINK Menu [
].
REAR Menu
3.1. Press the Cursor UP/DOWN buttons
E
/
F
to select
another signal source. The red point mark indicates the selected
source.
3.2. Press the TV/VIDEO button
source.
3.2. Press the TV/VIDEO button
●
to clear the on-screen display
or press: RED button
to restore the AERIAL signal.
YELLOW button
to see the FRONT Menu.
BLUE button
to see the AV LINK Menu [
]
FRONT Menu
4.1. Press the Cursor UP/DOWN buttons
E
/
F
to select
another signal source. The red point mark indicates the selected
source.
4.2. Press the TV/VIDEO button
source.
4.2. Press the TV/VIDEO button
●
to clear the on-screen display
or press: RED button
to restore the AERIAL signal.
GREEN button
to see the REAR Menu.
BLUE button
to see the AV LINK Menu [
]
AV LINK Menu - Record what you see-
[
]
5.1. Press the Cursor UP/DOWN buttons
E
/
F
to select
Record what you see. The red point mark indicates the selected
item.
item.
5.2. Press the RED button
to start recording.
5.3. Press the GREEN button
to stop recording.
Device scan check if a VCR with AV LINK system
is connected to the TV, through the AV-1 terminal.
is connected to the TV, through the AV-1 terminal.
About AV LINK: THIS FEATURE CAN ONLY BE USED WITH NexTView, Smart Link, Easy Link
and Megalogic COMPATIBLE VCR.
and Megalogic COMPATIBLE VCR.
This “Intelligent” communication system allows to control some VCR functions from the TV and vice versa.
For example it is possible to program the VCR timer recording from the TV or record the signal currently being
displayed on the TV regardless of the signal source.
In this case, the VCR and the TV must be connected through the euroconnector specially available for this function
(AV-1 terminal in this TV set). Refer to your VCR operation manual for further information.
TV/VIDEO Menu
REAR Menu
FRONT Menu
AV LINK Menu
A
41
AV LINK Menu - Preset download
6.1. Press the Cursor UP/DOWN buttons
E
/
F
to select
Preset download. The red point mark indicates the selected item.
6.2. Press the BLUE button
to begin preset downloading to
the VCR.
6.3. The message appears on the screen.
6.3. The message appears on the screen.
If the TV is connected to a VCR with AV LINK function or compatible,
the TV will automatically transfer the stored TV channels to the VCR.
the TV will automatically transfer the stored TV channels to the VCR.
6.4. When the message disappears, the programme list of the VCR
is now the same as of the TV set.
is now the same as of the TV set.
AV LINK -TIMER PROGRAMMING-
In this menu you can set a late start and stop time for a recording.
1.
Select the channel you wish to record by using the 0 ~ 9 digit
or
E
/
F
buttons.
2.
Press the TV/VIDEO button
●
to see the TV/VIDEO Menu.
3.
Press the BLUE button
to see the AV LINK Menu.
4.
Press the Cursor UP/DOWN buttons
E
/
F
to select
Timer programming. The red point mark indicates the selected item.
5.
5.
Press the BLUE button
to see the TIME PROGRAMMING
Menu.
6.
6.
Press the Cursor UP/DOWN buttons
E
/
F
to select:
Device: to select the controller set (VCR or TV) [
] by using the
Cursor LEFT/RIGHT buttons
C
/
I
.
Date: to enter the recording date using the number buttons. Enter 2 digits for the date, then 2 for the month. e.g. For
July 9th, press 0 9 (9th), then 0 7 (July).
July 9th, press 0 9 (9th), then 0 7 (July).
Start/End: to set a late start and stop time. Enter 2 digits for the hour and 2 for the minutes for the Start, then 2 for the
hour and 2 for the minutes for the End.
hour and 2 for the minutes for the End.
Mode: if you want to make additional recordings at the same time each day or week, use
C
/
I
to select Daily or Weekly.
Speed: to change recording speed between Standard-Play (SP) and Long-Play (LP), by using
C
/
I
buttons.
Standard-Play gives the best picture quality; Long-Play provides the longest recording time.
7.
Press the YELLOW button
«PROG. VCR» to memorize the TIMER PROGRAMMING data.
8.
Now the VCR should be manually set for Timer Mode. Refer to your VCR operation manual for further information.
9.
Press the TV/VIDEO button
●
to clear the on-screen display.
About Device
■
«Device VCR»: preferably select «Device VCR» to memorize the TIMER PROGRAMMING data in video memory
buffer.
When you select «Device VCR», Mode (Unique/Daily/Weekly) and Speed (SP/LP) can be changed only if the video
has these functions available.
When you select «Device VCR», Mode (Unique/Daily/Weekly) and Speed (SP/LP) can be changed only if the video
has these functions available.
■
«Device TV»: when the video cannot accept the TIMER PROGRAMMING data (i.e. when the video has the
memory buffer full), select «Device TV» to memorize the TIMER PROGRAMMING data in TV memory buffer.
When you select «Device TV», the late recording only can be applied within the next 24 hours.
When you select «Device TV», Mode (Unique) and Speed (SP) cannot be changed.
When you select «Device TV», in the event of a power cut, disconnection from the plug or if you turn off the TV by
the Main power button (
æ) on the TV set, the TIMER PROGRAMMING data will be cancelled; In order to keep the
programmed data, use Stand-by button (
æ TV) on the remote control to switch off the TV set.
AV LINK DOWNLOAD:
PROGRAM XX
AV LINK Menu
TIMER PROGRAMMING Menu

