Sharp XV-Z9000E (serv.man16) User Manual / Operation Manual ▷ View online
23
Operation Buttons
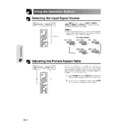
Selecting the Input Signal Source
Using the Operation Buttons
Press INPUT on the projector, INPUT 1, INPUT 2,
INPUT 3, INPUT 4 or INPUT 5 on the remote control
to select the desired input mode.
INPUT 3, INPUT 4 or INPUT 5 on the remote control
to select the desired input mode.
• When no signal is received, “NO SIGNAL” will be displayed.
When a signal that the projector is not preset to receive is
received, “NOT REG.” will be displayed.
received, “NOT REG.” will be displayed.
On-screen Display
Adjusting the Picture Aspect Ratio
This function allows you to modify or customize the
picture display mode to enhance the input image.
Depending on the input signal, you can choose SIDE
BAR, SMART STRETCH, CINEMA ZOOM, STRETCH,
NORMAL, or DOT BY DOT image.
picture display mode to enhance the input image.
Depending on the input signal, you can choose SIDE
BAR, SMART STRETCH, CINEMA ZOOM, STRETCH,
NORMAL, or DOT BY DOT image.
1 Press RESIZE. Each time RESIZE is pressed, the
picture mode changes as shown on the next page.
2 To return to the standard image, press UNDO
while “RESIZE” is displayed on the screen.
INPUT buttons
1
2
INPUT 1 Mode
INPUT 2 Mode
INPUT 5 Mode
INPUT 4 Mode
INPUT 3 Mode
24
Operation Buttons
COMPUTER
EXAMPLE
960
⳯ 720
1280
⳯ 720
480i
480P
NTSC
PAL
SECAM
960
⳯ 720
1280
⳯ 720
480P
–
–
720P
–
–
1280
⳯ 720
1280
⳯ 720
1280
⳯ 720
SIDE BAR
STRETCH
CINEMA
ZOOM
SMART
STRETCH
1280
⳯ 720
–
–
1280
⳯ 720
1280
⳯ 720
1080i
For 4:3
aspect ratio
For 16:9
aspect ratio
EXAMPLE
VGA
SVGA
XGA
SXGA
Input Signal
NORMAL
Output screen image
DOT BY DOT
For 4:3 aspect ratio
(640
(640
⳯ 480)
For 4:3 aspect ratio
(800
(800
⳯ 600)
For 4:3 aspect ratio
(1024
(1024
⳯ 768)
For 5:4 aspect ratio
(1280
(1280
⳯ 1024)
960
⳯ 720
800
⳯ 600
SVGA (800
⳯ 600)
NORMAL
DOT BY DOT
For 4:3
aspect ratio
For without
4:3 aspect ratio
960
⳯ 720
1024
⳯ 720
XGA (1024
⳯ 768)
960
⳯ 720
1280
⳯ 720
SXGA (1280
⳯ 960)
900
⳯ 720
1280
⳯ 720
SXGA (1280
⳯ 1024)
480i
480P
NTSC
PAL
SECAM
720P
1080i
Input Signal
SIDE BAR
SMART STRETCH
Output screen image
STRETCH
CINEMA ZOOM
For 4:3 aspect ratio
Letter box image
For 16:9 aspect ratio
With squeeze
VIDEO/DVD/DTV
Adjusting the Picture Aspect Ratio
25
Operation Buttons
Gamma Correction Function
• Gamma is an image quality enhancement function
that offers a richer image by brightening the darker
portions of the image without altering the brightness
of the brighter portions.
portions of the image without altering the brightness
of the brighter portions.
• Four gamma settings are available to allow for
differences in the images displayed and in the
brightness of the room.
brightness of the room.
• When you are displaying images with frequent, dark
scenes, such as a film or concert, or when you are
displaying images in a bright room, this feature makes
the dark scenes easier to see and gives the
impression of greater depth in the image.
displaying images in a bright room, this feature makes
the dark scenes easier to see and gives the
impression of greater depth in the image.
Gamma Modes
On-screen Display
ss
s
STANDARD
GAMMA 1
GAMMA 2
CUSTOM
Gamma mode
Selected Mode
STANDARD
GAMMA 1
GAMMA 2
CUSTOM
Standard picture without gamma correction.
Brightens darker portions of images for more
enhanced presentations.
enhanced presentations.
Gives greater depth to darker portions of
images for a more exciting theatre experience.
images for a more exciting theatre experience.
Allows you to adjust gamma value using
SharpVision Manager (supplied).
SharpVision Manager (supplied).
1 Press GAMMA to display “GAMMA”.
2 Then, the present Gamma mode is displayed.
Each time GAMMA is pressed, the gamma level
toggles as shown on the left.
toggles as shown on the left.
3 To return to the standard image, press UNDO
while “GAMMA” is displayed on the screen.
• The CUSTOM setting of VIDEO mode optimizes the video
source to reproduce the image more beautifully. It darkens
bright portions of the image and gives greater depth to
darker portions of the image.
Select CUSTOM as your default setting if you prefer a
smooth textured image to a sharply contrasted one.
bright portions of the image and gives greater depth to
darker portions of the image.
Select CUSTOM as your default setting if you prefer a
smooth textured image to a sharply contrasted one.
• STANDARD and GAMMA 2 settings of VIDEO mode (except
COMPONENT 480P/720P/1080i) incorporate a DYNAMIC
GAMMA function for optimizing GAMMA correction frame
by frame in real time, thus providing a more beautiful image.
GAMMA function for optimizing GAMMA correction frame
by frame in real time, thus providing a more beautiful image.
• GAMMA 1 settings are the same for both RGB and VIDEO
modes.
3
1,2
26
Basic Operation
Basic Operations
Using the GUI (Graphical User Interface) Menu Screen
(GUI) On-screen Display
1
INPUT 3, 4 (VIDEO) mode
1
INPUT 1, 2 (COMPONENT) or 5 (RGB) mode
4
1 Press MENU to display the INPUT 1, 2, 3, 4 or 5
mode menu bar.
2 Press
/
to select an adjustment main menu
on the menu bar.
3 Press
/
to select a specific adjustment item.
4 To display a single adjustment item, press ENTER
after selecting the item. Only the menu bar and
the selected adjustment item will appear.
the selected adjustment item will appear.
5 Press
/
to adjust the item.
6 Press UNDO to return to the previous screen.
7 To exit the GUI, press MENU.
• For details on items on the menu screen, see the tree charts
on pages 27 and 28.
This projector has two sets of menu screens that allow
you to adjust the image and various projector settings.
These menu screens can be operated from the projector
or the remote control with the following procedure.
you to adjust the image and various projector settings.
These menu screens can be operated from the projector
or the remote control with the following procedure.
5
5
2
3
2
3
2
5
1,7
4
6
2,3,5
Main menu
Sub menu

