Sharp XV-Z200E (serv.man8) Service Manual ▷ View online
14
XV-Z200U/E, XV-Z201E
DT-300
DT-300
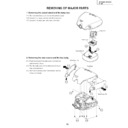
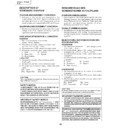
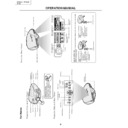
3. Removing the main PWB.
3-1. Remove 6 screws.
3-2. Remove each connector on the main PWB.
4. Removing the power unit.
4-1. Remove each connector on the power PWB.
4-2. Remove 2 screws, and remove the power unit fan.
4-3. Remove 3 screws, and take out the power unit as-
sembly.
4-4. Remove 6 screws, and remove power shield.
3-2
3-2
3-1
3-2
3-2
Main PWB
(TF)
(DA)
(TD)
(BA)
(FD)
(FB)
(PG)
(FA)
(FC)
(ED)
(TC)
(TH)
(RB)
4-1
4-2
4-3
4-4
4-4
4-3
Power PWB
Power Unit Fan
Power Shield
(EC)
(EA)
(EA1)
(EB)
15
XV-Z200U/E, XV-Z201E
DT-300
DT-300
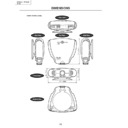
6. Removing the optic mechanism unit.
6-1. Remove 5 screws, and remove the optic mechanism
unit.
5. Removing the Ballast unit.
5-1. Remove lens shift knob.
5-2. Remove 2 screws, and remove the ballast socket.
5-3. Remove 3 screws, and remove the ballast unit.
5-4. Remove shielding plate, and remove 2 connectors
on the ballast PWB.
5-5. Remove 2 screws, and remove ballast PWB.
5-3
5-2
5-4
5-1
5-5
Shielding Plate
Ballast PWB
Lens Shift Knob
Exhaust Duct Unit
(EC)
(BA)
6-1
Optic Mechanism Unit
16
XV-Z200U/E, XV-Z201E
DT-300
DT-300
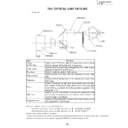
8. Removing the formatter PWB.
8-1. Remove 2 screws, and remove the angle.
8-2. Remove 5 screws, and remove the blower fan unit.
8-3. Remove 2 screws, and remove the heat sink.
8-4. Remove 4 screws. Remove the backer plate M, stud
plate M, stud spring M, and 2 connectors from the
formatter PWB. After that, remove the formatter PWB.
7. Removing the each other PWBs.
7-1. Remove 1 screw, and remove front R/C receiver PWB
unit .
7-2. Remove 1 screw, and remove LED PWB unit.
7-3. Remove 1 screw, and remove a terminal-2 PWB unit.
7-4. Remove 2 screws, and remove an AC socket.
7-5. Remove 1 screw, and remove rear R/C receiver PWB
unit.
7-6. Remove 1 screw, and remove terminal-1 PWB unit.
7-2
7-1
7-3
7-4
7-5
7-6
AC Socket
Terminal-2 PWB
Front R/C Receiver PWB
Rear R/C Receiver PWB
LED PWB
Terminal-1 PWB
8-1
8-2
8-2
8-4
8-3
Blower Fan Unit
Angle
Lamp Shield
Heat Sink
Stud Spring M
Stud M
Backer Plate M
Formatter PWB
DMD
17
XV-Z200U/E, XV-Z201E
DT-300
DT-300
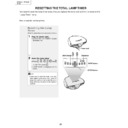
Precautions in replacing the DMD chip
Note: Be careful not to allow dust and fingerprint
Note: Be careful not to allow dust and fingerprint
on the cover glass of DMD chip and prism
surface of optical engine.
surface of optical engine.
1. Tighten 4 screws gradually from opposite sides
to fix the backer plate M, stud spring M, and stud
M. To perform this step, press the shadow part
of the stud spring M to the formatter PWB with
your finger.
M. To perform this step, press the shadow part
of the stud spring M to the formatter PWB with
your finger.
2. If something shade appears on the projection
screen like Fig1, release 2 screws on mirror
adjusting plate and move that plate to adjust
illumination area of DMD chip.
adjusting plate and move that plate to adjust
illumination area of DMD chip.
Fig.1
Shade
Stud Spring M
Stud M
Backer Plate M
DMD
(Digital Micromirror
Device) chip
+Outer Frame
+C-Spring
(Digital Micromirror
Device) chip
+Outer Frame
+C-Spring
Mirror Adjusting Plate
Formatter PWB
Prism Surface
Display

