Sharp XV-Z200E (serv.man5) Service Manual ▷ View online
5
XV-Z200U/E, XV-Z201E
DT-300
DT-300
NOTE POUR LE PERSONNEL
D’ENTRETIEN
D’ENTRETIEN
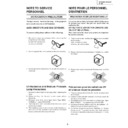
PRECAUTION POUR LES RADIATIONS UV
La source de lumière, la lampe métal halide, dans
l e p ro j e c t e u r é m e t d e p e t i t e s q u a n t i t é s d e
radiation UV.
l e p ro j e c t e u r é m e t d e p e t i t e s q u a n t i t é s d e
radiation UV.
EVITEZ TOUTE EXPOSITION DIRECTE DES
YEUX ET DE LA PEAU.
YEUX ET DE LA PEAU.
Pour votre sécurité, nous vous prions de respecter
les points suivants:
les points suivants:
1. Toujours porter des lunettes de soleil lors d’un entretien
du projecteur
avec la lampe allumée
et le haut du coffret retiré.
avec la lampe allumée
et le haut du coffret retiré.
2. Ne pas faire fonctionner la lampe à l’extérieur du boîtier
de lampe.
3. Ne pas faire fonctionner plus de 2 heures avec le coffret
retiré.
Précautions pour les radiations UV
et la lampe moyenne pression
et la lampe moyenne pression
1. Toujours débrancher la fiche AC lors du remplacement
de la lampe.
2. Laisser l’unité refroidir pendant une heure avant de
procéder à l’entretien.
3. Ne remplacer qu’avec une lampe du même type. Type
BQC-XVZ200++1 caractéristique 370V/210W.
4. La lampe émet de petites quantités de radiation UV-
éviter tout contact direct avec les yeux.
5. La lampe moyenne pression implique un risque
d’explosion. Toujours suivre les instr uctions
d’installation décrites ci-dessous et manipuler la lampe
avec soin.
d’installation décrites ci-dessous et manipuler la lampe
avec soin.
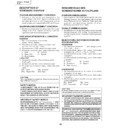
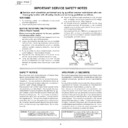
NOTE TO SERVICE
PERSONNEL
PERSONNEL
UV-RADIATION PRECAUTION
The light source, metal halide lamp, in the projector
emits small amounts of UV-Radiation.
AVOID DIRECT EYE AND SKIN EXPOSURE.
To ensure safety please adhere to the following:
1. Be sure to wear sun-glasses when servicing the
projector with the lamp
turned “on” and the top
enclosure removed.
turned “on” and the top
enclosure removed.
2. Do not operate the lamp outside of the lamp housing.
3. Do not operate for more than 2 hours with the enclosure
removed.
UV-Radiation and Medium Pressure
Lamp Precautions
Lamp Precautions
1. Be sure to disconnect the AC plug when replacing the
lamp.
2. Allow one hour for the unit to cool down before
servicing.
3. Replace only with same type lamp. Type BQC-
XVZ200++1 rated 370V/210W.
4. The lamp emits small amounts of UV-Radiation, avoid
direct-eye contact.
5. The medium pressure lamp involves a risk of explosion.
Be sure to follow installation instructions described
below and handle the lamp with care.
below and handle the lamp with care.
123456789012345678901234567890121234567890123456
123456789012345678901234567890121234567890123456
123456789012345678901234567890121234567890123456
123456789012345678901234567890121234567890123456
123456789012345678901234567890121234567890123456
123456789012345678901234567890121234567890123456
123456789012345678901234567890121234567890123456
123456789012345678901234567890121234567890123456
123456789012345678901234567890121234567890123456
123456789012345678901234567890121234567890123456
6
XV-Z200U/E, XV-Z201E
DT-300
DT-300
123456789012345678901234567890121234567890123456
123456789012345678901234567890121234567890123456
123456789012345678901234567890121234567890123456
123456789012345678901234567890121234567890123456
123456789012345678901234567890121234567890123456
123456789012345678901234567890121234567890123456
1
2
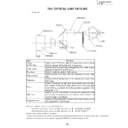
Lamp
Reflector
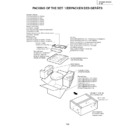
Comme de petites quantités de radiation UV sont
émises par une ouverture entre le couvercle du con-
duit et le botier de la lampe,il est recommandé de
placer le CAPUCHON D'OPTIQUE sur l'ouverture
pendant l'entretien pour éviter une exposition des yeux
et la peau.
émises par une ouverture entre le couvercle du con-
duit et le botier de la lampe,il est recommandé de
placer le CAPUCHON D'OPTIQUE sur l'ouverture
pendant l'entretien pour éviter une exposition des yeux
et la peau.
Remarque: Priére de se procurer un capuchon
d'optique acant d'entretien un modéle XV-
Z200U/DT-300/XV-Z200E/XV-Z201E qui
est livré sans.
Z200U/DT-300/XV-Z200E/XV-Z201E qui
est livré sans.
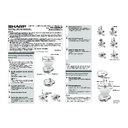
Since small amounts of UV-Radiation are emitted
from an opening between the duct cover and the
lamp housing, it is recommended to place the LENS
CAP on the opening during servicing to avoid eye
and skin exposure.
from an opening between the duct cover and the
lamp housing, it is recommended to place the LENS
CAP on the opening during servicing to avoid eye
and skin exposure.
Note: Please obtain a lens cap before servicing a
models XV-Z200U/DT-300/XV-Z200E/XV-
Z201E that is received without one.
Z201E that is received without one.
DANGER ! –– Never turn the power on without the
lamp to avoid electric-shock or damage of the devices
since the stabilizer generates high voltages at its start.
lamp to avoid electric-shock or damage of the devices
since the stabilizer generates high voltages at its start.
UV-RADIATION PRECAUTION (Continued)
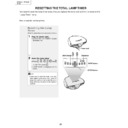
Lamp Replacement
Note:
Since the lamp reaches a very high temperature during
units operation replacement of the lamp should be
done at least one hour after the power has been turned
off. (to allow the lamp to cool off.)
Installing the new lamp, make sure not to touch the
lamp (bulb) replace the lamp by holding its reflector
units operation replacement of the lamp should be
done at least one hour after the power has been turned
off. (to allow the lamp to cool off.)
Installing the new lamp, make sure not to touch the
lamp (bulb) replace the lamp by holding its reflector
2
.
[Use original replacement only.]
DANGER ! –– Ne jamais mettre sous tension sans la
lampe pour éviter un choc électrique ou des
dommages des appareils car le stabilisateur génère
de hautes tensions à sa mise en route.
lampe pour éviter un choc électrique ou des
dommages des appareils car le stabilisateur génère
de hautes tensions à sa mise en route.
123456789012345678901234567890121234567890123456
123456789012345678901234567890121234567890123456
123456789012345678901234567890121234567890123456
123456789012345678901234567890121234567890123456
123456789012345678901234567890121234567890123456
123456789012345678901234567890121234567890123456
1
2
Remplacement de la lampe
Remarque:
Comme la lampe devient très chaude pendant le
fonctionnement de l’unité, son remplacement ne doit
être effectué au moins une heure après avoir coupé
l’alimentation (pour permettre à la lampe de refroidir).
En installant la nouvelle lampe, s’assurer de ne pas
toucher la lampe (ampoule). Remplacer la lampe en
tenant son réflecteur
fonctionnement de l’unité, son remplacement ne doit
être effectué au moins une heure après avoir coupé
l’alimentation (pour permettre à la lampe de refroidir).
En installant la nouvelle lampe, s’assurer de ne pas
toucher la lampe (ampoule). Remplacer la lampe en
tenant son réflecteur
2
.
[N’utiliser qu’un remplacement d’origine.]
PRECAUTION POUR LES RADIATIONS UV (Suite)
Lampe
Reflecteur
7
XV-Z200U/E, XV-Z201E
DT-300
DT-300
Precautions for using lead-free solder
1 Employing lead-free solder
"MAIN, THERMINAL1/2, LED, KEY, FRONT-R/C RECEIVER, REAR-R/C RECEIVER, POWER, BALLAST PWBs"
of this model employs lead-free solder. The LF symbol indicates lead-free solder, and is attached on the PWBs and
service manuals. The alphabetical character following LF shows the type of lead-free solder.
Example:
2 Using lead-free wire solder
When fixing the PWB soldered with the lead-free solder, apply lead-free wire solder. Repairing with conventional
lead wire solder may cause damage or accident due to cracks.
As the melting point of lead-free solder (Sn-Ag-Cu) is higher than the lead wire solder by 40°C, we recommend you
to use a dedicated soldering bit, if you are not familiar with how to obtain lead-free wire solder or soldening bit,
contact our service station or service ranch in your area.
3 Soldering
As the melting point of lead-free solder (Sn-Ag-Cu) is about 220°C which is higher than the conventional lead solder
by 40°C, and as it has poor solder wettabillty, you may be apt to keep the soldering bit in contact with the PWB for
extended period of time. However, Since the land may be peeled off or the maximum heat-resistance temperature
of parts may be excoeded, remove the bit from the PWB as soon as you conurm the steady soldering condition.
Lead-free solder contains more tin, and the end of the soldering bit may be easily corroded. Make sure to tum on
and off the power of the bit as required.
if a different type of solder stays on the tip of the soldering bit, it is alloyed with lead-free solder. Clean the bit after
every use of it.
When the tip of the soldering bit is blackened during use, file it with steel wool or fine sandpaper.
Becareful when replacing parts with polarity indication on the PWB silk.
L
F a
Indicates lead-free solder of tin, silver and copper.
Part No.
★
Description
Code
ZHNDAi123250E
J
φ
0.3mm
250g(1roll)
BL
ZHNDAi126500E
J
φ
0.6mm
500g(1roll)
BK
ZHNDAi12801KE
J
φ
1.0mm
1kg(1roll)
BM
Lead-free wire solder for servicing
Display

