Sharp XV-Z10E (serv.man9) Service Manual ▷ View online
18
XV-Z10E
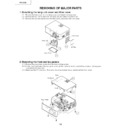
REMOVING OF MAJOR PARTS
1. Detaching the lamp unit cover and filter cover
1-1. Remove the lock screw from the lamp cover, and detach the lamp cover.
1-2. Remove the two lock screws from the lamp unit, and detach the lamp unit.
1-3. Remove the one lock screws from the filter cover, and detach the filter cover.
1-2. Remove the two lock screws from the lamp unit, and detach the lamp unit.
1-3. Remove the one lock screws from the filter cover, and detach the filter cover.
2. Removing the front and top panels
2-1. Remove the seven lock screws from the front and top panels.
2-2. Lift the right-hand side of the top panel, and undo the hooks at the front and left-hand side of the top panel.
2-2. Lift the right-hand side of the top panel, and undo the hooks at the front and left-hand side of the top panel.
Now detach the top panel.
2-3. Disconnect the TD lead wire. Then undo the arrow-marked hooks, and detach the front panel.
1-2
1-2
1-3
1-1
Lamp Cover
Air Filter
Filter Cover
Lamp Unit
2-2
2-2
2-1
2-3
2-3
(TD)
Top Panel
Hook
Hook
Front Panel
19
XV-Z10E
3. Detaching the main PWB
3-1. Remove the two lock screws from the main PWB unit, and detach the main PWB.
4. Removing the optical unit
4-1. Remove the screw from the inlet ass'y fixing the earth wire between the inlet ass'y and the power unit, and
disconnect the earth wire at this end.
4-2. Remove the two lock screws from the lamp socket, and detach the lamp socket.
4-3. Remove the lock screw from the bimetal, and detach the bimetal.
4-4. Remove the five lock screws from the optical unit, and detach the optical unit, side shield and power insulating
4-3. Remove the lock screw from the bimetal, and detach the bimetal.
4-4. Remove the five lock screws from the optical unit, and detach the optical unit, side shield and power insulating
board.
3-1
[FD]
[EA]
[FA]
[SP]
[TI]
[FB]
[RP]
[GP]
[BP]
[LF]
[TH]
Main PWB
Lamp Socket
Bimetal
Optical Unit
Side Shield
Power Insulating Board
4-4
4-3
4-4
4-1
4-4
4-2
20
XV-Z10E
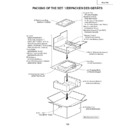
5. Detaching the power/ballast PWB
5-1. Remove the three lock screws from the power/ballast PWB, and detach the power/ballast PWB and the earth
wire.
5-2. Detach the wind deflector.
5-3. Detach the ballast PWB.
5-3. Detach the ballast PWB.
Power PWB
Wind Deflector
Ballast PWB
Bottom Shield
Insulator
Insulator
Earth Wire
5-1
5-2
5-3
5-1
21
XV-Z10E
6. Detaching the AC inlet, exhaust fan, speaker, suction duct and suction fan
6-1. Detach the AC inlet PWB.
6-2. Remove the lock screw from the exhaust fan, and detach the exhaust fan.
6-3. Detach the speaker.
6-4. Remove the two lock screws from the suction duct, and detach the suction duct.
6-5. Detach the suction fan.
6-2. Remove the lock screw from the exhaust fan, and detach the exhaust fan.
6-3. Detach the speaker.
6-4. Remove the two lock screws from the suction duct, and detach the suction duct.
6-5. Detach the suction fan.
6-4
Suction Duct
Exhaust Fan
Leaf Switch
Suction Fan
Speaker
Bottom Panel
AC inlet PWB
6-5
6-3
6-1
6-2
Display

