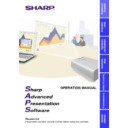
Sharp XG-P10XE (serv.man12) User Manual / Operation Manual ▷ View online
1
Foreword
This software is designed for presentations and for enhancement of
images projected from SHARP LCD projectors. It includes the following
functions:
images projected from SHARP LCD projectors. It includes the following
functions:
Projector Control Software:
RS-232C Control
This function allows you to control the projector’s functions/adjustments
from your PC.
The projector can be controlled from a central PC/CONTROLLER.
from your PC.
The projector can be controlled from a central PC/CONTROLLER.
Image Enhancement Software:
Gamma Correction
This function allows you to set the projector’s Gamma values directly
from your PC. The ease of specifying preset values enables very precise
custom brightness, contrast and color adjustments.
from your PC. The ease of specifying preset values enables very precise
custom brightness, contrast and color adjustments.
Support Software for Presentation Transfer:
Presentation Transfer
This mode transmits
BMP
and
JPEG
images to a projector. By saving
presentation slides as BMP or JPEG images you can do an entire
presentation with SHARP LCD projectors.
presentation with SHARP LCD projectors.
Capture & Transfer
This mode allows you to transmit an image of what is currently displayed
on your monitor. This is as simple as pressing the “Capture & Transfer”
button in the application.
on your monitor. This is as simple as pressing the “Capture & Transfer”
button in the application.
Quick Transfer
This mode is similar to “Capture & Transfer” but it can be used easily by
clicking the “Right” mouse button, even during a Microsoft PowerPoint
presentation.
clicking the “Right” mouse button, even during a Microsoft PowerPoint
presentation.
2
This software operates under the Microsoft Windows 95 and 98 operating
systems. This manual references only these Microsoft Windows
Operating Systems and compatible Mouse devices. For details please
refer to the Microsoft Windows operation manual.
systems. This manual references only these Microsoft Windows
Operating Systems and compatible Mouse devices. For details please
refer to the Microsoft Windows operation manual.
Note that
Sharp Advanced Presentation Software
is subject to change
without prior notice for upgrading and improvement.
3
If you want to project your presentation slides saved as BMP or JPEG
files...
files...
Presentation Transfer transfers images quickly &
easily in presentation format.
easily in presentation format.
(See page 35)
If you want to project an image of what is currently displayed on your monitor...
Capture & Transfer captures the image on the PC
monitor and transfers it to the projector.
monitor and transfers it to the projector.
(See page 39)
If you want to project a single image quickly...
For Your Reference
There are five functions via RS-232C serial port.
Quick Transfer captures the image on the PC monitor
and transfers it to the projector using the mouse as a
shortcut.
and transfers it to the projector using the mouse as a
shortcut.
(See page 40)
If you want to control the projector adjustments from your PC...
RS-232C Control controls the projector adjustments
via the RS-232C serial port.
via the RS-232C serial port.
(See page 16)
If you want to adjust image colors on the screen...
Gamma Correction controls the image colors via the
RS-232C serial port.
RS-232C serial port.
(See page 28)
4
Contents
Foreword ....................................................................................... 1
For your reference ........................................................................ 3
For your reference ........................................................................ 3
Installing/Uninstalling
Required Hardware and Software ............................................... 6
Projector and PC Connections .................................................... 6
Installing the Software ................................................................. 7
Uninstalling the Software .......................................................... 10
Projector and PC Connections .................................................... 6
Installing the Software ................................................................. 7
Uninstalling the Software .......................................................... 10
Operations
Starting and Quitting .................................................................. 12
Opening Modes ....................................................................... 12
Starting from the “Sharp Advanced Presentation
Software” icon in the Windows task tray ............................ 12
Starting from the Windows “Start” button ........................... 13
Starting from the “Sharp Advanced Presentation
Software” shortcut icon on the Windows desktop .............. 13
Software” icon in the Windows task tray ............................ 12
Starting from the Windows “Start” button ........................... 13
Starting from the “Sharp Advanced Presentation
Software” shortcut icon on the Windows desktop .............. 13
Changing Auto-Launch Setting ............................................... 14
When “Auto-Launch ON” is selected .................................. 14
When “Auto-Launch OFF” is selected ................................ 14
When “Auto-Launch OFF” is selected ................................ 14
Quitting .................................................................................... 14
Help ......................................................................................... 15
Help ......................................................................................... 15
Controlling the Projector’s Adjustment .................................... 16
RS-232C Control ..................................................................... 16
“Set Up” Adjustment ................................................................ 18
“Input1 PICT”/“Input2 PICT”/“Input3 PICT” Adjustment .......... 19
“Fine Sync” Adjustment ........................................................... 20
“Audio” Adjustment .................................................................. 21
“Options” Adjustment .............................................................. 22
Save Control Settings and Load Control Settings .................. 24
To make “Save Control Settings” ........................................ 24
To make “Load Control Settings” ........................................ 24
To make “Load Control Settings” ........................................ 24
Password setting ........................................................................ 25
Setting the Password .............................................................. 25
Changing the Password .......................................................... 26
Changing the Password .......................................................... 26
Selecting the Keylock Level ...................................................... 27
Adjusting Images ........................................................................ 28
Adjusting Images ........................................................................ 28
Gamma Correction .................................................................. 28
Adjusting the Gamma curve .................................................... 29
Adjusting the Gamma curve .................................................... 29
Setting the gamma correction area .................................... 30
Saving the Gamma Correction Settings .................................. 31
Loading the Gamma Correction Settings ................................ 31
Loading the Gamma Correction Settings ................................ 31
Setup for Transferring Images .................................................. 32
Selecting the Projector ............................................................ 32
Changing Connection Type ..................................................... 32
Changing Compression Rate .................................................. 33
Changing Connection Type ..................................................... 32
Changing Compression Rate .................................................. 33

