Sharp XG-MB70X (serv.man39) Service Manual / Technical Bulletin ▷ View online
PJR 2005 01 03
Date of Issue: 18
th
April 2006
Classification:
White
PROJECTOR TECHNICAL BULLETIN
Page 1 of 7
Sharp Electronics (UK) Limited
Reference - LV-109 LP-001
Revision - 3
White – Carry out as required
Yellow – Carry out as required and whenever the unit comes in for service
Red – Carry out on all units
MODEL
XGMB70X
SYMPTOM As below:
1. Projector may lock up on repeated on/off cycling.
2. 'TEMP' keeps appearing after the projector is turned on from the standby mode.
3. When connected to a VCR showing a blue or black background, the picture rolls.
4. When the power has been turned on with a signal fed into the projector, the
2. 'TEMP' keeps appearing after the projector is turned on from the standby mode.
3. When connected to a VCR showing a blue or black background, the picture rolls.
4. When the power has been turned on with a signal fed into the projector, the
brightness change is large when adjusting the contrast.
5. In the RGB mode the fine sync setting is cancelled when the input is changed, then
changed back to RGB mode.
CAUSE
Software issues.
ACTION
Upgrade the software to the latest version. This can be found on the Sharp Technical
Web.
1. Connect the projector and the PC via a RS232 cross connection cable.
2. Turn the projector on.
3. Enter the factory mode (with the menu not displayed, press, menu, menu, vol+,
Web.
1. Connect the projector and the PC via a RS232 cross connection cable.
2. Turn the projector on.
3. Enter the factory mode (with the menu not displayed, press, menu, menu, vol+,
vol-, enter, enter and menu in sequence).
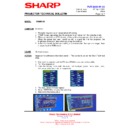
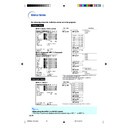
4. The menu below will now appear.
5. Select VERSION and press the enter key.
6. Note down the factory data:
5. Select VERSION and press the enter key.
6. Note down the factory data:
PJR 2005 01 03
Date of Issue: 18
th
April 2006
Classification:
White
PROJECTOR TECHNICAL BULLETIN
Page 2 of 7
Sharp Electronics (UK) Limited
Reference - LV-109 LP-001
Revision - 3
White – Carry out as required
Yellow – Carry out as required and whenever the unit comes in for service
Red – Carry out on all units
7. AD1, AD2 and DLP (all).
8. Turn the projetor off.
9. Disconnect the power lead.
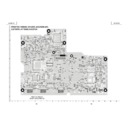
10. Slide the switch on the main PWB.
9. Disconnect the power lead.
10. Slide the switch on the main PWB.
PJR 2005 01 03
Date of Issue: 18
th
April 2006
Classification:
White
PROJECTOR TECHNICAL BULLETIN
Page 3 of 7
Sharp Electronics (UK) Limited
Reference - LV-109 LP-001
Revision - 3
White – Carry out as required
Yellow – Carry out as required and whenever the unit comes in for service
Red – Carry out on all units
Rewriting the software:
1. Unzip the file downloaded update file (this can be found on the Sharp Technical
Web under this model).
2. Double click on the "FlashUpgrader.exe" file. The window shown below will
appear:
3. Click on the Choose button.
4. Select the folder that you extracted.
4. Select the folder that you extracted.
5. Select the file pwSDK.inf in this folder
6. Unckeck the "Continuous Flash Mode" check box.
7. Uncheck the "Notify on Completion" check box.,
8. Check the "Reset Target After Download" check box.
9. Select "Flash" in Modes.
7. Uncheck the "Notify on Completion" check box.,
8. Check the "Reset Target After Download" check box.
9. Select "Flash" in Modes.
PJR 2005 01 03
Date of Issue: 18
th
April 2006
Classification:
White
PROJECTOR TECHNICAL BULLETIN
Page 4 of 7
Sharp Electronics (UK) Limited
Reference - LV-109 LP-001
Revision - 3
White – Carry out as required
Yellow – Carry out as required and whenever the unit comes in for service
Red – Carry out on all units
10. Click on the flash button.
11. Connect the power lead to the projector (DO NOT disconnect while rewriting
software).
12. Rewriting will start automatically. Progress is shown on the bar below:
13. When rewriting is complete, close the application.
14. Disconnect the AC lead.
14. Disconnect the AC lead.
Display

