Sharp XG-MB70X (serv.man10) Service Manual ▷ View online
29
XG-MB70X
No.
Adjusting point
Adjusting conditions
Adjusting procedure
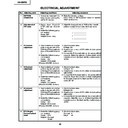
21
Adjustment of
DLP voltage
DLP voltage
1. Read voltage rank of DLP
description.
2. Set the switch correspond-
ing to the rank which has
been read.
been read.
1. Carry out adjustment when DLP chip has been re-
placed or combination of chip and formatter has been
changed.
Rank:
changed.
Rank:
B C D E
Setting value: 1 2 3 4
Adjustment when assembling
No.
Adjusting point
Adjusting conditions
Adjusting procedure
22
Adjustment of
DLP Brightness
DLP Brightness
1. Select the following group
and subject.
Group : DLP
Subject : R-Bright
Group : DLP
Subject : R-Bright
G-Bright
B-Bright
B-Bright
1. Check the fixed value.
Fixed value
: 32
Checkpoints
23
RGB tone
reproduction
adjustment
reproduction
adjustment
1. Make sure the 100% and 95% white as well as the
0% and 5% black gradations are visible.
1. Feed the SMPTE pattern
signal.
24
White balance
checking and
readjustment
checking and
readjustment
1. RGB Inputt, sRGB Input,
DTV Input, DVD Input,
VIDEO Input
VIDEO Input
Check that there is no deviation of white balance with
the monitor.
the monitor.
1. Select OFF from the process mode.
Make sure the off-timer starts with 5 minutes
onscreen and count one minute in one second.
And then indication is 0 minute, the power supply
of the set is cut off.
onscreen and count one minute in one second.
And then indication is 0 minute, the power supply
of the set is cut off.
25
Off-timer per-
formance
formance
1. Heat the thermistor with a
hair dryer.
1. Make sure that the temperature is indicated.
26
Thermistor
performance
checking
performance
checking
1. Feed the phase check pat-
tern signal.
1. In the VGA, SVGA, XGA and SXGA modes, make
sure the Clock, Phase, H-Pos and V-Pos settings
can be automatically adjusted.
can be automatically adjusted.
27
Auto sync
performance
checking
performance
checking
1. Connect to a PC with a
USB cable.
1. Check that advance/reverse operation on PC screen
is possible by using remote control.
28
USB operation
check
check
1. Select the following group
and subjects.
Group : LAMP
Subject : OFF
Group : LAMP
Subject : OFF
1. Connect to a PC with a
LAN cable.
1. Check that communication is possible.
29
LAN operation
check
check
30
XG-MB70X
No.
Adjusting point
Adjusting conditions
Adjusting procedure
30
Delivery set-
tings
tings
1. Make the following settings.
Destination
Process
Remote control
adjustment
adjustment
USA
SS4
Factory setting at 4
China
SS5
Factory setting at 5
Europe and
the Other
SS3
Factory setting at 3
Contries
AF (autofocus) inspection
< Camera >
Required conditions:
1. Place the unit in front of the screen (size: 60-inch diagonal) at the distance of 1.8m. There is no light source such as
Required conditions:
1. Place the unit in front of the screen (size: 60-inch diagonal) at the distance of 1.8m. There is no light source such as
a fluorescent light or reflector in the background.
2. Focus is adjusted correctly.
3. RGB input of 256-gradation pattern.
Method:
1. Send AF inspection command ("_CMR 1").
2. Check that the response command is "OK".
< AF function >
Required conditions:
1. Place the unit in front of the screen (size: 60-inch diagonal) at the distance of 1.8m. There is no light source such as
3. RGB input of 256-gradation pattern.
Method:
1. Send AF inspection command ("_CMR 1").
2. Check that the response command is "OK".
< AF function >
Required conditions:
1. Place the unit in front of the screen (size: 60-inch diagonal) at the distance of 1.8m. There is no light source such as
a fluorescent light or reflector in the background.
Method:
1. Press the AF button. AF operation must end within 11 seconds.
2. Check that the difference from the just focus point is within ±15cm.
1. Press the AF button. AF operation must end within 11 seconds.
2. Check that the difference from the just focus point is within ±15cm.
* The above time applies when the focus start position is not fixed.
After the camera inspection, AF operation must end within 6 seconds.
After the camera inspection, AF operation must end within 6 seconds.
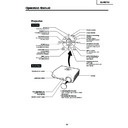
Calling and quitting the process mode with the control keys on this model.
∗ Although it is possible for the process OUT to exit using the process menu, the IN/OUT toggle command is also
available considering the existing specification.
1. Calling and quitting
With the menu not displayed, press the "ENTER", "ENTER", "VOL+", "VOL-", "ENTER", "ENTER" and "MENU"
keys on main unit.
keys on main unit.
2. Others
Press the S3563 process key (toggle) on the main PWB to call and quit the process menu.
Note: When adjusting in the process mode, set a signal with a vertical frequency of 60 Hz or no signal. (May not be
properly adjusted with other signals.)
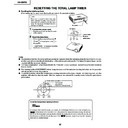
Resetting the lamp timer for this model
1. Resetting procedure
In Stand-by, run this command to clear the operating time of the lamp to 0 and turn on the power.
Press and hold "DOWN", "ENTER", and "MENU", and then press the Power (toggle) key of the set.
Press and hold "DOWN", "ENTER", and "MENU", and then press the Power (toggle) key of the set.
Forced disabling of the System-Lock of this model
1. Disabling procedure
With System-Lock input window onscreen, press the "MENU", "ENTER", "ENTER", "MENU", "ENTER", "ENTER"
and "MENU" keys, in this order, on the remote controller.
and "MENU" keys, in this order, on the remote controller.
31
XG-MB70X
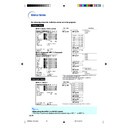
» Adjustment mode process menu
Adjustment mode process menu 1
* Adjust only the shaded items below.
* Adjust only the shaded items below.
Adjustment Process Menu
First layer
DTV
VERSION
DVD
SS
VIDEO
TEMP
AD
OPTION
AD2
LAMP
DLP
LINE
VIDEO1
Pedestal
Pedestal
EXIT
second layer
Initial Value
DTV
Contrast
4
Tint
5
Color
12
Sharpness
2
Bright
40
B-DRIVE
41
R-DRIVE
41
EXIT
DVD
Contrast
4
Tint
5
Color
12
Sharpness
3
Bright
40
B-DRIVE
41
R-DRIVE
41
EXIT
VIDEO
Contrast
4
N-Tint
5
P-Tint
5
S-Tint
5
N-Color
6
P-Color
6
S-Color
6
Sharpness
3
Bright
40
B-DRIVE
41
R-DRIVE
41
EXIT
AD
R-Bright
63
G-Bright
63
B-Bright
63
R-Contrast
155
G-Contrast
155
B-Contrast
155
EXIT
second layer
Initial Value
AD2
R-Bright2
63
G-Bright2
63
B-Bright2
63
R-Contrast2
155
G-Contrast2
155
B-Contrast2
155
EXIT
DLP
Index Delay
10500
R-Bright
32
G-Bright
32
B-Bright
32
R-Contrast
34
G-Contrast
34
B-Contrast
34
SR-Cont
34
SG-Cont
34
SB-Cont
34
EXIT
VIDEO1
N-Contrast
12
P-Contrast
13
S-Contrast
14
Color
17
NT3.58Delay
1
NT4.43Delay
1
PAL Delay
1
SECAM Delay 3
EXIT
EXIT
Pedestal
R-Bright
-10
G-Bright
-10
B-Bright
-10
R-Contrast
15
G-Contrast
15
B-Contrast
15
EXIT
32
XG-MB70X
second layer
Initial Value
VERSION
Build
Boot Code
Config
RomCode
GUI
DLP
AF Unit
LAN
EXIT
Boot Code
Config
RomCode
GUI
DLP
AF Unit
LAN
EXIT
SS
SS2
SS3 EU
SS4 US
SS5 JPN
SS6 CHIN
EXIT
SS3 EU
SS4 US
SS5 JPN
SS6 CHIN
EXIT
TEMP
Temp1
Parameter of sensor1
Temp2
Parameter of sensor2
EXIT
OPTION
Pixel Gamma
Standard RGB
DLP Gamma
4
EXIT
LAMP
Current Time
Current time of use
History1
One Earlier
History2
Two Earlier
History3
Three Earlier
History4
Four Earlier
TOTAL TIME
Total operating hours
EXIT
LINE
OFF
LED CHECK
Calibration
K-Senser
EXIT
LED CHECK
Calibration
K-Senser
EXIT
Adjustment mode process menu 2
Display

