Sharp XG-C55X (serv.man9) Service Manual ▷ View online
15
XG-C55X
AC socket
INPUT button
ENTER button
UNDO buttom
Power (ON)
button
1
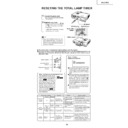
Connect the power cord.
Plug the power cord into the AC socket
of the projector.
of the projector.
2
Reset the lamp timer.
While pressing simultaneously
,
and
•
•
•
•
on the projector, press
ON
on
the projector.
LAMP 100% is displayed, indicating
that the lamp timer is reset.
Info
Make sure to reset the lamp timer only
when replacing the lamp. If you reset the
lamp timer and continue to use the same
lamp, this may cause the lamp to become
damaged or explode.
when replacing the lamp. If you reset the
lamp timer and continue to use the same
lamp, this may cause the lamp to become
damaged or explode.
Ë The warning lights on the projector indicate problems inside the projector.
Ë If a problem occurs, either the temperature warning indicator or the lamp replacement indicator will
Ë If a problem occurs, either the temperature warning indicator or the lamp replacement indicator will
illuminate red, and the power will turn off. After the power has been turned off, follow the proce-
dures given below.
dures given below.
Temperature warning
indicator
Lamp replacement
indicator
Power indicator
About the temperature warning indicator
If the temperature inside the pro-
jector increases, due to blockage
of the air vents, or the setting lo-
cation, "
jector increases, due to blockage
of the air vents, or the setting lo-
cation, "
" will blink in the
lower left corner of the picture. If
the temperature keeps on rising,
the lamp will turn off and the tem-
perature warning indicator will
blink, the cooling fan will run for
further 90 seconds, then the power
will be shut off. After "
the temperature keeps on rising,
the lamp will turn off and the tem-
perature warning indicator will
blink, the cooling fan will run for
further 90 seconds, then the power
will be shut off. After "
" ap-
pears, be sure to perform the fol-
lowing measures.
lowing measures.
About the lamp
replacement indicator
replacement indicator
ËThe lamp life becomes 0%, when used
for approximately 2,000 hours with "ON"
in "Power Save" or when used for approxi-
mately 1,500 hours with "OFF" in "Power
Save".
in "Power Save" or when used for approxi-
mately 1,500 hours with "OFF" in "Power
Save".
ËWhen the remaining lamp life becomes
6% or less, "
" will be displayed on the
screen in yellow. When the percentage
becomes 0%, "
becomes 0%, "
" will change to "
"
(red), the lamp will automatically turn off
and then the projector as well. At this time,
the lamp replacement indicator will illu-
minate in red.
and then the projector as well. At this time,
the lamp replacement indicator will illu-
minate in red.
ËIf you try to turn on the projector a fourth
time without replacing the lamp, the pro-
jector will not turn on.
jector will not turn on.
Maintenance indicator
Condition
Problem
Possible Solution
Temperature
warning
indicator
Normal
Abnormal
Off
Red on/
Power off
Power off
The internal
temperature is
abnormally high.
temperature is
abnormally high.
Abnormal
Blocked air intake
Relocate the projector to an area
with proper ventilation.
with proper ventilation.
Cooling fan break-
down
Internal circuit failure
Clogged air intake
down
Internal circuit failure
Clogged air intake
Take the projector to your nearest
Sharp Authorized Projector Dealer
or Service Center for repair.
Sharp Authorized Projector Dealer
or Service Center for repair.
Lamp
replacement
indicator
Red on/
Power off
Power off
The lamp does
not illuminate.
not illuminate.
Burnt-out lamp
Lamp circuit failure
Lamp circuit failure
Carefully replace the lamp.
Take the projector to your nearest
Sharp Authorized Projector Dealer
or Service Center for repair.
Please exercise care when
replacing the lamp.
Take the projector to your nearest
Sharp Authorized Projector Dealer
or Service Center for repair.
Please exercise care when
replacing the lamp.
Green on
Green
blinks
when the
lamp is
active.
Red blinks/
Red on
Red on
Time to change
the lamp
the lamp
Remaining lamp life
becomes 6% or
under.
becomes 6% or
under.
Power
indicator
The power
indicator blinks
in red when the
projector is on.
indicator blinks
in red when the
projector is on.
The filter cover, lamp
unit cover or lens
cov
unit cover or lens
cov
•
•
•
•
•
•
•
•
•
•
•
•
•
•
•
•
•
er is open.
Securely install the filter cover.
If the power indicator blinks even
when the filter cover is securely
installed, contact your nearest
Sharp Authorized Projector Dealer
or Service Center for advice.
If the power indicator blinks even
when the filter cover is securely
installed, contact your nearest
Sharp Authorized Projector Dealer
or Service Center for advice.
Green on/
Red on
Red on
Red blinks
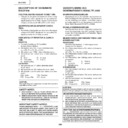
RESETING THE TOTAL LAMP TIMER
Display

