Sharp PG-A10S (serv.man8) Service Manual ▷ View online
20
PG-A10S
PG-A10S-SL
PG-A10S-SL
AN-A10T
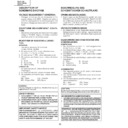
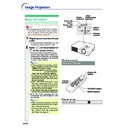
Resetting the TOTAL LAMP TIMER
1 Connect the power cord.
• Plug the power cord into the AC
socket of the projector.
socket of the projector.
2 Reset the lamp timer.
•While simultaneously holding down
and
on the projector, press
and
on the projector.
•“LAMP 0000H” is displayed, indicating
that the lamp timer is reset.
Info
• Make sure to reset the lamp
timer only when replacing the
lamp. If you reset the lamp
timer and continue to use the
same lamp, this may cause the
lamp to become damaged or
explode.
timer only when replacing the
lamp. If you reset the lamp
timer and continue to use the
same lamp, this may cause the
lamp to become damaged or
explode.
AC socket
Power ON button
Volume
buttons
buttons
AUTO SYNC
button
button
●
Resetting the total lamp timer
When replacing the lamp, reset the total lamp timer in the procedure below.
When replacing the lamp, reset the total lamp timer in the procedure below.
■
The warning lights on the projector indicate problems inside the projector.
■
If a problem occurs, either the temperature warning indicator or the lamp replacement indicator will illumi-
nate red, and the power will turn off. After the power has been turned off, follow the proce-duresgiven
below.
nate red, and the power will turn off. After the power has been turned off, follow the proce-duresgiven
below.
■
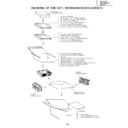
Replacing the Air Filter
21
PG-A10S
PG-A10S-SL
PG-A10S-SL
AN-A10T
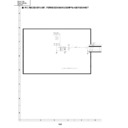
THE OPTICAL UNIT OUTLINE
Layout for proper setup of the optical components and parts (top view)
LIGHT SOURCE
(LAMP)
Mirror R,G,B
Condencing lens
B reflector
UV reflector
Mirror B
G reflector
Fly-eye lens(Input)
Fly-eye lens(Output)
Relay lens 1
Mirror R 1
Relay lens 2
R dichroic filter
Mirror R 2
Relay lens 3
Input polarizer R
LCD(R)
LCD(B)
LCD(G)
Output pre-polarizer G
Input polarizer B
Input polarizer G
Condencing lens B
Projection lens
Blue
Green/Red
Red
PBS
Green
Output pre-polarizer B
Cross dichroic prizm
Condencing lens G
22
PG-A10S
PG-A10S-SL
PG-A10S-SL
AN-A10T
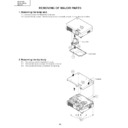
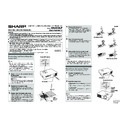
Replacing the prism holder unit
1. Remove the two lock screws, and take the prism holder unit and the projection lens assembly out of the optical
unit.
2. Remove the four lock screws, separate the prism holder unit and the projection lens assembly from each other.
3. Replace the prism holder unit with new one. Take the above steps 1 and 2 in reverse order.
3. Replace the prism holder unit with new one. Take the above steps 1 and 2 in reverse order.
Note: Even if just one of the LCD panels is defective, it is necessary to replace the entire prism holder unit. Do not
replace just the defective LCD panel only.
1
Prizm holder unit lock screws
2
Projection lens lock screws
Projection lens assembly
Prizm holder unit
R-LCD panel
B-LCD panel
G-LCD panel
Optical unit
Display


