Sharp MX-M850 (serv.man35) Service Manual ▷ View online
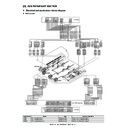
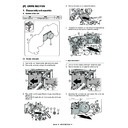
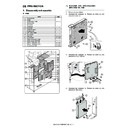
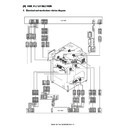
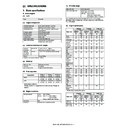
MX-M1100 EXTERNAL VIEW AND INTERNAL STRUCTURE 5 – 4
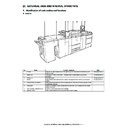
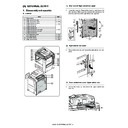
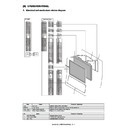
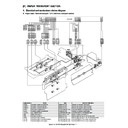
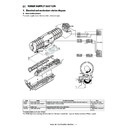
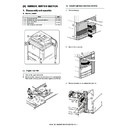
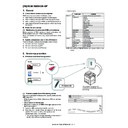
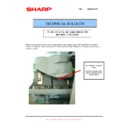
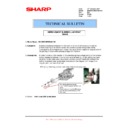
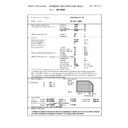
C. Automatic document feeder and document glass
No.
Name
Funciton / Operation
1
Document feeding area cover
Open to remove a misfed original.
2
Original guides
These help ensure that the original is scanned correctly.
Adjust the guides to the width of the original.
Adjust the guides to the width of the original.
3
Document feeder tray
Place originals in this tray. 1-sided originals must be placed face up.
4
Original exit tray
Originals are delivered to this tray after scanning.
5
Scanning area
Originals placed in the document feeder tray are scanned here.
6
Document glass
Use this to scan a book or other thick original that cannot be fed through the automatic document feeder.
5
6
1
2
3
4
MX-M1100 EXTERNAL VIEW AND INTERNAL STRUCTURE 5 – 5
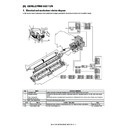
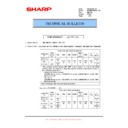
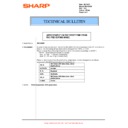
D. Operation panel
No.
Name
Funciton / Operation
1
Status indicators
Green and red indicators will light or blink to indicate the machine's status. When the green indicator lights or blinks, the
machine is operating normally. When the red indicator lights or blinks, an error has occurred.
machine is operating normally. When the red indicator lights or blinks, an error has occurred.
2
Touch panel
Messages and keys appear in the touch panel display.
Touch the displayed keys to perform a variety of operations.
When a key is touched, a beep sounds and the selected item is highlighted. This provides confirmation as you perform
an operation.
Touch the displayed keys to perform a variety of operations.
When a key is touched, a beep sounds and the selected item is highlighted. This provides confirmation as you perform
an operation.
3
[HOME] key
Touch this key to display the home screen. Frequently used settings can be registered in the home screen to enable
quick and easy operation of the machine.
quick and easy operation of the machine.
4
[SYSTEM SETTINGS] key
Press this key to display the system settings menu screen. The system settings are used to configure paper tray settings,
store addresses for transmission operations, and adjust parameters to make the machine easier to use.
store addresses for transmission operations, and adjust parameters to make the machine easier to use.
5
[JOB STATUS] key
Press this key to display the job status screen. The job status screen is used to check information on jobs and to cancel
jobs.
jobs.
6
[LOGOUT] key (
)
Press this key to log out after you have logged in and used the machine. When using the fax function, this key can also
be pressed to send tone signals on a pulse dial line.
be pressed to send tone signals on a pulse dial line.
7
Numeric keys
These are used to enter the number of copies, fax numbers, and other numerical values.
8
[#/P] key (
)
When using the copy function, press this key to use a job program. When using the fax function, this key can be used
when dialing.
when dialing.
9
[CLEAR ALL] key (
)
Press this key to return to the initial operation state.
Use this key when you wish to cancel all settings that have been selected and start operation from the initial state.
Use this key when you wish to cancel all settings that have been selected and start operation from the initial state.
10
[CLEAR] key (
)
Press this key to return the number of copies to "0".
11
[STOP] key (
)
Press this key to stop a copy job or scanning of an original.
12
[START] key (
)
Press this key to copy or scan an original. This key is also used to send a fax in fax mode.
13
[PROOF COPY] key (
)
Use this to make a proof copy. For information on proof copying, see "CHECKING COPIES BEFORE PRINTING (Proof
Copy)" in the Copier Guide.
Copy)" in the Copier Guide.
14
[POWER SAVE] key (
) /
indicator
Use this key to put the machine into auto power shut-off mode to save energy.
The [POWER SAVE] key (
The [POWER SAVE] key (
) blinks when the machine is in auto power shut-off mode.
15
[POWER] key (
)
Use this key to turn the machine power on and off.
16
Main power indicator
This lights up when the machine's main power switch is in the "on" position. Normally this lights solid green.
When the machine has the Internet fax or fax function and the power is turned off with the [POWER] key (
When the machine has the Internet fax or fax function and the power is turned off with the [POWER] key (
),
this lights solid orange.
PROOF COPY
LOGOUT
SYSTEM
SETTINGS
HOME
JOB STATUS
1
2
3
4
5 6
7
8
9 10 11
12 13
14 15 16
PROOF COPY
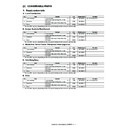
MX-M1100 EXTERNAL VIEW AND INTERNAL STRUCTURE 5 – 6
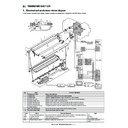
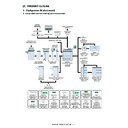
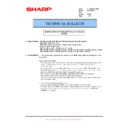
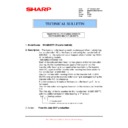
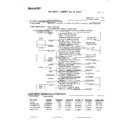
E. Print/send status (Job status)
No.
Name
Funciton / Operation
Note
1
Mode select tabs
Use these tabs to select print mode, scan mode, fax mode, or Internet fax mode.
• The [Print Job] tab shows copy, print, received fax, received Internet fax, and self print
• The [Print Job] tab shows copy, print, received fax, received Internet fax, and self print
jobs.
• The [Scan to] tab shows transmission jobs that use the scanner function.
• The [Fax Job] tab shows transmission (and reception) jobs that use the fax and PC-Fax
• The [Fax Job] tab shows transmission (and reception) jobs that use the fax and PC-Fax
functions.
• The [Internet Fax] tab shows transmission (and reception) jobs that use the Internet fax
and PC-I-fax functions.
For more information on
the job status screen in
each mode, see the
manual for each mode.
the job status screen in
each mode, see the
manual for each mode.
2
Job list
• The screen shows lists of the jobs that are reserved and in progress, and jobs that have
been completed.
When the [Print Job] tab is touched in the mode select tabs, the job status screen selector
key changes and the "Spool" list appears.
A brief description of each job and its status appears in the list.
When the [Print Job] tab is touched in the mode select tabs, the job status screen selector
key changes and the "Spool" list appears.
A brief description of each job and its status appears in the list.
• The "Spool" screen shows spooled print jobs and encrypted PDF jobs waiting for password
entry. To move an encrypted PDF job from the spool list to the job queue, touch the key of
the job and enter the job password.
the job and enter the job password.
3
Job status screen selector
key
key
This switches the job list display between spooled jobs, the job queue, and completed jobs.
• "Spool" : This shows spooled print jobs and encrypted PDF jobs waiting for password
• "Spool" : This shows spooled print jobs and encrypted PDF jobs waiting for password
entry. "Spool" appears when print jobs are displayed.
• "Job Queue" : This shows reserved jobs and the job in progress.
• "Complete" : This shows completed jobs.
• "Complete" : This shows completed jobs.
4
“Paper Empty” display
Add paper.
When the status is "Paper Empty", the specified size of paper for the job is not loaded in any
of the trays.
In this case, the job will be held until the required size of paper is loaded. Other jobs that are
waiting will be printed (if possible) ahead of the held job. (However, other jobs will not be
printed if the paper ran out while printing was in progress.)
If you need to change the paper size because the specified paper size is not available, touch
the key of the job in the job list “2” to select it, touch the [Detail] key described in “6”, and
select a different paper size.
5
keys
These change the page of the displayed job list.
6
[Detail] key
This shows detailed information on a selected job.
When a job has been stored using Quick File or File in document filing mode, or when a
broadcast transmission has been performed in image send mode, the job appears as a key in
the completed jobs screen. You can touch the [Detail] key to show details on the completed
job, and you can also touch the [Call] key to reprint or resend the job.
7
[Priority] key
A reserved job in the "Job Queue" screen can be printed ahead of all other reserved jobs by
selecting the job and then touching this key.
In the print job queue, select the print or copy job to which you wish to give priority and touch
this key. The job in progress stops and printing of the selected job begins. When the selected
job is completed, the interrupted job resumes.
selecting the job and then touching this key.
In the print job queue, select the print or copy job to which you wish to give priority and touch
this key. The job in progress stops and printing of the selected job begins. When the selected
job is completed, the interrupted job resumes.
8
[Stop / Delete] key
Use this key to cancel the job currently in progress or a selected reserved job. Note that
printing of received faxes and received Internet faxes cannot be canceled.
printing of received faxes and received Internet faxes cannot be canceled.
9
[Call] key
A job that appears in the completed jobs screen as a key can be touched followed by the
[Call] key to reprint or resend the job. This is the same [Call] key that appears when the
[Detail] key is touched.
[Call] key to reprint or resend the job. This is the same [Call] key that appears when the
[Detail] key is touched.
Detail
Spool
Complete
Stop/Delete
2
3
4
0002 / 0000
Computer01
0002 / 0000
0312345678
0001 / 0000
Print Job
Job Queue
Sets / Progress
Status
Scan to
Fax Job
Internet Fax
Priority
1
1
Job Queue
1
0020 / 0001
Paper Empty
Waiting
Waiting
Copying
Copy
Copy
Spool
Complete
Job Queue
Detail
Call
"Complete"
job screen
job screen
1
2
3
4
5
5
6
7
8
7
8
9
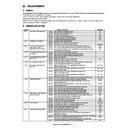
MX-M1100 EXTERNAL VIEW AND INTERNAL STRUCTURE 5 – 7
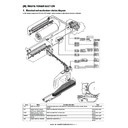
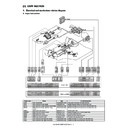
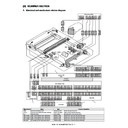
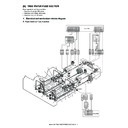
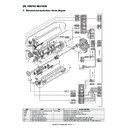
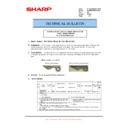
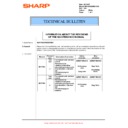
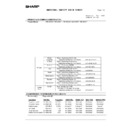
F. Sensor
Signal name
Name
Type
Function / Operation
Active condition
Note
APFD1
ADU paper entry detection 1
Reflection type
Detects the ADU paper pass.
APFD2
ADU paper entry detection 2
Reflection type
Detects the ADU paper pass.
APPD1
ADU transport detection 1
Reflection type
Detects the ADU paper transport.
APPD2
ADU transport detection 2
Reflection type
Detects the ADU paper transport.
APPD3
ADU transport detection 3
Reflection type
Detects the ADU paper transport.
SPLS3
SPLS3
SPLS1
SPLS1
SPWS
SPWS
SPED
SPED
STUD
STUD
SPRDMD1
SPRDMD1
SPPD1
SPPD1
SPPD2
SPPD2
SPPD3
SPPD3
SPPD4
SPPD4
SPPD5
SPPD5
SPPD6
SPPD6
SOCD
SOCD
MHPS
MHPS
OCSW
OCSW
SEL_ANIN_2
SEL_ANIN_2
SEL_ANIN_4
SEL_ANIN_4
C1LUD
C1LUD
C1PED
C1PED
C1SPD
C1SPD
C2LUD
C2LUD
C2PED
C2PED
TANSET
TANSET
C2SPD
C2SPD
C3SS1
C3SS1
C3SS3
C3SS3
C3SS2
C3SS2
C3SS4
C3SS4
C3SPD
C3SPD
C3LUD
C3LUD
C3PFD
C3PFD
VPPD
VPPD
PPD1
PPD1
PPD2
PPD2
C4PWS
C4PWS
TNBOX
TNBOX
HUS-RA/TH-RA
HUS-RA/TH-RA
HUS-CL/TH-CL
HUS-CL/TH-CL
PCS
PCS
PPD3
PPD3
PPD4
PPD4
BOTSW
BOTSW
TFSD
TFSD
BOTD
BOTD
MCHPS1
MCHPS1
DESS
DESS
TLS
TLS
FPGHP
FPGHP
POIND
POIND
POD
POD
DSBD1
DSBD1
DSBD2
DSBD2
FDSBD
FDSBD
APPD1
APPD1
APPD2
APPD2
TLS2
TLS2
APPD3
APPD3
APFD1
APFD1
WEBED
WEBED
WEBSPD
WEBSPD
TCS
TCS
C1PPD1
C1PPD1
C1PPD2
C1PPD2
APFD2
APFD2
DPFS-T
DPFS-T
DPFS-R
DPFS-R
C2PFD
C2PFD
DSW-CS
DSW-CS
C1PFD
C1PFD
C4PFD
C4PFD
TNF
TNF
C3PED
C3PED
C4LUD
C4LUD
C4PED
C4PED
C4SS1
C4SS1
C4SS3
C4SS3
C4SS2
C4SS2
C4SS4
C4SS4
C4SPD
C4SPD
SEL_IN_8
SEL_IN_8
SEL_IN_7
SEL_IN_7
SEL_IN_5
SEL_IN_5
SEL_IN_6
SEL_IN_6
SEL_ANIN_1
SEL_ANIN_1
SLCOV
SLCOV
SPPD7
SPPD7
SPOD
SPOD
SDFS1
SDFS1
SDFS2
SDFS2
SCOV
SCOV
STLD
STLD

