Sharp MX-FN19 / MX-FN20 / MX-PN12 (serv.man5) Service Manual ▷ View online
MX-7040N MX-FN19 (FINISHER (50 sheets binding)) 13 – 6
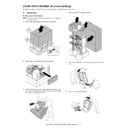
10) Loosen both of the caster fixing screws of the front side and
rear side.
11) Remove the screw, and remove the spanner installed inside
the front lower door.
12) Turn the bolt for which the adjustment is necessary, and adjust
to become it within the range of specification.
13) Check to insure that the upper and lower clearances between
the main unit and the finisher are even.
MX-7040N MX-FN19 (FINISHER (50 sheets binding)) 13 – 7
14) Tighten the caster fixing screws so that the indicator scale is
fit.
15) Install the rear lower cover with the fixing screws.
16) Install the auxiliary wheels with the fixing screws.
17) Install the spanner for adjustment to inside the front lower door.
18) Close the front lower cover, and secure it with the fixing
screws.
19) Attach the front upper cover.
20) Close the front upper cover.
1
2
2
MX-7040N MX-FN19 (FINISHER (50 sheets binding)) 13 – 8
21) Attach the front lower cover with the fixing screw.
F. Connection of the finisher
1)
Engage the finisher to the main unit.
2)
Open the front cover of finisher.
3)
Fix the finisher to the main unit with the step screw (Packed
items No.4).
items No.4).
4)
Close the front cover.
5)
Remove the screw, and remove the connector cover on rear
side of the finisher.
side of the finisher.
6)
Install the step screw (Packed items No.4).
7)
Attach the connector cover on rear side of the finisher.
G. Connection of connector to the main unit
1)
Connect two connectors of the finisher to the main unit, and
tighten the screws.
tighten the screws.
MX-7040N MX-FN19 (FINISHER (50 sheets binding)) 13 – 9
H. Staple position label attachment
1)
Attach the staple position label (Packed items No.11, 12) to the
position indicated in the figure.
For scanner
position indicated in the figure.
For scanner
For DSPF
I. Turn on the power of the main unit
1)
Connect the power plug of the machine to the power outlet,
and turn ON the main power switch and the operation panel
power switch.
and turn ON the main power switch and the operation panel
power switch.
Cleaning of the document scan section
CAUTION
When streaks appear on copy or scan
images, open the automatic document
feed unit and clean the document scan
section with the glass cleaner (accessory).
Click on the first or last page to see other MX-FN19 / MX-FN20 / MX-PN12 (serv.man5) service manuals if exist.

