Sharp MX-DEX1 (serv.man8) Service Manual ▷ View online
MX-DEX1/DEX2 DISASSEMBLY AND ASSEMBLY 6 – 3
3)
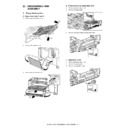
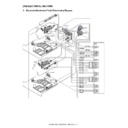
Remove the paper feed upper PG reinforcing plate.
4)
Remove the bracket for each sensor.
H. Transport sensor
1)
Remove paper feed unit 1 or 2.
2)
Remove the paper feed vertical transport PG unit. (This step
is only necessary for paper feed unit 2).
is only necessary for paper feed unit 2).
3)
Remove the paper feed upper PG reinforcing plate.
4)
Remove the sensor holder.
I. Size detection PWB
1)
Remove paper feed tray 1 or 2.
2)
Remove the size detection PWB unit.
3)
Remove the size detection PWB after releasing the pawl.
J. Paper level sensor
1)
Remove paper feed tray 1 or 2.
2)
Remove the paper level sensor.
2. Drive section
A. Drive unit
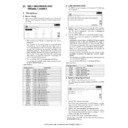
1)
Remove paper feed tray 1 or 2.
2)
Remove the rear cabinet.
3)
Remove the drive unit.
DEX2
ONLY
ONLY
DEX2
ONLY
ONLY
1
2
DEX2
ONLY
ONLY
MX-DEX1/DEX2 DISASSEMBLY AND ASSEMBLY 6 – 4
B. Main motor
1)
Remove paper feed tray 1 or 2.
2)
Remove the rear cabinet.
3)
Remove the main motor.
C. Lift-up motor
1)
Remove paper feed tray 1 or 2.
2)
Remove the rear cabinet.
3)
Remove the lift-up motor unit.
4)
Remove the lift-up coupling after releasing the pawl.
Detach the lift-up spring from the lift-up motor.
Detach the lift-up spring from the lift-up motor.
D. Desk 1 paper feed clutch
1)
Remove the drive unit.
2)
Disconnect the connector and then remove each part.
3)
Remove the drive frame.
4)
Remove the harness seat and each part and then remove
desk 1 paper feed clutch unit.
desk 1 paper feed clutch unit.
1
2
3
DEX2
ONLY
ONLY
DEX2
ONLY
ONLY
MX-DEX1/DEX2 DISASSEMBLY AND ASSEMBLY 6 – 5
5)
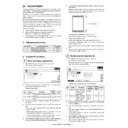
Remove the E ring and then remove desk 1 paper feed clutch.
E. Desk 2 paper feed clutch
1)
Remove the drive unit.
2)
Disconnect the connector and then remove each part.
3)
Remove the drive frame.
4)
Remove desk 2 paper feed clutch unit.
5)
Remove the E ring and then remove desk 2 paper feed clutch.
F. Transport clutch
1)
Remove the drive unit.
2)
Disconnect the connector and then remove each part.
3)
Remove the drive frame.
4)
Remove the harness seat and each part and then remove the
transport clutch unit.
transport clutch unit.
5)
Remove the E ring and then remove the transport clutch.
3. Miscellaneous
A. Control PWB
1)
Remove the rear cabinet.
2)
Remove the control PWB.
DEX2 ONLY
2
1
DEX2
ONLY
ONLY
DEX2 ONLY
MX-DEX1/DEX2 DISASSEMBLY AND ASSEMBLY 6 – 6
B. Transport roller (Main unit)
1)
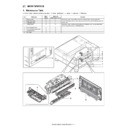
Remove the right side front cabinet of the copier main unit.
2)
Remove the lower right door unit.
3)
Remove the paper-feed transport lower PG unit.
4)
Remove the transport lower gear and belt.
5)
Remove the ground plate. Remove each part and then
remove the transport roller.
remove the transport roller.
Display

