Sharp MX-6201N / MX-7001N (serv.man37) Service Manual ▷ View online
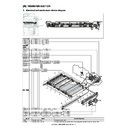
MX-7001N TRANSFER SECTION M – 13
4)
Disenage the pawl (D). Remove the PTC cleaner B (E), and
remove the PTC cleaner (F).
* When installing, check that the charger wire (G) is posi-
remove the PTC cleaner (F).
* When installing, check that the charger wire (G) is posi-
tioned to center of the cleaner pad (H).
* When installing the PTC cleaner B (E), be sure to check that
the pawl (D) and the pawl (I) of the PTC cleaner (F) is
engaged.
engaged.
* When removing or installing, be careful that the charger wire
(G) hang up the lower side (J) of the PTC cleaner (F).
b. Charger wire
1)
Remove the paper dust removal cleaner. (Refer to the “[G]
PAPER TRANSPORT SECTION”.)
PAPER TRANSPORT SECTION”.)
2)
Remove the PTC unit. (Refer to the "(1) PTC unit".)
3)
Remove the PTC cleaner B and PTC cleaner. (Refer to the “a.
PTC cleaner B, PTC cleaner”.)
PTC cleaner B, PTC cleaner”.)
4)
Loosen the screw (A) within the range to hold the plate.
Remove the round terminal (C) from the pawl (B). Remove the
spring (E) from the pawl (D). Remove the charger wire (F).
Remove the spring (E) form the round terminal (G).
* When installing, hold the round terminal (C). Don't touch the
Remove the round terminal (C) from the pawl (B). Remove the
spring (E) from the pawl (D). Remove the charger wire (F).
Remove the spring (E) form the round terminal (G).
* When installing, hold the round terminal (C). Don't touch the
wire directly.
* When installing, be careful to dirt of the wire and don't put oil
etc., and be sure to prevent the wire bending or twisting.
D. Secondary transfer separating drive unit
(1) Secondary transfer separating drive unit
1)
Release the lock (A), and open the right door unit (B).
Unit
Parts
Mainte
nance
1
PTC unit
c
Charger wire
✕ ▲
G
H
J
D
E
I
1-b
F
1-a
1-c
Unit
Parts
Page
1
Secondary transfer
separating drive unit
separating drive unit
a
Secondary transfer
separation motor
separation motor
M -14
b
Secondary transfer
separation drive sensor
separation drive sensor
M -15
Parts
1
Secondary transfer drive unit
D
E
B
C
E
G
F
1-c
A
1
1-a
1-b
A
B
MX-7001N TRANSFER SECTION M – 14
2)
Remove the screws (C), and remove the paper guide (D).
3)
Remove the screws (E), and remove the pressure plate (F)
and springs (G).
and springs (G).
4)
Disconnect the connector (H). Remove the screw (I). Disenage
the pawl (J), and remove the cover (K).
the pawl (J), and remove the cover (K).
5)
Remove the screws (L), and remove the secondary transfer
separation drive unit (M).
separation drive unit (M).
a. Secondary transfer separation motor
1)
Release the lock (A), and open the right door unit (B).
2)
Remove the screws (C), and remove the paper guide (D).
3)
Remove the screws (E), and remove the pressure plate (F)
and springs (G).
and springs (G).
C
C
D
E
E
E
E
F
G
G
I
H
H
K
J
L
L
M
1
Unit
Parts
1
Secondary transfer
separating drive unit
separating drive unit
a
Secondary transfer separation motor
1-a
A
B
C
C
D
E
E
E
E
F
G
G
MX-7001N TRANSFER SECTION M – 15
4)
Disconnect the connector (H). Remove the screws (I), and
remove the secondary transfer separation motor unit (J).
remove the secondary transfer separation motor unit (J).
5)
Disengage the pawls (K), and remove the coupling (M) and
spring (N) from the secondary transfer separation motor (L).
spring (N) from the secondary transfer separation motor (L).
b. Secondary tansfer separation drive sensor
1)
Release the lock (A), and open the right door unit (B).
2)
Remove the screws (C), and remove the paper guide (D).
3)
Remove the screws (E), and remove the pressure plate (F)
and springs (G).
and springs (G).
4)
Disconnect the connector (H). Remove the screw (I). Disenage
the pawl (J), and remove the cover (K).
the pawl (J), and remove the cover (K).
5)
Disconnect the connector (L), and remove the secondary sep-
aration drive sensor (M).
aration drive sensor (M).
Unit
Parts
1
Secondary transfer
separating drive unit
separating drive unit
b
Secondary transfer separation drive
sensor
sensor
I
H
I
J
K
M
K
N
L
1-a
1-b
A
B
C
C
D
E
E
E
E
F
G
G
I
H
H
K
J
L
M
1-b
MX-7001N TRANSFER SECTION M – 16
E. Others
(1) Transfer belt separation BK detection
1)
Remove the primary transfer unit. (Refer to the "A. Primary
transfer unit".)
transfer unit".)
2)
Remove the rear cabinet. (Refer to the "[A] EXTERNAL OUT-
FIT")
FIT")
3)
Remove the screws (A), and open the control box (B).
4)
Disconnect the connectors (C).
5)
Disconnect the connector (D). Remove the screw (E), and dis-
engage the pawls (F), and remove the electrode holder (G).
engage the pawls (F), and remove the electrode holder (G).
6)
Remove the transfer belt separation BK detection (H).
Parts
Page
a
Transfer belt separation BK detection
M -16
b
Sensor inside the PTC unit
M-17
Parts
a
Transfer belt separation BK detection
b
a
a
B
B
A
A
C
C
D
G
E
F
F
a
H
Click on the first or last page to see other MX-6201N / MX-7001N (serv.man37) service manuals if exist.

