Sharp AR-SP8 Service Manual ▷ View online
CONTENTS
Parts marked with “
” are important for maintaining the safety of the machine. Be sure to replace these parts
with the replacement parts specified to maintain the safety and performance of the machine.
SHARP CORPORATION
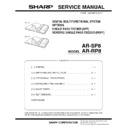
SERVICE MANUAL
CODE : 00ZARRP8//A1E
DIGITAL MULTIFUNCTIONAL SYSTEM
OPTIONS
SINGLE PASS FEEDER (SPF)
REVERSE SINGLE PASS FEEDER (RSPF)
OPTIONS
SINGLE PASS FEEDER (SPF)
REVERSE SINGLE PASS FEEDER (RSPF)
AR-SP8
MODEL
AR-RP8
AR-SP8
AR-RP8
[ 1 ] GENERAL . . . . . . . . . . . . . . . . . . . . . . . . . . . . . . . . . . . . . . . . . . . 1 - 1
[ 2 ] UNPACKING AND INSTALLATION . . . . . . . . . . . . . . . . . . . . . . . 2 - 1
[ 3 ] OPERATIONAL DESCRIPTIONS . . . . . . . . . . . . . . . . . . . . . . . . . 3 - 1
[ 4 ] DISASSEMBLY AND ASSEMBLY . . . . . . . . . . . . . . . . . . . . . . . . 4 - 1
[ 5 ] ADJUSTMENTS . . . . . . . . . . . . . . . . . . . . . . . . . . . . . . . . . . . . . . 5 - 1
[ 6 ] TEST COMMAND . . . . . . . . . . . . . . . . . . . . . . . . . . . . . . . . . . . . . 6 - 1
PARTS GUIDE
AR-SP8/RP8 GENERAL 1 - 1
[1] GENERAL
1. Outline and specifications of each option
A. AR-SP8 (Single pass feeder)
(1) Part name
(2) Specifications
B. AR-RP8 (Reverse single pass feeder)
(1) Part name
(2) Specifications
No.
Part name
1
Original guides
2
Document feeder cover
3
Document feeder tray
4
Exit area
Original capacity
30 sheets (52 to 90g/m
2
) (14 to 23.9 lbs.)
Original size
A4 to A5 / 8-1/2" x 14" to 5-1/2" x 8-1/2"
Original replacement speed
12CPM (A4/8-1/2" x 11"Landscape) (15CPM model)
Original placement
Face up
Original weight
52 to 90g/m
2
(14 - 23.9lbs.)
Mixed feeding(Paper size)
No
Original which cannot
Thermal papers, originals with punch holes for files, be used folded paper, transparent originals such as OHP films,
stapled or clip used originals with cover up liquid used, Originals with tape sealed, originals with high level frictional
coefficient such as photos or catalogs.
stapled or clip used originals with cover up liquid used, Originals with tape sealed, originals with high level frictional
coefficient such as photos or catalogs.
No.
Part name
1
Original guides
2
Document feeder cover
3
Document feeder tray
4
Exit area
5
Reversing tray
Original capacity
30 sheets (52 to 90g/m
2
) (14 to 23.9 lbs.)
Original size
A4 to A5 / 8-1/2" x 14" to 5-1/2" x 8-1/2"
Original replacement speed
12CPM (A4/8-1/2" x 11"Landscape)
Job speed (Tray1,Landscape)
Single copy
S to S
12CPM
S to D
5.6CPM
D to S
5.5CPM
D to D
5.2CPM
Multi copy
S to S
16CPM (15CPM for Letter/A4)
D to S
16CPM (15CPM for Letter/A4)
Original placement
Face up
Original weight
52 to 90g/m
2
(14 - 23.9lbs.)
Mixed feeding
No
Original which cannot
Thermal papers, originals with punch holes for files, be used folded paper, transparent originals
such as OHP films, stapled or clip used originals with cover up liquid used, Originals with tape
sealed, originals with high level frictional coefficient such as photos or catalogs.
such as OHP films, stapled or clip used originals with cover up liquid used, Originals with tape
sealed, originals with high level frictional coefficient such as photos or catalogs.
1
2
3
4
1
2
3
4
5
AR-SP8/RP8 UNPACKING AND INSTALLATION 2 - 1
[2] UNPACKING AND INSTALLATION
<Before Installation>
For improvement of workability, part of the description in this
manual may be modified without prior notice. In this case, refer to
the service manual.
manual may be modified without prior notice. In this case, refer to
the service manual.
Parts included
Turn the main switch to the "OFF" position and remove the power
plug from the outlet.
plug from the outlet.
1) Remove the document cover.
Remove the document cover from the copier.
2) Remove the rear cabinet.
Remove the three screws and then remove the rear cabinet.
3) Remove the rear cabinet cover.
Remove the screw and then remove the rear cabinet cover.
4) Cut out a part of the rear cabinet cover.
Cut out the cut-out portion of the rear cabinet cover with nippers or
the like. (Be careful about the orientation of the nippers so that the
cross section is flat.)
the like. (Be careful about the orientation of the nippers so that the
cross section is flat.)
5) Remove the hinge guides L and R.
Remove the screws (two for each) and then remove the hinge
guides L and R.
guides L and R.
AR-SP8 Unit
(SPF Unit)
AR-RP8 Unit
(RSPF Unit)
Hinge guide R
Installation manual: 1 sheet
Hinge guide L
Screw (M3 x 8): 1 pc.
AR-SP8/RP8 UNPACKING AND INSTALLATION 2 - 2
6) Attach the hinge guides L and R.
Attach the hinge guides L and R by fitting the pawls (two for each)
into the frame of the copier and secure them with the two screws for
each that have been removed in step 3.
into the frame of the copier and secure them with the two screws for
each that have been removed in step 3.
7) Place the SPF/RSPF on the copier.
Gently place the SPF/RSPF on the document glass as shown in the
illustration.
illustration.
At this time, be careful not to damage the original scanning section
and the OC mat.
and the OC mat.
8) Connect the SPF/RSPF with the copier using the relay harness.
<1> Connect the connector.
<2> Fit the snap band to the position shown in the illustration.
<3> Fit the grounding terminal using the supplied screw (M3 x 8).
9) Attach the rear cabinet.
Fit the four pawls located at the lower part of the rear cabinet into
the copier and secure the cabinet with the three screws.
the copier and secure the cabinet with the three screws.
10) Attach the rear cabinet cover.
Fit the harness of the SPF/RSPF into the cut-out portion of the
rear cabinet cover and secure the cover with the screw.
rear cabinet cover and secure the cover with the screw.
At this time, check that the three pawls of the rear cabinet cover
are fitted into the rear cabinet.
are fitted into the rear cabinet.
Pawls
Pawls
OC mat
Original scanning
section
section
1
2
3
Pawl
Side view
Pawl

