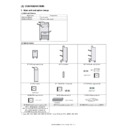
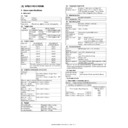
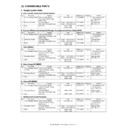
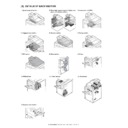
Sharp AR-M550 (serv.man10) Service Manual ▷ View online
AR-M550/M620 EXTERNAL VIEW AND INTERNAL STRUCTURE 5 - 2
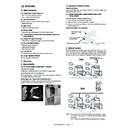
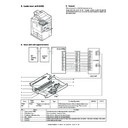
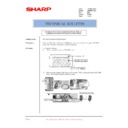
B. Internal operation parts
No.
Parts
Note
Name
Function/Operation
1
Duplex unit
Open this cover to remove a misfeed from the fusing unit area.
2
Fusing unit
Toner images are fused here.
The fusing unit is hot. Take care in
removing misfed paper.
removing misfed paper.
3
Cover of the duplex unit
Open when a misfeed has occurred in duplex unit.
4
Toner cartridge
The toner cartridge must be replaced when indicated on the
operation panel.
operation panel.
5
Main power switch
Keep this switch turned on when the fax option or network
scanner option is installed.
scanner option is installed.
6
Right side cover
Open when a misfeed has occurred in bypass tray or large
capacity tray.
capacity tray.
7
Upper cover of large capacity tray
Open when a misfeed has occurred in large capacity tray.
8
Left side cover release
Push this knob up to open the left side cover.
9
Left cover of paper drawer
Open this cover to remove paper misfed in the tray 3 and tray 4.
10
Photoconductive drum
Images are formed on the photoconductive drum.
Do not touch or damage the
photoconductive drum.
photoconductive drum.
1
2
3
4
5
6
7
10
9
8
AR-M550/M620 EXTERNAL VIEW AND INTERNAL STRUCTURE 5 - 3
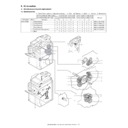
C. Operation, display parts
*
1
: When the network scanner option is installed.
*
2
: When the fax option is installed.
No.
Parts
Note
Name
Function/Operation
1
Touch panel
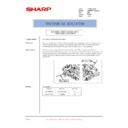
The machine status, messages and touch keys are displayed on the
panel. The document filing, copy, network scanner*1 , and fax*2
functions are used by switching to the screen for the desired function.
panel. The document filing, copy, network scanner*1 , and fax*2
functions are used by switching to the screen for the desired function.
2
Mode select keys and indicators
Use to change modes and the corresponding display on the touch
panel.
[DOCUMENT FILING] key
Press to select the document filing mode.
[IMAGE SEND] key/LINE indicator/DATA indicator
Press to enter the network scan mode when the network scanner
function is added.
[COPY] key
Press to select the copy mode.
panel.
[DOCUMENT FILING] key
Press to select the document filing mode.
[IMAGE SEND] key/LINE indicator/DATA indicator
Press to enter the network scan mode when the network scanner
function is added.
[COPY] key
Press to select the copy mode.
3
[PRINT] key/READY indicator/
DATA indicator
DATA indicator
Press to enter the print mode.
READY indicator
Print data can be received when this indicator is lit.
DATA indicator
Lights up or blinks when print data is being received. Also lights up or
blinks when printing is being performed.
READY indicator
Print data can be received when this indicator is lit.
DATA indicator
Lights up or blinks when print data is being received. Also lights up or
blinks when printing is being performed.
4
[JOB STATUS] key
Press to display the current job status.
5
[CUSTOM SETTINGS] key
This is used to store, edit, and delete user names and folder names for
the document filing function, and to configure the key operator
programs and printer configuration settings.
the document filing function, and to configure the key operator
programs and printer configuration settings.
6
Numeric keys
Use to enter number values for various settings.
7
[ ] key ([ACC.#-C] key)
This key is used in copy mode, document filing mode, network scanner
mode*
mode*
1
, and fax mode*
2
.
8
[#/P] key
This is used as a program key when using the copy function, and to dial
when using the fax function*
when using the fax function*
2
.
9
[C] key
This key is used in copy mode, document filing mode, network scanner
mode*
mode*
1
, and fax mode*
2
.
10
[START] key
Use this key to start copying in copy mode, scan a document in network
scanner mode*
scanner mode*
1
, or scan a document for transmission in fax mode*
2
.
11
[CA] key
This key is used in copy mode, document filing mode, network scanner
mode*
mode*
1
, and fax mode*
2
. Use the key to cancel settings and perform an
operation from the initial machine state.
1
2
3
4
5
6
7
8
9
10
11
AR-M550/M620 EXTERNAL VIEW AND INTERNAL STRUCTURE 5 - 4
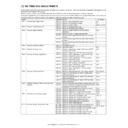
D. Job status screen (common to print, copy, network scan and internet fax)
This screen is displayed when the [JOB STATUS] key on the operation panel is pressed.
A job list showing the current job at the top of the job queue or a list showing completed jobs can be displayed.
The contents of jobs can be viewed or jobs can be deleted from the queue.
No.
(Displayed in the touch panel)
Note
Name
Function/Operation
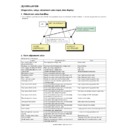
1
Job list
The displayed jobs in the job list are themselves operation keys. To cancel
printing or to give a job the highest print priority, touch the relevant job key to
select the job and execute the desired operation using the keys described in 8
and 9.
This shows the current job and the jobs waiting to be run. The icons to the left
of the jobs in the queue show the job mode. The document filing reprint job icon
is highlighted.
Note that the icon does not become highlighted during retransmission of a fax/
image transmission job.
Print mode
Copy mode
E-MAIL/FTP mode:
Scan to e-mail job
Scan to FTP job
Scan to Sharpdesk job
Fax mode:
Fax send job
Fax reception job
PC-FAX send job
Internet Fax mode
i-Fax send job
i-Fax reception job
PC-Internet Fax send job
*1:"PAPER EMPTY" in the job
status display
When a job status display indicates
"PAPER EMPTY", the specified
paper size for the job is not loaded
in any of the trays.
In this case, the job will be
suspended until the required paper
is loaded. Other stored jobs will be
printed (if possible) until the
required paper is loaded.
(Other jobs will not be printed if the
paper runs out during printing.) If
you need to change the paper size
because the specified paper size is
not available, touch the current job
key to select it and then touch the
[DETAIL] key described in 9.
2
Mode select key
This switches the job list display between "JOB QUEUE" and "COMPLETE".
"JOB QUEUE": Shows stored jobs and the job in progress.
"COMPLETE": Shows finished jobs.
Files saved in the automatic temporary save folder by the document filing
function and finished broadcast transmission jobs appear as keys in the
finished job screen. An automatic temporary save file in the finished job screen
or the [Filing] key can be touched, followed by the [CALL] key, to call up a
finished job and print or transmit it. A finished broadcast transmission job key
can be touched followed by the [DETAIL] key to check the result of the
transmission.
3
[PRINT JOB] key
This displays the print job list of print mode (copying, printing, fax reception,
Internet fax reception, and self printing).
Internet fax reception, and self printing).
JOB QUEUE
COPY
COPY
Suzuki
066211221
STATUS
020 / 001
020 / 000
020 / 000
002 / 000
PRINT JOB
E-MAIL/FTP
FAX JOB
INTERNET-FAX
INTERNET-FAX
JOB QUEUE
COMPLETE
JOB QUEUE
COMPLETE
DETAIL
PRIORITY
STOP/DELETE
DETAIL
CALL
PAPER EMPTY
WAITING
WAITING
1/1
SETS / PROGRESS
COPYING
"Stored job/job in progress" job status screen
"Finished job" job
status screen
status screen
*1
1
2
3
4
5
6
7
8 9 10
11
AR-M550/M620 EXTERNAL VIEW AND INTERNAL STRUCTURE 5 - 5
4
[E-MAIL/FTP] key
This displays the transmission status and finished jobs of scan mode (Scan to
e-mail, Scan to FTP, and Scan to SharpDesk) when the network scanner
option is installed.
e-mail, Scan to FTP, and Scan to SharpDesk) when the network scanner
option is installed.
5
[FAX JOB] key
This displays the transmission/reception status and finished jobs of fax mode
(fax and PC-Fax) when the fax option is installed.
(fax and PC-Fax) when the fax option is installed.
6
Display switching
keys
keys
Use to switch the page of the displayed job list.
7
[INTERNET-FAX] key
This displays the transmission/reception status and finished jobs of Internet fax
mode and PC Internet fax mode when the network scanner option is installed.
mode and PC Internet fax mode when the network scanner option is installed.
8
[STOP/DELETE] key
Use to cancel or delete the current job or delete the selected reserved job. Note
that printing of received faxes and received Internet faxes cannot be canceled
or deleted.
that printing of received faxes and received Internet faxes cannot be canceled
or deleted.
9
[PRIORITY] key
A stored job in the "JOB QUEUE" job list can be printed ahead of all other
stored jobs by selecting the job and then touching this key.
stored jobs by selecting the job and then touching this key.
10
[DETAIL] key
This shows detailed information on the selected job. Files saved in the
automatic temporary save folder by the document filing function and finished
broadcast transmission jobs appear as keys in the finished job screen. An
automatic temporary save file in the finished job screen or the [Filing] key can
be touched, followed by the [CALL] key, to call up a finished job and print or
transmit it. A finished broadcast transmission job key can be touched followed
by the [DETAIL] key to check the result of the transmission.
11
[CALL] key
When this key is touched after selecting a temporarily stored job in the finished
job screen, the "JOB SETTINGS" menu screen appears to let you resend or
reprint the finished job.
job screen, the "JOB SETTINGS" menu screen appears to let you resend or
reprint the finished job.
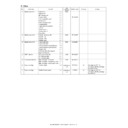
No.
(Displayed in the touch panel)
Note
Name
Function/Operation

