Sharp AR-M351U / AR-M451U (serv.man16) Service Manual ▷ View online
AR-M351U/M451U, AR-M355U/M455U ADJUSTMENTS 8 - 4
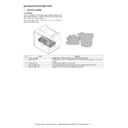
<Specification>
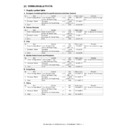
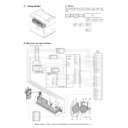
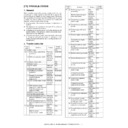
<2> Print off-center adjustment
Items which must have been completed before this adjust-
ment.
ment.
• LSU right angle adjustment (If there is no distortion in self print,
the adjustment is not required.)
Items which must be executed after completion of this adjust-
ment.
ment.
• Each tray resist amount setting
• Print lead edge adjustment
• Front/rear and left/right void amount setting
1) Execute SIM50-10.
2) Set the paper feed tray and the magnification ratio for the
adjustment.
3) After entering the adjustment values, press START key, and
printing is started.
4) Check the off-center (distance from the paper edge) of the
printed copy. Repeat procedure 2) until the specification is
satisfied.
satisfied.
• For the duplex mode (Single
→
Duplex), add 10 to the above set value.
• When the print line is shifted toward a from the paper center, decrease the value.
• When the print line is shifted toward b from the paper center, increase the value.
<3> Each tray resist amount setting
Items which must have been completed before this adjust-
ment.
ment.
• LSU right angle adjustment (If there is no distortion in self print,
the adjustment is not required.)
• Print off-center adjustment
Items which must be executed after completion of this adjust-
ment.
ment.
• Print lead edge adjustment
• Front/rear and left/right void amount setting
1) Execute SIM 51-2.
2) Enter the resist adjustment value with 10-key.
3) Press [START] key.
When [START] key is pressed, the adjustment value is set and
paper feed and copying are performed.
paper feed and copying are performed.
4) Adjust the resist quantity so that paper is transferred stably.
Measuring
point
Specification
Set value
Print
distortion
adjustment
distortion
adjustment
Self print
pattern 71
pattern 71
θ
= 90° ± 0.13°
θ
changes about 0.25
degrees for 1 scale of
adjustment. (A shifts
about 1mm.)
adjustment. (A shifts
about 1mm.)
a b
Print lead edge
2
SIMULATION 50-10
PRINT OFF-CENTER ADJUSTMENT. SELECT 0-8, AND PRESS
START.
0.TRAY SELECT
1
1.COPY START
2.MAGNIFICATION
100
(ADJUSTMENT DATA)
3.TRAY1
50
4.TRAY2
50
5.TRAY3
50
6.TRAY4
50
7.BPT
50
8.ADU
50
Adjustment position
Measurement
reference
Specification
Set value
Default
Range
Tray 1
Tray 1
Output pattern
center line
center line
0±1.5mm
50
0 - 99
Set value 1: 0.1mm shift
Tray 2
Tray 2
Tray 3
Tray 3/LCC left
Tray 4
Tray 4/LCC right
MFT
Manual feed
ADU
Duplex
a
b
Print lead edge
∗
This adjustment is executed when there is any lead edge vari-
ation or skew for each tray.
ation or skew for each tray.
1
SIMULATION 51-2
RESIST TIMING ADJUSTMENT. SELECT 0-8, AND PRESS START.
0.TRAY SELECT
1
1.PRINT START
2.TRAY1
60
3.TRAY2
50
4.DESK
50
5.BPT
55
6.ADU
50
7.SPF(HIGH)
60
8.SPF(LOW)
75
AR-M351U/M451U, AR-M355U/M455U ADJUSTMENTS 8 - 5
When the set value is increased, the warp amount of paper is
increased. When the adjustment value is decreased, the warp
amount of paper is decreased.
increased. When the adjustment value is decreased, the warp
amount of paper is decreased.
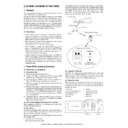
<4> Self print lead edge adjustment
Items which must have been completed before this adjust-
ment.
ment.
• LSU right angle adjustment (If there is no distortion in self print,
the adjustment is not required.)
• Print off-center adjustment
• Resist amount adjustment
Items which must be executed after completion of this adjust-
ment.
ment.
• Front/rear and left/right void amount setting
• OC scan lead edge adjustment
• SPF scan lead edge adjustment
1) Execute SIM 50-5.
2) Set the lead edge void adjustment value (DENA) as specified
2) Set the lead edge void adjustment value (DENA) as specified
below.
(Standard set value) Paper lead edge void: 3.5mm (DENA:
35)
35)
∗
Set the adjustment value of DENA to 35. (Enter 35 as the
adjustment value of DENA, and press [P] key.)
adjustment value of DENA, and press [P] key.)
3) Check the lead edge void area on the self print pattern
(SIM67-1).
(Enter 1 and press [START] key.)
4) If the adjustment result is not satisfactory, perform the follow-
ing procedures.
∗
If the lead edge void area is not 3.5mm:
Change the adjustment value of RRCB and perform the
adjustment. (Change the adjustment value of RRCB and
press [START] key.)
(Shift for the adjustment value change: 0.1mm/step)
Change the adjustment value of RRCB and perform the
adjustment. (Change the adjustment value of RRCB and
press [START] key.)
(Shift for the adjustment value change: 0.1mm/step)
<Specification>
<5> Front/rear and left/right void amount setting
Items which must have been completed before this adjust-
ment.
ment.
• LSU right angle adjustment (If there is no distortion in self print,
the adjustment is not required.)
• Print off-center adjustment
• Resist amount adjustment
• Print lead edge adjustment
Items which must be executed after completion of this adjust-
ment.
ment.
• OC scan lead edge adjustment
• SPF scan lead edge adjustment
1) Execute SIM 50-1.
(Lead edge image loss/void area adjustment)
(Lead edge image loss/void area adjustment)
1) Set the lead edge image loss adjustment value (LEAD EDGE)
and the paper lead edge void adjustment value (DENA) as fol-
lows.
lows.
(Standard set value)
Lead edge image loss: 1.5mm (LEDA: 15)
Lead edge image loss: 1.5mm (LEDA: 15)
Paper lead edge void: 3.5mm (DENA: 35)
∗
Set LEAD to 15. (Enter 15 as the adjustment value of LEAD,
and press [P] key.) (0.1mm/step)
and press [P] key.) (0.1mm/step)
∗
Set DENA to 35. (Enter 35 as the adjustment value of
DENA, and press [P] key.) (0.1mm/step)
DENA, and press [P] key.) (0.1mm/step)
2) Make a copy at the normal ratio (100%) and check the lead
edge void area and the image loss. (Enter 100 as the set value
of the copy magnification ratio (MAGNIFICATION), and press
[START] key.)
of the copy magnification ratio (MAGNIFICATION), and press
[START] key.)
3) If the adjustment result is not satisfactory, perform the follow-
ing procedures.
∗
If the lead edge void are is not 3.5mm:
Change the adjustment value of RRCB and perform the
adjustment. (Change the adjustment value of RRCB and
press [START] key.) (1msec/step)
Change the adjustment value of RRCB and perform the
adjustment. (Change the adjustment value of RRCB and
press [START] key.) (1msec/step)
∗
If the lead edge image loss is not 1.5mm:
Change the adjustment value of RRCA and perform the
adjustment. (Change the adjustment value of RRCA and
press [START] key.)
(Shift for the adjustment value change: 0.2mm/step)
Change the adjustment value of RRCA and perform the
adjustment. (Change the adjustment value of RRCA and
press [START] key.)
(Shift for the adjustment value change: 0.2mm/step)
(Rear edge void area adjustment)
Adjust so that the rear edge void area is 3.5mm. (Change the
adjustment value of TRAIL EDGE, and press [START] key.)
adjustment value of TRAIL EDGE, and press [START] key.)
(Front/rear frame direction image loss adjustment)
Set the adjustment value of SIDE to 20. (Enter 20 as the adjust-
ment value of SIDE, and press [P] key.)
ment value of SIDE, and press [P] key.)
When the adjustment value is changed, the image position is
shifted in the front/rear frame direction.
shifted in the front/rear frame direction.
(Front/rear frame direction void area adjustment)
Adjust so that the total of the front/rear direction void areas is
7.0mm. (Change the adjustment values of FRONT/REAR, and
press [START] key.)
7.0mm. (Change the adjustment values of FRONT/REAR, and
press [START] key.)
Front frame void area = 3.5mm
Rear frame void area = 3.5mm
If, as shown above, the front and the rear void areas are not even,
use SIM 50-5 to adjust the image off-center position.
use SIM 50-5 to adjust the image off-center position.
Item
Set
range
Default
AR-M351U/
M355U
AR-M451U/
M455U
2 TRAY1
Tray 1 resist
adjustment value
adjustment value
0 - 99
65
60
3 TRAY2
Tray 2 resist
adjustment value
adjustment value
55
50
4 DESK
Desk resist
adjustment value
adjustment value
55
50
5 BPT
Manual tray resist
adjustment value
adjustment value
60
55
6 ADU
ADU resist
adjustment value
adjustment value
55
50
Set position
Specification
Set value
Self print lead
edge
adjustment
SIM 50-5
edge
adjustment
SIM 50-5
Print start
position A of
the output
pattern 1
position A of
the output
pattern 1
A = 4.0mm or less
(Lead and tail
total: 8.0mm or
less)
(Lead and tail
total: 8.0mm or
less)
Shift of
0.175mm
(35ppm) /
0.225mm
(45ppm) for
set value 1.
0.175mm
(35ppm) /
0.225mm
(45ppm) for
set value 1.
2
SIMULATION 50-5
LEAD EDGE ADJUSTMENT. SELECT 0-20, AND PRESS START.
0.TRAY SELECT
LEAD EDGE ADJUSTMENT. SELECT 0-20, AND PRESS START.
0.TRAY SELECT
1
1.PRINT START
(ADJUSTMENT DATA)
LEAD EDGE: 2.RRCB
LEAD EDGE: 2.RRCB
50
3.SIDE2 ADJ.
50
RESIST: 4.T1
50
5.T2
50
6.DESK
50
7.BPT
50
8.ADU
50
OFF CENTER: 9.T1
50
10.T2
50
11.T3
50
12.T4
50
13.BPT
50
14.ADU
50
(VOID SETTING) 15.LEAD_EDGE(DENA)
50
16.TRAIL_EDGE(DENB)
30
17.FRONT/REAR
30
A
[Output pattern]
AR-M351U/M451U, AR-M355U/M455U ADJUSTMENTS 8 - 6
<Specification>
B. Adjustment on the scanner side
<1> OC scan distortion adjustment
Items which must have been completed before this adjust-
ment.
ment.
• Adjustment on the engine side (If there is no problem in self
print, no need to adjust.)
Items which must be executed after completion of this adjust-
ment.
ment.
• OC scan off-center
• OC scan lead edge adjustment
1) Make a test chart as shown below. (Make a self-print pattern
71.)
2) Make a copy from the table glass, and check it.
At that time, set the test chart correctly. If it is set in a distorted
position, the adjustment cannot be made correctly.
position, the adjustment cannot be made correctly.
3) If the output value is not in the specified range, perform the fol-
lowing adjustment.
4) Adjust the distortion.
Use a level gauge to check that the scanner is installed hori-
zontally.
zontally.
Make a copy and check it. If there is any distortion as shown in
Fig. 1 or Fig. 2, loosen the scanner fixing screw (M4 x 8) and
the cam A fixing screw (M3 x 12) and adjust.
Fig. 1 or Fig. 2, loosen the scanner fixing screw (M4 x 8) and
the cam A fixing screw (M3 x 12) and adjust.
• In the case of Fig. 1
Shift cam A in the direction A by the difference in the copy image.
For one scale (one groove), shift by 0.5mm.
After shifting, tighten the fixing screw (M3 x 12) of cam A and
make a copy again, and check the copy again to insure that there
is no distortion.
make a copy again, and check the copy again to insure that there
is no distortion.
• In the case of Fig. 2
Shift cam A in the direction B by the difference in the copy image.
For one scale (one groove), shift by 0.5mm.
After shifting, tighten the fixing screw (M3 x 12) of cam A and
make a copy again, and check the copy again to insure that there
is no distortion.
make a copy again, and check the copy again to insure that there
is no distortion.
After adjustment, tighten the fixing screw (M3 x 12) and the scan-
ner fixing screw (M4 x 8).
ner fixing screw (M4 x 8).
∗
If the above adjustment does not fix the problem, perform the
MB rail adjustment.
MB rail adjustment.
∗
After the OC distortion adjustment, perform SIM53-8 SPF scan-
ning position automatic adjustment.
ning position automatic adjustment.
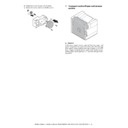
<2> SPF height adjustment
Items which must have been completed before this adjust-
ment.
ment.
• Nothing special
Items which must be executed after completion of this adjust-
ment.
ment.
• Nothing special
1) Close the (D)SPF.
2) Check to confirm that the dove and the reference plate in the
figure below are in contact with the table glass (point a) and
the side guide (point b). (Place copy paper under the dove and
pull it out.) If they are not in contact, adjust with the set screw.
the side guide (point b). (Place copy paper under the dove and
pull it out.) If they are not in contact, adjust with the set screw.
Set position
Specification
Set
value
Lead edge void
adjustment
“LEAD EDGE
VOID (DENA)”
adjustment
“LEAD EDGE
VOID (DENA)”
Output pattern
“71” print void
quantity A
“71” print void
quantity A
A = 4.0mm or
less
(A and B total:
8.0mm or less)
less
(A and B total:
8.0mm or less)
Shift of
0.1mm
for set
value 1.
0.1mm
for set
value 1.
Rear edge void
adjustment
“TAIL EDGE VOID
(DENB)”
adjustment
“TAIL EDGE VOID
(DENB)”
Output pattern
“71” print void
quantity B
“71” print void
quantity B
B = 4.0mm or
less
(A and B total:
8.0mm or less)
less
(A and B total:
8.0mm or less)
Side edge void
adjustment
“FRONT/REAR”
adjustment
“FRONT/REAR”
Output pattern
“71” print void
quantity C + D
“71” print void
quantity C + D
C and D total:
8.0mm or less
8.0mm or less
2
SIMULATION 50-1
LEAD EDGE ADJUSTMENT. SELECT 0-9, AND PRESS START.
0.TRAY SELECT
1
1.COPY START
2.MAGNIFICATION
100
(ADJUSTMENT DATA) 3.RRCA
50
4.RRCB
50
10.SIDE2 ADJ.
50
(IMAGE LOSS SETTING) 5.LEAD
15
6.SIDE
20
(VOID SETTING) 7.LEAD_EDGE(DENA)
50
8.TRAIL_EDGE(DENB)
30
9.FRONT/REAR
30
Print
lead edge
lead edge
Fixing screw
(M4 x 8)
(M4 x 8)
A
B
[Fig. 1]
[Fig. 2]
First copy image
First copy image
Image
Image
Paper
Paper
Difference
Difference
AR-M351U/M451U, AR-M355U/M455U ADJUSTMENTS 8 - 7
<Specification>
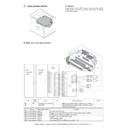
<3> SPF scan distortion adjustment
Items which must have been completed before this adjust-
ment.
ment.
• Adjustment on the engine side (If there is no problem in self
print, no need to adjust.)
• OC scan distortion adjustment
• SPF height adjustment
Items which must be executed after completion of this adjust-
ment.
ment.
• SPF off-center
• SPF lead edge adjustment
• Front/rear and left/right void amount setting
1) Make a test chart as shown below. (Print a self-print pattern
71.)
2) Make a copy with DSPF.
3) Check that it is in the specified range.
4) Execute SIM51-2 to check the SPF set value.
Change the set value of the SPF resist amount to the following
value.
value.
5) Though the SPF resist amount is the above value, if there is
any distortion in SPF scan, adjust the SPF installing position in
the following procedures.
the following procedures.
6) Loosen the nut which is fixing the adjustment set screw of the
hinge R, and adjust the adjustment set screw.
7) Make a copy again, and check again that the value is in the
specified range.
8) Tighten the nut to fix the adjustment screw.
<Specification>
∗
After the SPF distortion adjustment, perform SIM53-8 SPF
scanning position automatic adjustment.
scanning position automatic adjustment.
<4> OC scan magnification ratio adjustment
Items which must have been completed before this adjust-
ment.
ment.
• Adjustment on the engine side (If there is no problem in self
print, no need to adjust.)
• OC scan distortion adjustment
Items which must be executed after completion of this adjust-
ment.
ment.
• OC scan lead edge adjustment
• Original off-center adjustment
1) Place a print of self-print pattern (A3 or WLT) 70 or a scale on
the table glass.
2) Close the original cover, and make a copy.
3) Check that the value is within the specification.
4) If the value is not within the specified range, execute SIM48-1
(item 3, 4).
5) Make a copy again and check again that the value is within the
specification.
Specification
Adjustment
position
Distance between
dove (Reference
plate) and table
glass
dove (Reference
plate) and table
glass
3-point contact
(Left front/Left rear/Right
front when viewed from
the front)
(Left front/Left rear/Right
front when viewed from
the front)
Hinge
adjustment set
screw
adjustment set
screw
a
b
a
b
a
b
7
SPF (HIGH)
60
8
SPF (LOW)
75
Specification
Adjustment position
Skew feed
Within ±3mm
Hinge R adjustment screw
1
SIMULATION 51-2
RESIST TIMING ADJUSTMENT. SELECT 0-8, AND PRESS START.
0.TRAY SELECT
1
1.PRINT START
2.TRAY1
60
3.TRAY2
50
4.DESK
50
5.BPT
55
6.ADU
50
7.SPF(HIGH)
60
8.SPF(LOW)
75
a
b
a
b

