Sharp AR-C170 (serv.man55) User Manual / Operation Manual ▷ View online
7-1
CHAPTER 7
MACHINE MAINTENANCE
(FOR COPYING)
This chapter explains procedures for removing misfeeds in a reversing
single pass feeder, cleaning the machine, and troubleshooting.
single pass feeder, cleaning the machine, and troubleshooting.
Page
REMOVING AN ORIGINAL MISFEED ..........................................................7-2
●
Removing a misfed original from the reversing single pass feeder .......7-2
USER MAINTENANCE (For copying)............................................................7-3
CLEANING THE ORIGINAL SCANNING AREA ...........................................7-3
TROUBLESHOOTING...................................................................................7-4
Apollon_general-copy_EX.book 1 ページ 2004年6月7日 月曜日 午後1時59分
7-2
REMOVING AN ORIGINAL MISFEED
Removing a misfed original from the reversing single pass feeder
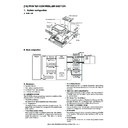
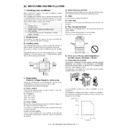
If an original misfeed occurs in the reversing single pass feeder, follow the steps below to remove the misfed original.
Check locations A, B, and C in the diagram at left to
remove the original.
remove the original.
1
Removing misfeeds from each location
● Check location A
Open the
document feeding
area cover and
gently remove the
misfed original
from the
document feeder
tray. Close the
document feeding
area cover.
document feeding
area cover and
gently remove the
misfed original
from the
document feeder
tray. Close the
document feeding
area cover.
● Check location B
Open the
reversing single
pass feeder and
rotate the two
release rollers in
the direction of
the arrow to make
the original feed
out. Close the
reversing single
pass feeder and
gently remove the
original.
reversing single
pass feeder and
rotate the two
release rollers in
the direction of
the arrow to make
the original feed
out. Close the
reversing single
pass feeder and
gently remove the
original.
If the misfed
original is small
(such as an A5
original), or if the
misfeed occurred
in the reversing
tray, open the
RSPF right side
cover and gently
remove the
original. Close the
RSPF right side
cover.
original is small
(such as an A5
original), or if the
misfeed occurred
in the reversing
tray, open the
RSPF right side
cover and gently
remove the
original. Close the
RSPF right side
cover.
● Check location C
Remove the misfed
original from the
exit area.
original from the
exit area.
If the misfed
original cannot be
easily removed
from the exit area,
open the
moveable part of
the document
feeder tray and
remove the
reversing tray and
then remove the
original.
original cannot be
easily removed
from the exit area,
open the
moveable part of
the document
feeder tray and
remove the
reversing tray and
then remove the
original.
2
Open and close the document feeder cover.
Opening and
closing the cover
clears the misfeed
display. Copying
cannot be
resumed until this
step is performed.
closing the cover
clears the misfeed
display. Copying
cannot be
resumed until this
step is performed.
A message may appear indicating the number of
originals which must be returned to the document
feeder tray. Return the originals to the document
feeder tray and press the [START] key for colour or
black and white copying as appropriate for the job
being resumed.
originals which must be returned to the document
feeder tray. Return the originals to the document
feeder tray and press the [START] key for colour or
black and white copying as appropriate for the job
being resumed.
NOTES
● For misfeed removal in the main unit and other peripheral devices, see page 2-18.
● When a misfeed occurs, touch the [INFORMATION] key to display detailed information for misfeed removal.
● When a misfeed occurs, touch the [INFORMATION] key to display detailed information for misfeed removal.
Document feeding area cover
Release roller
RSPF right side cover
After removing a misfed original from the exit area, be
sure to attach the reversing tray securely to the exit area.
Reversing tray
Apollon_general-copy_EX.book 2 ページ 2004年6月7日 月曜日 午後1時59分
7-3
7
USER MAINTENANCE (For copying)
To ensure good service from this product over a long period of time, it is recommended that the following
maintenance procedures be performed on a regular basis.
maintenance procedures be performed on a regular basis.
Wipe with a clean, soft cloth.
If necessary, moisten the cloth with water or a small amount of neutral detergent.
When finished, wipe dry with a clean cloth.
If necessary, moisten the cloth with water or a small amount of neutral detergent.
When finished, wipe dry with a clean cloth.
If you find that a dirty image results when a copies are made using the reversing single
pass feeder, wipe the original scanning area (the area that contains the long narrow
glass shown at left).
pass feeder, wipe the original scanning area (the area that contains the long narrow
glass shown at left).
CLEANING THE ORIGINAL SCANNING AREA
If you find that black (or white) lines appear when you make copies using the reversing single pass feeder, use the
accessory glass cleaning tool to clean the original scanning area.
accessory glass cleaning tool to clean the original scanning area.
1
Open the reversing single pass feeder and
remove the glass cleaning tool.
remove the glass cleaning tool.
2
Clean the original scanning area with the
glass cleaning tool.
glass cleaning tool.
3
Replace the glass cleaning tool in its
storage position.
storage position.
CAUTION
Do not use flammable spray to clean the machine. If gas from the spray comes in contact with hot electrical
components or the fusing unit inside the machine, fire or electrical shock may result.
Do not use flammable spray to clean the machine. If gas from the spray comes in contact with hot electrical
components or the fusing unit inside the machine, fire or electrical shock may result.
NOTE
When cleaning, do not use thinner, benzene, or similar volatile cleaning agents. These may
degrade or discolour the housing.
Example of dirty print image
Black lines
Original feed direction
White lines
Apollon_general-copy_EX.book 3 ページ 2004年6月7日 月曜日 午後1時59分
7-4
TROUBLESHOOTING
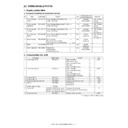
Whenever the machine stops or operation is not possible, check the operation panel display for messages. In most
cases, these messages will give sufficient information to return the machine to an operating condition. In cases where
this information is not enough, check the list below for more information. This section describes problems concerning
copier features. For troubleshooting specific problems related to the printer, network scanner, and fax features, see
the separate manuals provided for these features. For problems related to other peripheral devices, see page 2-24.
Problem
Check
Solution or cause
Machine does not
operate.
operate.
Are the [START] keys indicators off?
If the indicators are not on, the machine may
be warming up. Warm-up should be
completed in 99 seconds or less.
be warming up. Warm-up should be
completed in 99 seconds or less.
Copies are too dark
or too light.
or too light.
Is the original image too dark or too light?
Select an appropriate resolution setting for
the original being copied and adjust the copy
exposure. (See page 5-10)
the original being copied and adjust the copy
exposure. (See page 5-10)
Is the exposure mode set to "AUTO"?
The exposure level for "AUTO" can be
adjusted using the "Exposure adjustment"
key operator program. Contact your key
operator. (See page 15 of the key operator's
guide.)
adjusted using the "Exposure adjustment"
key operator program. Contact your key
operator. (See page 15 of the key operator's
guide.)
An appropriate resolution setting for the
original has not been selected.
original has not been selected.
Change the resolution setting to "AUTO" or
manually select an appropriate resolution
setting. (See page 5-10)
manually select an appropriate resolution
setting. (See page 5-10)
Text is not clear on a
copy.
copy.
An appropriate resolution setting for the
original has not been selected.
original has not been selected.
Change the resolution setting to "TEXT".
Moiré appears on a
copy of a magazine,
catalogue, or other
printed material.
copy of a magazine,
catalogue, or other
printed material.
An appropriate resolution setting for the
original has not been selected.
original has not been selected.
Change the resolution setting to "PRINTED
PHOTO".
PHOTO".
Text overlaying a
photo is not clear on
a copy of a map,
magazine or other
printed material.
photo is not clear on
a copy of a map,
magazine or other
printed material.
An appropriate resolution setting for the
original has not been selected.
original has not been selected.
Change the resolution setting to "MAP".
Smudges appear on
copies.
copies.
Document glass or document cover dirty?
Clean the surface of the document glass,
and the original scanning area and original
presser part of the reversing single pass
feeder. (See page 7-3.)
and the original scanning area and original
presser part of the reversing single pass
feeder. (See page 7-3.)
Black or white line appear on copies when
the single pass feeding function is used.
the single pass feeding function is used.
Clean the original scanning area. (See page
7-3.)
7-3.)
Original smudged or blotchy?
Use a clean original.
Image cannot be
rotated.
rotated.
Is the auto paper select or auto image
function set?
function set?
Rotation copy functions only if the machine
is either in the auto paper select mode or in
the auto image mode. (See page 4-7.)
is either in the auto paper select mode or in
the auto image mode. (See page 4-7.)
Part of original
image is not copied.
image is not copied.
Is the original positioned correctly?
Set the original properly. (page 4-6)
Is the copy ratio proper for the original and
paper sizes?
paper sizes?
Use the auto image function to select the
appropriate copy ratio based on the original
and copy sizes. (See page 5-12.)
appropriate copy ratio based on the original
and copy sizes. (See page 5-12.)
Blank copies
Is the original placed correctly?
When using the document glass, place the
original face down.
When using the reversing single pass
feeder, place original face up.
original face down.
When using the reversing single pass
feeder, place original face up.
Apollon_general-copy_EX.book 4 ページ 2004年6月7日 月曜日 午後1時59分
Display

