Sharp AR-651 (serv.man9) Service Manual ▷ View online
AR-651/810 CONTROL PANEL 5 - 1
5. CONTROL PANEL
5. 1. Control Panel and Display Panel
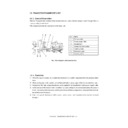
The display unit consists of key switches and touch-panel switches to operate the copier and select
various modes. LEDs and an LCD are used to display the state of the copier and show messages.
When the operator’s attention is required, graphic symbols appear with messages explaining the condition
of the copier in the LCD panel.
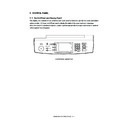
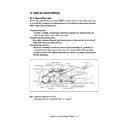
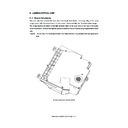
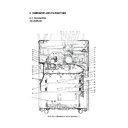
Control Panel Exterior View
AR-651/810 CONTROL PANEL 5 - 2
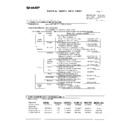
No.
Message
1
WAIT WARMING UP
2
READY(WARMING
UP)
3
READY
4
COPYING
5
Saving energy
- Press [START]
6
Place next original
Press [START] to
copy
7
—
8
READY (PRINTING)
9
READY
(ADD PAPER)
10
READY
(FINISHER FULL)
11
READY
(HOLE PUNCH
DUST FULL)
State of copier
Scanner warming up
- Displayed when the power is turned ON un-
til the copier becomes ready to start scan-
ning.
Ready for scanning
- The copier is ready for scanning and waiting
for operator to select the copying conditions.
- Returns to default setting if no key is
operated within 45 seconds.
Ready for copying
- The copier is ready for copying and waiting for
the operator to select the copying conditions.
- Returns to default setting if no key is operated
within 45 seconds.
The original is being scanned
- Displayed by pressing the [START] key.
The copier is in the energy saver mode.
Ready for the next original
- Displayed by pressing the [Next original;
YES] key.
Power is OFF
- Nothing is displayed in the display panel.
- Timer LED is lit.
Ready for scanning
- The copier is ready for scanning and waiting
for the operator to select the copying conditions.
Background printing is in progress.
Ready for scanning
- The copier is ready for scanning and waiting
for the operator to select the copying conditions.
Paper in the cassette has run out during printing.
Ready for scanning
- The copier is ready for scanning and waiting
for the operator to select the copying conditions.
The finisher is full of paper.
Ready for scanning
- The copier is ready for scanning and waiting
for operator to select the copying conditions.
The punching dust box is full.
Note
- The set number “1” and the repro-
duction ratio “100%” are displayed
when the power is turned ON.
- The set number “1” is displayed. Press
the digital key to change the number.
- The number is reset to “1” by pressing
the [CLEAR] key.
- Bypass feed copying is enabled.
- The set number “1” is displayed. Press
the digital key to change the number.
- The number is reset to “1” by pressing
the [CLEAR] key.
- Bypass feed copying is enabled.
- After scanning is completed, the copier
becomes ready for the next scanning.
- Can be cleared by pressing the
[START] key or function select key.
- Displayed for SADF and manually
placed originals.
- Press the [START] key or function
select key.
- Since background printing is in
progress, the scanned image is not
output immediately.
- Printing is resumed by adding paper
to the cassette.
- Printing is resumed by removing
paper from the finisher.
- Printing is resumed by removing
punching dust from the dust box.
5. 2. 1. Display during normal copying
5. 2. Items Shown on Display Panel
AR-651/810 CONTROL PANEL 5 - 3
No.
Message
State of copier
Note
12
READY
(SADDLE STITCH
TRAY FULL)
13
READY
(SET CORRECT
CASSETTE)
14
READY (ADDING
TONER)
15
READY (CHECK
STAPLER)
16
READY (CHECK
SADDLE STITCH
STAPLER)
17
READY (USE
GENUINE SHARP
TONER)
18
ENTER DEPART-
MENT CODE
19
READY (ADD
INSERTER PAPER)
20
READY (ADD TAB
SHEET)
21
READY (FINISHER
IN USE)
Ready for scanning
- The copier is ready for scanning and waiting
for the operator to select the copying conditions.
The saddle stitcher is full of paper.
Ready for scanning
- The copier is ready for scanning and waiting for
the operator to select the copying conditions.
Correct size cassette not installed during printing
Ready for scanning
- The copier is ready for scanning and waiting
for the operator to select the copying
conditions.
Copier is adding toner to the DV.
Ready for scanning
- The copier is ready for scanning and waiting for
the operator to select the copying conditions.
The finisher unit is out of staples.
Ready for scanning
- The copier is ready for scanning and
waiting for the operator to select the
copying conditions.
The saddle stitcher unit is out of
staples.
Ready for scanning
- The copier is ready for scanning and
waiting for the operator to select the
copying conditions.
Toner other than Sharp’s has been used.
The copier is waiting for the operator to
enter the department code.
- Displayed when the department manage-
ment function has been used
Ready for scanning
- The copier is ready for scanning and
waiting for the operator to select the
copying conditions.
No inserter paper
Ready for scanning
- The copier is ready for scanning and
Ready for scanning
- The copier is ready for scanning and
waiting for the operator to select the
copying conditions.
copying conditions.
No tab paper
Ready for scanning
-The copier is ready for scanning and
waiting for the operator to select the
copying conditions.
Finisher manually operating
Printing is resumed by removing pa-
per from the saddle stitcher unit.
- Printing is resumed by changing
the setting for cassette selection,
then pressing the [START] key.
- Printing is resumed automatically
when the toner supply is completed.
- Printing is resumed automatically
when the staple cartridge is
replaced with a new one.
- Printing is resumed automatically
when the staple cartridge is
replaced with a new one.
The display is made to disappear by
using the toner provided by Sharp.
The copier becomes ready to start
copying when the correct depart-
ment code is entered.
Printing is resumed when the
[START] key is pressed under the
condition the printing UI is displayed
([JOB STATUS] key pressed) after
adding inserter paper.
Printing is resumed when the
[START] key is pressed under the
condition the printing UI is displayed
([JOB STATUS] key pressed) after
Printing is resumed when the
[START] key is pressed under the
condition the printing UI is displayed
([JOB STATUS] key pressed) after
adding tab paper.
Printing is started when pressing the
[START] key.
AR-651/810 CONTROL PANEL 5 - 4
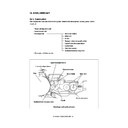
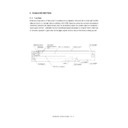
Fig. 5.2-1
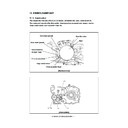
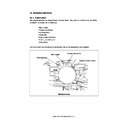
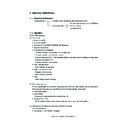
Fig. 5.2-2
C
A
K
I
H
E
J
B
F
D
E
G

