Sharp AR-651 (serv.man22) Service Manual ▷ View online
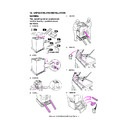
AR-651/810 UNPACKING AND INSTALLATION 19 - 5
32) UNLOCK
33) ROTATE
34) APPLY
35) ROTATE
36) INSTALL
37) INSTALL
38) INSTALL
39) INSTALL
1
2
1
2
1
2
1
2
1
AR-651/810 UNPACKING AND INSTALLATION 19 - 6
40) REMOVE
41) FILL
42) INSTALL
43) INSTALL
44) INSTALL
45) INSTALL
46) INSTALL
47) ROTATE
1
2
3
1
2
2
1
2
1
2
AR-651/810 UNPACKING AND INSTALLATION 19 - 7
48) INSTALL
49) CONNECT
50) ROTATE
51) INSTALL
52) INSTALL
• When options are installed, be sure to fasten the
screw securely after the installation.
53) CLOSE
54) ADJUSTMENT
55) CHECK
1
2
1
2
3
3
AR-651/810 UNPACKING AND INSTALLATION 19 - 8
56) PLUG IN
57) INSTALL
58) ADJUSTMENT
Adjustment of the Auto-Toner Sensor
(1) While pressing keys [0] and [5]
simultaneously, turn on the power switch to
show [100% TEST MODE A] on the
message display.
show [100% TEST MODE A] on the
message display.
(2) Key in code “200” and press the START key.
The copier will start operating, and certain
values will appear in Zones “A” and “B”.
values will appear in Zones “A” and “B”.
(3) About 2 minutes later, the values in Zone “B”
will start changing.
(4) After a short time, the value in Zone “B” will
automatically stop changing and, at the
same time, the message will also change as
shown below.
same time, the message will also change as
shown below.
(5) In this status, check that the value in Zone
“B” is in the range of 245 to 255 (auto-toner
sensor output range of 2.45V to 2.55V).
sensor output range of 2.45V to 2.55V).
(6) If the value in Zone “B” is in not in the range
of 245 to 255, use the [
Down] / [
Up]
keys to adjust the value.
(7) Press the [SET] key. The message display
will return to [100% TEST MODE A].
(8) Key in code “290” and press the START key.
The copier will start operating. The message
display will return to WAIT.
display will return to WAIT.
(9) About 1 minute later, the copier will stop
operating. The message display will return
to TEST MODE.
to TEST MODE.
(10) Turn OFF the power switch to finish the
adjustment.
* Do not turn it on again.
59) SHAKE
60) REMOVE
AR-S810
(Japan only)
(Japan only)
Click on the first or last page to see other AR-651 (serv.man22) service manuals if exist.

