|
|
AR-122E (serv.man3)
Service Manual Complete
Service Manual
|
127
|
6.58 MB
|
|
|
AR-122E (serv.man4)
Cover
Service Manual
|
8
|
230.86 KB
|
|
|
AR-122E (serv.man5)
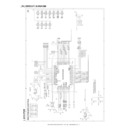
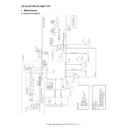
Sect 14. Circuit Diagram
Service Manual
|
22
|
1.45 MB
|
|
|
AR-122E (serv.man6)
Sect 13. Electrical Section
Service Manual
|
13
|
292.61 KB
|
|
|
AR-122E (serv.man7)
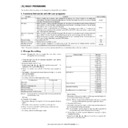
Sect 12. User Programs
Service Manual
|
2
|
45.43 KB
|
|
|
AR-122E (serv.man8)
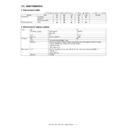
Sect 11. Maintenance
Service Manual
|
1
|
71.07 KB
|
|
|
AR-122E (serv.man9)
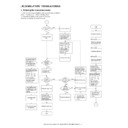
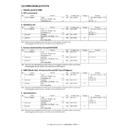
Sect 10. Simulation Trouble Codes
Service Manual
|
17
|
141.14 KB
|
|
|
AR-122E (serv.man10)
Sect 9. Adjustments
Service Manual
|
7
|
205.7 KB
|
|
|
AR-122E (serv.man12)
Sect 7. Operational Description
Service Manual
|
8
|
368.96 KB
|
|
|
AR-122E (serv.man13)
Sect 6. Copy Process
Service Manual
|
4
|
110.86 KB
|
|
|
AR-122E (serv.man14)
Sect 5. Unpacking Installation
Service Manual
|
4
|
437.47 KB
|
|
|
AR-122E (serv.man15)
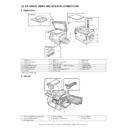
Sect 4. External Views Internal Structures
Service Manual
|
7
|
377.88 KB
|
|
|
AR-122E (serv.man16)
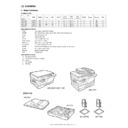
Sect 3. Consumable Parts
Service Manual
|
3
|
118.21 KB
|
|
|
AR-122E (serv.man17)
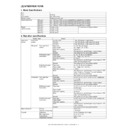
Sect 2. Specifications
Service Manual
|
3
|
59 KB
|
|
|
AR-122E (serv.man18)
General
Service Manual
|
1
|
138.91 KB
|
|
|
AR-122EN (serv.man2)
Please also refer to AR122E)
Service Manual
|
18
|
904.3 KB
|
|
|
AR-122E (serv.man52)
Online Manual
User Manual / Operation Manual
|
36
|
2.47 MB
|
|
|
AR-122E (serv.man53)
Sect. 8 Appendix
User Manual / Operation Manual
|
3
|
70.72 KB
|
|
|
AR-122E (serv.man54)
Sect. 7 Optional Equipment (AL-12PKM)
User Manual / Operation Manual
|
29
|
537.19 KB
|
|
|
AR-122E (serv.man55)
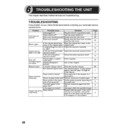
Sect. 6 Troubleshooting
User Manual / Operation Manual
|
6
|
176.85 KB
|
|
|
AR-122E (serv.man56)
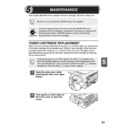
Sect. 5 Maintenance
User Manual / Operation Manual
|
5
|
272.67 KB
|
|
|
AR-122E (serv.man57)
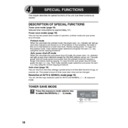
Sect. 4 Special Functions
User Manual / Operation Manual
|
3
|
101.03 KB
|
|
|
AR-122E (serv.man58)
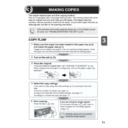
Sect. 3 Making Copies
User Manual / Operation Manual
|
7
|
223.18 KB
|
|
|
AR-122E (serv.man59)
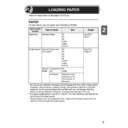
Sect. 2 Loading the Paper
User Manual / Operation Manual
|
4
|
118.46 KB
|
|
|
AR-122E (serv.man60)
Sect.1 Introduction
User Manual / Operation Manual
|
3
|
136.19 KB
|
|
|
AR-122E (serv.man61)
Contents
User Manual / Operation Manual
|
5
|
133.68 KB
|
|
|
AR-122EN (serv.man9)
Please see AR122E Operation Manual
User Manual / Operation Manual
|
5
|
133.68 KB
|

|
AR-122E (serv.man87)
Win2K GDI Driver (v2.8A.006)with WHQL
Drivers
|
|
772.21 KB
|

|
AR-122E (serv.man88)
WinXP GDI Driver (v2.8A.006)with WHQL
Drivers
|
|
772.21 KB
|

|
AR-122E (serv.man89)
WinNT4.0 GDI Driver (v2.8A.006)
Drivers
|
|
802.74 KB
|

|
AR-122E (serv.man90)
WinMe GDI Driver (v2.8A.006)
Drivers
|
|
858.18 KB
|

|
AR-122E (serv.man91)
Win9X GDI Driver (v2.8A.006)
Drivers
|
|
889.6 KB
|

|
AR-122EN (serv.man28)
Win2K GDI Driver (v2.8A.006)with WHQL
Drivers
|
|
772.21 KB
|

|
AR-122EN (serv.man29)
WinXP GDI Driver (v2.8A.006)with WHQL
Drivers
|
|
772.21 KB
|

|
AR-122EN (serv.man30)
WinNT4.0 GDI Driver (v2.8A.006)
Drivers
|
|
802.74 KB
|

|
AR-122EN (serv.man31)
WinMe GDI Driver (v2.8A.006)
Drivers
|
|
858.18 KB
|

|
AR-122EN (serv.man32)
Win9X GDI Driver (v2.8A.006)
Drivers
|
|
889.6 KB
|

|
AR-122E (serv.man93)
AR122E Driver for Windows Vista. Windows Vista
Drivers
|
|
6.45 MB
|

|
AR-122EN (serv.man33)
AR122E Driver for Windows Vista
Drivers
|
|
6.45 MB
|
|
|
AR-122E (serv.man19)
Information of parts change
Service Manual / Parts Guide
|
2
|
28.25 KB
|
|
|
AR-122E (serv.man20)
Information of parts change.
Service Manual / Parts Guide
|
4
|
30.17 KB
|
|
|
AR-122E (serv.man21)
Strength increase of the turn over gate to prevent breakage.
Service Manual / Parts Guide
|
3
|
58.91 KB
|
|
|
AR-122E (serv.man22)
Information of parts change To improve productivity, the L pulley has been changed.
Service Manual / Parts Guide
|
2
|
20.3 KB
|
|
|
AR-122E (serv.man23)
Parts Change 250 sheet tray.
Service Manual / Parts Guide
|
2
|
22.68 KB
|
|
|
AR-122E (serv.man24)
Parts Guide Complete
Service Manual / Parts Guide
|
44
|
1.62 MB
|
|
|
AR-122E (serv.man25)
Back Cover
Service Manual / Parts Guide
|
2
|
29.38 KB
|
|
|
AR-122E (serv.man26)
Index
Service Manual / Parts Guide
|
8
|
94.24 KB
|
|
|
AR-122E (serv.man27)
Sect 29 to 31. DC power supply PWB
Service Manual / Parts Guide
|
5
|
56.36 KB
|
|
|
AR-122E (serv.man28)
Sect 28. MCU PWB contd.
Service Manual / Parts Guide
|
2
|
28.24 KB
|
|
|
AR-122E (serv.man29)
Sect 27 28. Operation MCU PWB
Service Manual / Parts Guide
|
1
|
23.83 KB
|
|
|
AR-122E (serv.man30)
Sect 26. Packing materials accessories
Service Manual / Parts Guide
|
1
|
94.1 KB
|
|
|
AR-122E (serv.man31)
Sect 25. 2ND paper feeding unit(AR157E)
Service Manual / Parts Guide
|
1
|
76.77 KB
|
|
|
AR-122E (serv.man32)
Sect 23 24. Harness 2ND frame unit (AR157E)
Service Manual / Parts Guide
|
1
|
104.01 KB
|
|
|
AR-122E (serv.man33)
Sect 22. 250 sheet tray
Service Manual / Parts Guide
|
1
|
69.36 KB
|
|
|
AR-122E (serv.man34)
Sect 20 21. Socket holder TC case unit
Service Manual / Parts Guide
|
1
|
60.87 KB
|
|
|
AR-122E (serv.man35)
Sect 19. Multi manual paper feeding unit
Service Manual / Parts Guide
|
2
|
102.26 KB
|
|
|
AR-122E (serv.man36)
Sect 18. Single manual paper feeding unit
Service Manual / Parts Guide
|
1
|
66.82 KB
|
|
|
AR-122E (serv.man37)
Sect 16 17. Single multi manual paper feeding cover unit
Service Manual / Parts Guide
|
1
|
41.44 KB
|
|
|
AR-122E (serv.man38)
Sect 15. Drive unit
Service Manual / Parts Guide
|
1
|
81.11 KB
|
|
|
AR-122E (serv.man39)
Sect 14. Fusing unit
Service Manual / Parts Guide
|
2
|
119.2 KB
|
|
|
AR-122E (serv.man40)
Sect 13. Base plate unit 2
Service Manual / Parts Guide
|
1
|
135.33 KB
|
|
|
AR-122E (serv.man41)
Sect 12. Base plate unit 1
Service Manual / Parts Guide
|
2
|
139.43 KB
|
|
|
AR-122E (serv.man42)
Sect 11. Middle frame
Service Manual / Parts Guide
|
1
|
109.8 KB
|
|
|
AR-122E (serv.man43)
Sect 9 10 LSU Delivery paper guide unit
Service Manual / Parts Guide
|
1
|
69.28 KB
|
|
|
AR-122E (serv.man44)
Sect 8. Optical frame
Service Manual / Parts Guide
|
1
|
104.17 KB
|
|
|
AR-122E (serv.man45)
Sect 7. Side door unit
Service Manual / Parts Guide
|
1
|
92.84 KB
|
|
|
AR-122E (serv.man46)
Sect 6. Operation panel
Service Manual / Parts Guide
|
1
|
76.72 KB
|
|
|
AR-122E (serv.man47)
Sect 5. RSPF SPF pick up unit(AR157E)
Service Manual / Parts Guide
|
1
|
62.43 KB
|
|
|
AR-122E (serv.man48)
Sect 4. RSPF transport unit(AR157E)
Service Manual / Parts Guide
|
1
|
103 KB
|
|
|
AR-122E (serv.man49)
Sect 3. RSPF Exteriors (AR157E)
Service Manual / Parts Guide
|
2
|
145.65 KB
|
|
|
AR-122E (serv.man50)
Sect 1 2 Exteriors Original Cover Unit
Service Manual / Parts Guide
|
2
|
85.19 KB
|
|
|
AR-122E (serv.man51)
Front Cover Contents
Service Manual / Parts Guide
|
1
|
31.17 KB
|
|
|
AR-122EN (serv.man3)
Information of parts change
Service Manual / Parts Guide
|
2
|
28.25 KB
|
|
|
AR-122EN (serv.man4)
Information of parts change.
Service Manual / Parts Guide
|
4
|
30.17 KB
|
|
|
AR-122EN (serv.man5)
Strength increase of the turn over gate to prevent breakage.
Service Manual / Parts Guide
|
3
|
58.91 KB
|
|
|
AR-122EN (serv.man6)
Information of parts change To improve productivity, the L pulley has been changed.
Service Manual / Parts Guide
|
2
|
20.3 KB
|
|
|
AR-122EN (serv.man7)
Parts Change 250 sheet tray.
Service Manual / Parts Guide
|
2
|
22.68 KB
|
|
|
AR-122EN (serv.man8)
Parts listing
Service Manual / Parts Guide
|
18
|
904.3 KB
|
|
|
AR-122E (serv.man2)
Specifications
Service Manual / Specification
|
3
|
59 KB
|
|
|
AR-122EN
Information of parts guide, OC gasket.
Service Manual / Specification
|
2
|
294.08 KB
|
|
|
AR-122E (serv.man64)
Starting Powder List (This list takes priority over information in Service Manuals).
Service Manual / Technical Bulletin
|
4
|
66.25 KB
|
|
|
AR-122E (serv.man65)
Change in material of turn plate sheet.
Service Manual / Technical Bulletin
|
3
|
57.76 KB
|
|
|
AR-122E (serv.man66)
Manual paper feed roller material change.
Service Manual / Technical Bulletin
|
5
|
342.3 KB
|
|
|
AR-122E (serv.man67)
Parts Changes.
Service Manual / Technical Bulletin
|
2
|
29.35 KB
|
|
|
AR-122E (serv.man68)
Countermeasures against toner scattering in the process unit section.
Service Manual / Technical Bulletin
|
2
|
62.83 KB
|
|
|
AR-122E (serv.man69)
Improvement of the scanner's dust-proof property
Service Manual / Technical Bulletin
|
6
|
558.43 KB
|
|
|
AR-122E (serv.man70)
Supply of the upper heat roller for preventing toner adhesion, as a service part.
Service Manual / Technical Bulletin
|
2
|
40.18 KB
|
|
|
AR-122E (serv.man71)
Change of operation pwb to comply with RoHS.
Service Manual / Technical Bulletin
|
4
|
98.25 KB
|
|
|
AR-122E (serv.man72)
1. Main motor change, 2 - AC power cord change.
Service Manual / Technical Bulletin
|
3
|
100.5 KB
|
|
|
AR-122E (serv.man73)
1. Standardising the the MC harness unit, 2. Changing the CD-ROM, 3. Changing the screws to comply with RoHS.
Service Manual / Technical Bulletin
|
6
|
1.08 MB
|
|
|
AR-122E (serv.man74)
1. Changing the MCU PWB, 2. Changing the shafts to comply with RoHS, 3. Changing the LSU unit to comply with RoHS, 4. Changing ht erollers to comply with RoHS
Service Manual / Technical Bulletin
|
9
|
403.35 KB
|
|
|
AR-122E (serv.man75)
MCU PWB part change info
Service Manual / Technical Bulletin
|
3
|
79.55 KB
|
|
|
AR-122E (serv.man76)
ROM version upgrade...v3.11
Service Manual / Technical Bulletin
|
1
|
7.03 KB
|
|
|
AR-122E (serv.man77)
Information of parts change, 1 Transport belt change, 2 MFD sensor PWB change, 3 Transport clutch change, 4 DV bearing change, 5 Standardisation of separator pawl, 6 POD PPD1 sensor PWB change.
Service Manual / Technical Bulletin
|
6
|
342.13 KB
|
|
|
AR-122E (serv.man78)
1. Rear cover change, 2. Scanner motor change, 3. Shape change of the U-turn guide lower
Service Manual / Technical Bulletin
|
3
|
68.51 KB
|
|
|
AR-122E (serv.man79)
Information of parts change. DV Box Unit and Base Tray R.
Service Manual / Technical Bulletin
|
1
|
10.78 KB
|
|
|
AR-122E (serv.man80)
1 Changing the 250-sheet casstte pawls F and R to cmply with RoHS, 2 Changing the SPF and the RSPF hinges to comply with RoHS. 3 Changing the DMX roller to comply with RoHS.
Service Manual / Technical Bulletin
|
4
|
107.58 KB
|
|
|
AR-122E (serv.man81)
1 Changing the PPD2 sensor PWB to comply with RoHS. 2 Changing the SPF sensor PWB to comply with RoHS.
Service Manual / Technical Bulletin
|
2
|
46.22 KB
|
|
|
AR-122E (serv.man82)
1 Standardising the roller r (pick up roler) in the manual paper feeding section. 2 Changing to lead-free operation PWB and IF PWB. 3 Changing the high voltage PWB to comply with RoHS.
Service Manual / Technical Bulletin
|
3
|
68.66 KB
|
|
|
AR-122E (serv.man83)
Information of parts change, OC gasket.
Service Manual / Technical Bulletin
|
2
|
294.08 KB
|
|
|
AR-122E (serv.man84)
003-Information of parts change.
Service Manual / Technical Bulletin
|
1
|
81.36 KB
|
|
|
AR-122E (serv.man85)
Supply of component parts list for the DV Units
Service Manual / Technical Bulletin
|
2
|
158.49 KB
|
|
|
AR-122E (serv.man86)
Countermeasure against noise when operating the machine
Service Manual / Technical Bulletin
|
2
|
549.45 KB
|
|
|
AR-122EN (serv.man11)
Starting Powder List (This list takes priority over information in Service Manuals).
Service Manual / Technical Bulletin
|
4
|
66.25 KB
|
|
|
AR-122EN (serv.man12)
Change in material of turn plate sheet.
Service Manual / Technical Bulletin
|
3
|
57.76 KB
|
|
|
AR-122EN (serv.man13)
Manual paper feed roller material change.
Service Manual / Technical Bulletin
|
5
|
342.3 KB
|
|
|
AR-122EN (serv.man14)
Parts Changes.
Service Manual / Technical Bulletin
|
2
|
29.35 KB
|
|
|
AR-122EN (serv.man15)
Countermeasures against toner scattering in the process unit section.
Service Manual / Technical Bulletin
|
2
|
62.83 KB
|
|
|
AR-122EN (serv.man16)
Improvement of the scanner's dust-proof property
Service Manual / Technical Bulletin
|
6
|
558.43 KB
|
|
|
AR-122EN (serv.man17)
Supply of the upper heat roller for preventing toner adhesion, as a service part.
Service Manual / Technical Bulletin
|
2
|
40.18 KB
|
|
|
AR-122EN (serv.man18)
Change of operation pwb to comply with RoHS.
Service Manual / Technical Bulletin
|
4
|
98.25 KB
|
|
|
AR-122EN (serv.man19)
1. Main motor change, 2 - AC power cord change.
Service Manual / Technical Bulletin
|
3
|
100.5 KB
|
|
|
AR-122EN (serv.man20)
1. Standardising the the MC harness unit, 2. Changing the CD-ROM, 3. Changing the screws to comply with RoHS.
Service Manual / Technical Bulletin
|
6
|
1.08 MB
|
|
|
AR-122EN (serv.man21)
1. Changing the MCU PWB, 2. Changing the shafts to comply with RoHS, 3. Changing the LSU unit to comply with RoHS, 4. Changing ht erollers to comply with RoHS
Service Manual / Technical Bulletin
|
9
|
403.34 KB
|
|
|
AR-122EN (serv.man22)
ROM version upgrade...v3.11
Service Manual / Technical Bulletin
|
1
|
7.04 KB
|
|
|
AR-122EN (serv.man23)
Information of parts change. DV Box Unit and Base Tray R.
Service Manual / Technical Bulletin
|
1
|
10.78 KB
|
|
|
AR-122EN (serv.man24)
1 Changing the 250-sheet casstte pawls F and R to cmply with RoHS, 2 Changing the SPF and the RSPF hinges to comply with RoHS. 3 Changing the DMX roller to comply with RoHS.
Service Manual / Technical Bulletin
|
4
|
107.58 KB
|
|
|
AR-122EN (serv.man25)
1 Changing the PPD2 sensor PWB to comply with RoHS. 2 Changing the SPF sensor PWB to comply with RoHS.
Service Manual / Technical Bulletin
|
2
|
46.22 KB
|
|
|
AR-122EN (serv.man26)
1 Standardising the roller r (pick up roler) in the manual paper feeding section. 2 Changing to lead-free operation PWB and IF PWB. 3 Changing the high voltage PWB to comply with RoHS.
Service Manual / Technical Bulletin
|
3
|
68.66 KB
|
|
|
AR-122EN (serv.man27)
001-Information of parts change.
Service Manual / Technical Bulletin
|
1
|
81.36 KB
|

|
AR-122E (serv.man62)
ROM version upgrade v3.11..to prevent L1-00 F5-02
Driver / Update
|
|
147.61 KB
|

|
AR-122E (serv.man63)
MFP Driver -Win9x,Me,NT,2K XP
Driver / Update
|
|
10.01 MB
|

|
AR-122EN (serv.man10)
ROM version upgrade v3.11..to prevent L1-00 F5-02
Driver / Update
|
|
147.61 KB
|

|
AR-122E (serv.man92)
Readme for Installation
Driver / Update
|
|
353 B
|
|
|
AR-122E
Handy Guide A122E N 152E N
Handy Guide
|
22
|
265.56 KB
|

