Sharp AM-400 (serv.man9) Service Manual ▷ View online
AM-400DE
1 – 13
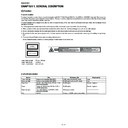
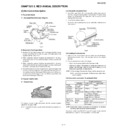
9. Clearing jammed printing paper
1) Press the side cover release
and then open the side cover
.
2) Push the two heater roller release levers down to release the
heater roller.
• Caution! The fusing unit (indicated in white at right) becomes
very hot during operation. Do not touch the fusing unit.
• Caution! The fusing unit (indicated in white at right) becomes
very hot during operation. Do not touch the fusing unit.
3) If the jammed page is protruding from the side of the machine, gen-
tly pull it out. Take care not to tear the paper or leave any torn
pieces of paper in the print compartment.
• If this clears the jam, go to Step 5.
• If you are unable to clear the jam in this way, go to Step 4.
• Take care not to touch or allow other objects to contact the drum
(the green cylinder). This damage the drum.
pieces of paper in the print compartment.
• If this clears the jam, go to Step 5.
• If you are unable to clear the jam in this way, go to Step 4.
• Take care not to touch or allow other objects to contact the drum
(the green cylinder). This damage the drum.
4) If the jammed page cannot be pulled out directly, open the front
cover
and rotate the white knob
in the direction
shown to feed the jammed page out into the output tray.
5) After the jammed page has been removed, push the two heater
roller release levers back up.
6) Close the front cover
(if you opened it) and then the side
cover
.
Note: If you find that another paper jam occurs immediately after
clearing a paper jam, open the side cover and then the front cover
and remove the jammed paper as explained above. With the front
cover and side cover still open, remove the output tray and remove
the printing paper from the paper tray. Replace the output tray and
close the front cover and then the side cover. Remove the output
tray once again, fan printing paper, replace it in the paper tray, and
then replace the output tray.
1
2
1
2
1
2
2
1
1
2
2
1
AM-400DE
1 – 14
10. Troubleshooting
1. Display
2. Audible signals
3. Printer error code (Troubleshooting Refer to page 5-27 to 5-29)
PAPER JAM
The roller sensor could not detect its home position
after driving the pick up motor for the specified period.
SYSTEM ERROR [P2]
The printer controller detected the optical unit (LSU)
error.
SYSTEM ERROR [P3]
Thermistor error was detected.
SYSTEM ERROR [P4]
ROM or RAM error was detected on the printer
control unit.
SYSTEM ERROR [P5]
High temperature error was detected.
SYSTEM ERROR [P6]
Low temperature error was detected.
SYSTEM ERROR [P7]
Communication error between the main controller
and the printer controller was detected.
The roller sensor could not become NOT-Active after
passing the specified period from picking up paper.
The external interrupt signal for optical unit (LSU) or
High-voltage control did not become active after
passing the specified period.
4. Scanner message (Troubleshooting Refer to page 5-29)
ADD PAPER
Check the printing paper. If the tray is empty, add
paper. If there is paper in the tray, make sure it is
inserted correctly (take out the stack, align the edges
evenly, and then reinsert it in the tray). Printing will
resume automatically when the output tray is
replaced.
BYPASS MISFEED
The paper is not inserted correctly in the bypass tray.
Remove the paper and insert it again.
BYPASS PAPER! /
IF COPY, PRESS
(alternating messages)
Paper has been inserted in the bypass tray. If the
paper has been inserted for a copy job, press
to
set the paper size. If the paper is for a print job, the
message can be disregarded.
COVER OPEN
One or both of the print compartment covers are
open. Make sure both covers are closed.
DATE/TIME UNSET
The date and time need to be set. Note
that the date and time settings will be lost if the
machine is unplugged or a power failure occurs.
DOCUMENT JAMMED
The original document is jammed. See the following
section, Clearing Paper Jams. Document jams will
occur if you load more than 20 pages at once or load
documents that are too thick.
The document may also jam if the receiving machine
doesn’t respond properly when you attempt to send a
fax.
DOCUMENT READY
A document has been inserted in the auto document
feeder and the machine is waiting for you to begin
faxing or copying.
DRUM LIFE OVER
This appears when the drum cartridge needs
replacement.
A
FAX RX IN MEMORY
A fax has been received in memory because the
toner cartridge needs replacement, you have run out
of printing paper, the paper is jammed, or paper is
inserted in the bypass tray. The fax will print out
automatically when the problem is fixed.
GRP. SPACE FULL
This appears if you attempt to store a Group when
both Groups are already programmed.
LINE ERROR
Transmission or reception was not successful. Press
the STOP key to clear the message and then try
again. If the error persists, see Line error.
MEMORY IS FULL
If faxes have been received to memory because
printing is not possible (an additional message will
indicate the problem), resolve the problem so that
printing can continue (see Substitute Reception to
Memory)
If you are attempting to send a fax, see If the memory
becomes full.
If you are copying, see If MEMORY IS FULL appears.
NO # STORED
This appears if you attempt to search for a Speed Dial
number when none have been stored.
OFF HOOK
This appears when an extension phone connected as
explained is lifted. Only
can be pressed in
fax mode when this message appears.
OUTPUT TRAY OFF
The output tray is not attached correctly. Attach it as
explained. The machine will not operate if the output
tray is not attached correctly.
PAPER JAMMED
The printing paper is jammed.
SET BYPASS PAPER /
SIZE: XXXX
(alternating messages; a
paper size appears in
“XXXX”)
Paper must be inserted in the bypass tray for a print
job or copy job that requires use of the bypass tray.
Insert the indicated size of paper in the tray.
SYSTEM ERROR [XX]
(a number appears in
“XX”)
(Refer to Printer error code/
Scanner message)
(Refer to Printer error code/
Scanner message)
If this message appears, unplug the power cord, wait
about 10 seconds, and then plug it back in. If the
message still appears, unplug the power cord and call
for service.
TONER EMPTY
The toner cartridge must be replaced. Printing will be
possible (although the output will be increasingly
faint) until a fax is received. Once a fax is received, it
will be held in memory and printing will not be
possible until the toner cartridge is replaced.
TONER NEAR EMPTY
The toner cartridge is almost out of toner
(approximately 200 pages can be printed).
TOTAL PAGE(S) 01
Number of fax pages transmitted or received.
Continuous tone
3 seconds
Indicates the end of transmission or
reception.
Intermittent tone
(3 beeps)
5 seconds
(1 second on, 1
second off)
Indicates incomplete transmission or
reception.
Rapid intermittent
tone
35 seconds
(0.7 seconds on,
0.3 seconds off)
Indicates that an extension phone
connected as explained is off hook.
CHK SCANNER LOCK
The scanner unit could not detect change point of
home postion. (ON -> OFF or OFF -> ON)
CHK SCANNER LOCK/
PLS RETURN POWER
(asternating messages)
Make sure that the scanner lock has been released
and then unplug the power cord, wait at least 5
seconds, and plug it back in.
REMOVE /
BYPASS PAPER
(alternating messages)
A fax has been received to memory because paper is
inserted in the bypass tray (faxes cannot be printed
while paper is in the bypass tray). Remove the paper
from the bypass tray to allow the fax to be printed.
PAPER MISMATCHED
This appears after printing if the size of the printed
image did not match the paper size on some pages
of the job. Check the printed pages and reprint as
needed.
AM-400DE
1 – 15
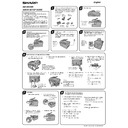
11. Quick setup guide
Connect the phone line cord
to the TEL. LINE jack and a wall jack.
Italy:
Use the provided adapter to connect the
line cord to the wall socket.
1
7
Attach the trays.
3
Load paper.
Make sure you have the following items. If any
are missing, contact your dealer or retailer.
Note:
The shape of the line cord plug varies by
country. An adapter (not shown) is provided in
some countries.
1. Remove the output tray.
4
5
6
Install the toner cartridge and drum cartridge.
2. Remove the drum cartridge from its
packaging.
4. Remove the toner cartridge from its
packaging. Shake the cartridge side
to side four or five times to distribute
the toner evenly within the
cartridge.
3. Insert the drum cartridge,
sliding it along the guides.
5. Insert the toner cartridge, sliding it along
the guides until it clicks into place.
7. Press
to select
"YES" and
then press
. (This resets
the toner cartridge counter.)
8. Reset the drum cartridge counter:
a.Press
once and then
or
until "LIFE" appears in the
display.
b. Press
and then
.
c. Press
repeatedly to exit.
MENU
Z
A
6. Close the front cover
ı
and
then the side cover
ˇ
.
Display:
1:YES, 2:NO
TONER EXCHANGED?
2. Insert a stack of paper
into the tray, print side up.
1. Press
ı
. Open the side cover
and then the front cover
.
Important:
Pull the scanner release toward you to
release the scanner lock.
Caution:
Pull the scanner release toward you to
release the scanner lock.
Caution:
Be sure to release the scanner lock
before plugging in the power cord.
Plug the power cord into a standard, earthed
power outlet.
Note:
Note:
The power outlet must be installed
near the equipment and must be easily
accessible.
2
1
2
3
Caution!
Do not touch the fusing unit
Do not touch the fusing unit
under the side cover after the
machine has been in operation,
as it may become very hot.
Grasp this handle to
push the cartridge in
Press on the arrow
mark to make sure
the cartridge clicks
into place
2
1
Toner
cartridge
Telephone line
cord
Drum
cartridge
CD-ROM
Setup
Guide
Document
feeder tray
Output tray
When the tray
stops, lift the
end slightly
and push in.
3. Squeeze the sides of the paper
guide and slide it to the slot for
the length of paper loaded.
4. Replace the output tray.
TEL.
LINE
TEL.
SET
For detailed instructions
on setting up and using the AM-400, see the
on setting up and using the AM-400, see the
online guide on the CD-ROM.
To open the guide, double-click the Manual folder on
the CD-ROM, double-click English, and then double-
click Online Manual.pdf.
(Note: Acrobat Reader 5.05 or higher is required to
view the manual.To install Version 5.05, double-click
Acrobat Reader, English
Acrobat Reader, English
, and then ar505enu.exe
on the CD-ROM.)
All company names and product names appearing in this
setup guide are the trademarks of their respective owners.
Set the date and time that appear
in the fax mode display.
1. In the date and time display of fax mode
(press
if needed to select fax
mode), press
,
,
.
2. Enter a two-digit number for the day
("01" to "31").
Example: the 5th
Example: the 5th
•
To clear a mistake press
.
3. Enter a 2-digit number for the month.
Example: February
4. Enter the year (four digits)
Example:
FAX
MENU
Z
8
5. Enter a two-digit number for the hour
(00 to 23) and a two-digit number for
the minute (00 to 59).
Example: 9:25
Example: 9:25
6. Press
.
7. Press
repeatedly to exit.
ENTER
The stack should
not be higher
than this line
Note:
The
shape of the
power plug
varies by
country
Note:
The
shape of the
line cord plug
varies by
country.
1
ı
2
ı
3
ı
1
ı
2
AM-400DE
1 – 16
Install the software on your computer. (The software
allows the machine to be used as a printer and scanner.)
allows the machine to be used as a printer and scanner.)
9
1. Make sure that a USB cable is not connected
to the machine and your computer.
(The cable
will be connected in Step 11.)
•
If a cable is connected and a Plug and Play window appears, close
the window and disconnect the cable.
2. Insert the Sharp CD-ROM into your computer's
CD-ROM drive.
3. Windows XP: Click the start button, click My
Computer
, and double-click the CD-ROM icon.
Windows Me/2000: Double click My Computer on
the desktop and double-click the CD-ROM icon.
4. Double-click the setup icon (
) in the CD-
ROM window.
5. If the Language Selection window appears,
select the language that you wish to use and click
Next
Next
(the language selections will vary depending
on your country or region).
6. Follow the on-screen instructions.
•
When the Setup Type Selection window appears, select
Standard
Standard
to install all of the software components (this should
normally be selected). If you only wish to install certain
components, select Custom and then select the components
that you wish to install.
•
In Windows 2000/XP, if a warning message appears at any time
regarding the Windows logo test or digital signature, be sure to click
Continue Anyway
or Yes.
7. When the Finish window appears to indicate that the
selected packages have been installed, click Close.
8.
If the installation was a Standard installation, the
following window will appear. Click OK.
•
If you installed the MFP drivers using a Custom installation
and did not install Sharpdesk, the following window will
appear. Click OK and go to Step 11.
9.
The following window will appear. Click Yes to restart
your computer.
10. The Search Setup Wizard will appear. Follow the
on-screen instructions to create an index
database for Sharpdesk.
11. Make sure that the machine's power cord is not
plugged in, and then connect the USB cable to the
USB port on the machine and on your computer.
12. Plug in the machine's power cord.
•
Windows XP
: Follow Steps 13 through 16 to
complete the installation of the software.
•
Windows 2000
: This completes the installation of the
software.
Note:
Note:
If a warning message regarding the Windows logo
test appears (the warning may appear twice), click Yes
each time the window appears. This will complete the
installation of the software.
•
Windows Me
: This completes the installation of the
software.
Note:
Note:
In the power management settings in the Control
Panel, System stand by
must be set to Never.
Completing the installation on Windows XP
13. In Windows XP, the Found New Hardware
13. In Windows XP, the Found New Hardware
Wizard
will appear. Make sure that Install the
software automatically (Recommended)
is
selected and click Next.
Note for Windows XP SP2
Note for Windows XP SP2
: The first window of the
wizard will ask you if the wizard can connect to Windows
Update. Select No, not this time and click Next.
•
If a warning message appears regarding the Windows
logo test, click Continue Anyway.
14.
When the wizard finishes installing the software, click
Finish
Finish
to close the wizard.
15. After a brief interval, the Found New Hardware
Wizard
will appear again. Make sure that Install
the software automatically (Recommended)
is
selected and click Next.
•
If a warning message appears regarding the Windows
logo test, click Continue Anyway.
16. When the wizard finishes installing the software,
click Finish to close the wizard. This completes
the installation of the software on Windows XP.
Note:
A USB 2.0 or 1.1 cable is required to connect the
machine to your computer. Please purchase this separately.
10
Configure Button Manager (one of the programs installed in the above step) as
the program on your computer that handles scanner events from the machine.
the program on your computer that handles scanner events from the machine.
Windows XP/Me
1. Click the start button, click Control Panel, and
1. Click the start button, click Control Panel, and
double-click Scanners and Cameras.
•
If Scanners and Cameras does not appear in Windows
Me, click view all Control Panel options.
2. Right-click the SHARP AM-400 icon and
select Properties.
3. The SHARP AM-400 Properties appear.
Click on the Events tab.
4. Select SC1 from the Select an event list.
5. In the Actions field, select Start this program
5. In the Actions field, select Start this program
and then select Sharp Button Manager I from the
list of programs. Click Apply.
6. Repeat Steps 4 and 5 for each of events SC2
through SC6. When finished, click the OK button.
Windows 2000
1. Click the Start button, point to Settings, and
1. Click the Start button, point to Settings, and
select Control Panel.
2. In the Control Panel, double-click Scanners and
Cameras
.
3. Select SHARP AM-400 and click Properties.
4. Click the Event s tab in the SHARP AM-400
4. Click the Event s tab in the SHARP AM-400
Properties
.
5. Select SC1 from the Scanner events list.
6. In Send to this application, select Sharp
6. In Send to this application, select Sharp
Button Manager I
.
•
If other applications appear in the list, make sure that
none are selected.
7. Click the Apply button.
8. Repeat Steps 5 through 7 for each of events SC2
8. Repeat Steps 5 through 7 for each of events SC2
through SC6. When finished, click the OK button.
R
R
R
R
R
R
R
R
R
R
R
R

