Sharp AL-1611 (serv.man13) Service Manual ▷ View online
AL-1611/AL-1622
DISASSEMBLY AND ASSEMBLY
11 – 9
D. Resist roller clutch/Resist roller
E. Paper feed roller (Semi-circular roller)
Use SIM6-10 to rotate the paper feed roller reversely, and remove the
roller.
F. Paper feed clutch
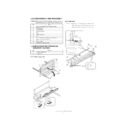
9. MANUAL MULTI PAPER FEED SECTION
A. Manual multi paper feed
( 1 )
( 4 )
( 3 )
( 2 )
( 3 )
( 3 )
(2)
(1)
No.
Content
A
Manual multi paper feed section
B
Manual transport clutch
C
Manual paper feed clutch
D
Manual transport roller/Manual paper feed roller
E
Multi feed solenoid
(2)
(1)
( 2 )
( 1 )
( 2 )
( 3 )
( A )
AL-1611/AL-1622
DISASSEMBLY AND ASSEMBLY
11 – 10
B. Manual transport clutch
C. Manual paper feed clutch
Disassembly: Set up the shutter arm (1) then remove it.
Assembly:
Install so that the boss section of the fulcrum arm (2)
comes between ribs.
comes between ribs.
Disassembly: Set up the cam transmission arm (2), and remove it.
Assembly:
Install so that the cam transmission arm (2) is under the
roller arm (A).
( 5 )
( 1 )
( 1 )
( 2 )
( 3 )
( 4 )
( 1 )
( 2 )
( 4 )
( 3 )
( A )
( 7 )
( 5 )
( 6 )
( 8 )
AL-1611/AL-1622
DISASSEMBLY AND ASSEMBLY
11 – 11
D. Manual transport roller/Manual paper feed roller
E. Multi feed solenoid
Assembly: Install so that the latches (A) and (B) move smoothly.
10. POWER SECTION
A. Power unit
Installation: Be careful of the installing direction of the manual trans-
port roller (4).
L
C
K
T
O
K
O
( 2 )
( 3 )
( 1 )
( 4 )
( 5 )
( 2 )
( 1 )
( 2 )
( A )
( B )
No.
Content
A
Power unit
( 3 )
( 4 )
( 5 )
( 3 )
( 3 )
( 4 )
( 2 )
( 1 )
( 1 )
( 1 )
( 1 )
AL-1611/AL-1622
DISASSEMBLY AND ASSEMBLY
11 – 12
11. SPF SECTION <AL-1622 ONLY>
A. Remove the SPF
1) Remove the SPF connector.
Connect the interface harness extended from the SPF, and fix with the
hand screws.
hand screws.
2) Remove the PWB shield plate.
Remove the six screws.
3) Remove the SPF harness and the ring core (included together
with the unit).
Pass the SPF harness through the ring core (2), and connect it to the
main PWB connector (CN11) inside the copier. (3)
main PWB connector (CN11) inside the copier. (3)
Pass the SPF harness through the plate hole from the above and fix it
to the plate with the supplied two hex cap screws. (1)
4) Remove the SPF to copier.
Tilt the SPF backward and insert into the hinge guide.
B. External fitting section
Note: Remove the pawl in the arrow direction.
(3)
(2)
★
Be careful about the direction
of the connector.
(1)
2
1
2
Click on the first or last page to see other AL-1611 (serv.man13) service manuals if exist.

